Phasers On Stun is recognizing you have less-than-optimal feet, especially to the
left of the crack/flake system. Still it is suggested to rerate this as 5.4.
Wide Or Not (5.7) - 28'. Climb up the ramp at the split between the two leftmost
boulders on the shelf below the main wall and step right to reach the base of a wide
vertical crack system to the right of Phasers On Stun and Sugar & Spice.
Follow the crack to the top. You can use wide crack techniques or not, as you see fit. If
you opt to lead it, bring a couple #4s.
Also be aware of glass at the bottom of the cliffs from bottles tossed over the top by
non-climber-types. An effort is being made to clean the area up, but it is an
ongoing process. Your help is appreciated. Also be aware that tourists coming to check
out the view of the valley may toss/throw rocks over without ever realizing that there
are climbers down below (just because you may have highly visible anchors doesn't
always mean anything; one afternoon the author and some friends had four top-ropes
rigged, and someone chucked a hefty rock into the woods just behind where they were all
climbing--fortunately no one was hurt...).
There are several newish routes on the left end of the main outcrop that climb up the
free-standing fin. Setting anchors on this can be...challenging. This wall is not often
climbed, as you can tell by the lichen-covered face.
Recent Convert (5.8) - 26'. Climb the right side of the main face
Size Isn't Everything (5.6) - 27'. Climb up the crack and lichen-free-ish center
face.
Ablation (5.7) - 27'. Work the left side of the crack and the lichen-full face
White Rocks South
GPS coords:
Lat: N 39°16.975'
Long: W077°23.958'
From the South Overlook, descend down the left side of the rocky overlook through a cleft
in the boulder line to reach the top of a band of rock below. Aim right to reach the
taller stuff. There is a fair bit of bouldering sprinkled around the area as well.
(boulderers have apparently even set up a little sunset view area over toward the house
complete with chairs and a small grill). On more crowded or popular days you may consider
wearing a helmet because you are within rock- and bottle-throwing range from the less
than aware people at the overlook (who won't even see your anchors below).
The tallest routes are on the semi-detached block tower directly down from the main
overlook. Anchors for the routes listed are trees far back or gear placements on a small
boulder set on the far corner from the climbing on top of the block tower. A few shorter
routes can be found on the wall left of the block tower.
Short Wall
This wall is some 30-40' left of the tall face of the semi-detached pillar. The handful
of routes here are short, but stout. Take care that your TR anchors, especially if
you take falls and cause them to shift any, could dislodge rocks above to drop on you
while you are climbing, or at the base of the crag! One early climber to this area,
after working the face problems hard, lowered back to the ground, and was narrowly
grazed in the head by a softball-sized rock that came loose under his anchors.
Searching For Glory (5.7-5.9) - 26'. Climb up the obvious crack line and face on
the right until you attain a sloping ledge with good fingerholds in the back. Either
finish by continuing up the crack above to the top (5.7+) or traverse right (on very thin
feet) until the ledge steepens to a ramp. Work around and up to the top of the ramp (5.9)
to a notch at the top of the rock.
TBD (5.10d) - 25'. Climb up the face a few feet right of the crack system of
tbd. Finish at the notch at the top of the wall.
(Project) (5.?) - 25'. Climb the nearly blank white face between the previous
climb and the left facing corner.
(Project) (5.10b?) - 27'. Climb up the left-facing overhanging corner system until
it tapers off. Instead of just ending here, continue left up the face to the top of the
rock wall.
The detached pillar routes are all high quality, about 35 ft of continuous sustained
moves. Do not overlook playing on these! The middle three routes are a bit close together
making it a little contrived, but they are all quality and each use different holds to
advance past the cruxes. The center three routes each have two cruxes, getting past the
first low overhang near the ground, and getting past the buldge about 2/3 up. Reach
Around and I Can't Seem to Find Molly share a the side pull near the ground,
but use different hands on it.
Motorcycle Rush (5.7+*) - 35'. Climb the left end of the face and arete to the
top.
Under Klingon (5.10b*) - 35'. Somewhat contrived. Stay leftish and don't use the
vertical crack or arete of Motorcycle Rush. The first crux can be passed using a
long reach or a bad undercling. The second crux is balancy.
Reach Around (5.10c*) - 35'. Stay in the middle, but don't use the lower left flake
of Under Klingon to pull past the first crux. Instead, use two fingers on the right
with a good left-facing side pull to a jug just right Under Klingon. The second
crux uses a reach side pull for the right hand.
I Can't Seem to Find Molly (5.10d*) - 35'. Traverse right, avoid touching the right
slab (to make it harder). Use the same sidepull as Reach Around, but with the left
hand. Pump through some good crimps/bad jugs to a good horizontal crack. Get a high right
foot and mangle, which will allow you to reach a small but good vertical pocket.
Lofty Appeal (5.10b/c****) - 35'. Don't peal off this alluring steep sustained
intricate route. Start on I Can't Seem To Find Molly but as you hit the horizontal
break and alcove, trend up right a couple moves and finish up the thin face just left of
Penguin Trainer.
Penguin Trainer (5.4) - 34'. Climb the corner and slab face on the right until the
corner goes vertical with a broad crack. Surmount the block in the crack and continue up
the arete to the top. It's a nice route, if not stellar.
GPS
coords:
Lat: N 39°33.501'
Long: W077°35.924'
Parking
coords:
Lat: N 39°32.132'
Long: W 077°36.250'
Annapolis Rocks is located off of the Appalachian Trail, approximately a 2.25 hike north
from Rt 40. It is characterized by many horizontal cracks and round bulgy walls. Due to
the nature of the formation of rock here, the routes either overhang to some degree and
are difficult, or are slabby and almost too easy to climb. Annapolis Rocks and Black
Rocks are basically the same: Weverton formation quartzite - a metamorphic rock composed
primarily of quartz. It is part of the Blue Ridge Province of folded and faulted
sedimentary rock, and is very weather resistant.
Be sure not to miss
Black Crack and Faint's Roof while visiting here.
ARGO ROCK:
GPS coords:
Lat: N 39°33.541'
Long: W077°35.927
Outcropping at the far north end of the Annapolis Rocks group. Medium to large pro for
anchors.
Approximately 50' south of Argo Rock lies the next outcropping of rock. This outcropping,
when seen from the overlook above Ounce Of Perception (when there are no leaves
covering it) has, with a little imagination, the visage of ex-President Richard Nixon.
The main climbing starts on the platform/ledge ~20' below the square ledge/roof halfway
up the cliff.
There has been some confusion, depending on who one talks to, as to exactly what route in
this area is Nixon's Nose. Some have said it is Ounce Of Perception, others
have indicated it's the aid route to the right of Faint's Roof, and others have
thought that it was the rock outcropping ~130 feet north/left of Faint's Roof.
Using information from some of the original climbers to the area (Rob Savoye, et al),
Nixon's Nose is the aid route to the right of Faint's Roof, making the
pillar of rocks to the north/left Nixon's Other Nose.
Anchors here are long runners and medium pro.
FAINT'S ROOF:
GPS coords:
Lat: N 39°33.501'
Long: W077°35.924'
Easily the most popular area at Annapolis Rocks (barring Black Crack, which is
probably the most popular climb at Annapolis Rocks), it is relatively easy to find by
angling left at the end of the quarter mile trail off of the Appalachian Trail until you
come to an obvious break in the trees/bushes that opens onto a broad area of flat rock -
the main overlook area at Annapolis Rocks. To the north from the overlook about 130' you
can see the rock outcropping, Nixon's Other Nose.
To get to the bottom, continue heading left (south) along the back edge of the rocks
until you come to a chimney-like notch in the rocks. Take this 3rd class downscramble to
the base and head right around the corner. In 30' or so you will see ~30' away a large
roof to the left of a tall, bumpy face. This would be Faint's Roof.
Along the wall to
the right as you go through the descent to get to the Faint's Roof area are a couple of
easy lines. If you choose to climb them, please try to not block the path for those
others who are ascending/descending this section of the cliff, okay?
Rambling Man (5.3) - 30'. This route is located around the corner, up, and to the
right of In Your Face. Start by a small-moderate sized oak tree where a rectangular
"hollow" or alcove is in the rock around head height. Climb up to and through
the alcove to a ledge halfway up the wall. Continue up the relatively steeper terrain to
the highest point above. There are a handful of little variations you can do that can
push the difficulty upwards of 5.5 without getting too contrived.
The Stair Steps (5.0) - 28'. To the right of Rambling Man is a broken face
with a large fracture crack. Climb up the blocky face following the crack to the top. It
gets a little awkward near the end when you have to deal with the large block boulder just
shy of the top. A fairly ideal climb for novices, though the base here is not good for
holding large groups of people.
Training Wheels (5.0) - 24'. This route is located to the right of the descent
route, next to a large boulder below a roof at waist level. Start just left of the roof
(crux) and climb up the featured face (4th) to the top. Nothing more to say about this
one. Really not worth dropping a rope on unless there is absolutely nothing else around
and you're in this section.
Foliage Sex (5.7) - 35'. This route is located around the corner and down from
Training Wheels, and starts below a cherry tree growing horizontally out from
beneath the left side of a large roof. Be sure your ropes drop to the left of the cherry
tree or you might more intimately understand the route name. Climb up just left of the
cherry tree, pulling through the jagged overhanging blocks until you can get your feet on
solid ground again. Continue on up the arete to the top. Be sure to pad your anchors as
the edge here is fairly sharp and will wear away at whatever you set.
Sunset Wall
Two new routes just left of Left Hand of Darkness
Unknown (5.?) - Start as for Left Hand of Darkness, but head up and left to an
incut corner with a vertical finger crack, just below a squarish roof. Pull up into the
corner then follow decent holds out left and around the arete, climbing up the wall to
the left of the blunt arete.
Gluten Free (5.10c) - Start as for Left Hand of Darkness, but head up and left
to an incut corner with a vertical crack, just below a squarish roof. Pull directly up
through the roof on less-than-optimal holds and ride the arete to the top.
Skyworld (5.9+) - 26'. Start as for Little Climb That Wanted To Be, but once
up on the ledge, instead of climbing the gully, puzzle straight up the face (V1) before
you, directly through the overhangs, using some non-typical climbing maneuvers if you are
a little height-challenged.
V1: Skyfall (5.7) - 26'. Bypass the initial 10' or so of the main face by climbing
up the left side, then stepping back onto the main face once you've skirted past the
overhangs.
![[fin rock]](fin-rock.jpeg) FIN ROCK:
FIN ROCK:
GPS coords:
(above Amazon From Ozegna)
Lat: N 39°33.463'
Long: W077°35.923'
This lone fin of rock is located approximately 180 feet south of Faint's Roof,
~40' southeast of The Little Climb.... Easiest way to set up the routes is to 4th
class it up
Access Arete and place the anchors. Want long slings/runners/webbing, some pro
(mid-range and/or larger) will help. Watch out for glass in the area; last couple of
years there were found been broken shards of glass up top near where one of the anchors
would nominally rest. Bring some bags to help clean this area up if you would. Anchors
here are comprised of medium to long webbing and medium to large pro.
Access Arete is located at the north corner of the rock fin, by a tall tree.
Lately someone has piled up a stack of rocks to assist with the first moves off the
ground (or back down for the downclimb).
A Call To Arms Direct (5.9*) - X'. Begin a few feet right of A Call To Arms,
just to the left of the tree. Go up to a great jam/layback that allows a stretchy move
up and to the right to the top of an M-shaped ledge (at the ledges right edge). Traverse
to the left along the ledge to the notch that forms the crux of the original climb. A fun
little variant to play with.
SOUTH END:
GPS coords: (above Black Crack)
Lat: N 39°33.444'
Long: W077°35.923'
Approximately 90' south of Blondes Just Wanna Have Fin is a short wall that rises
up out of the trees, containing a chimney-like cavity. This starts the South End routes.
The climb Black Crack is located on the tallest portion of this wall at the far
right end of the rock.
Located about halfway between Blondes Just Wanna Have Fin and Black Crack is an
oft-overlooked wall. This is mainly because it is shrouded by trees, and has low-angle clumpy 4th-class
scramble routes, and is not what you would come all the way out here specifically to climb, but there
are a few routes here that are worthy of dropping a rope on if nothing else is available that you want
to do.
Sevenfold (5.7+) - X'. This route is located at the outermost bulge of the rock
wall, ~35' left of the route Black Hole Sun. Climb up the short blank wall to a
ledge with a small tree. Then with deft footwork, crank through the center of the round,
bulgy roof above to a walk-off ledge (pine tree to left). If you stay to the left of the
bulging overhang the route is much easier. The climb basically ends at this walk-off
ledge, for if you set your anchors higher up to play on the upper projecting overhangs
(5.3 or so; juggy fun, not hard), rope drag will be a serious factor. Yes, you get a
taller climb out of it, but do you really want to stress your rope out so much? In any
event, like so many other routes in Maryland, if this [lower section] were taller it
would be a great route.
unnamed (5.?) - X'. Approximately 10' right of Sevenfold is a set of
jutting blocks. Climb up through these to a ledge. You can stop here or continue the fun
on easier ground by climbing higher. Again, though, higher anchors means rope drag
problems. :-/
A couple new routes on the South End. On June 11, 2006, in accordance to the inquiry in
the guide, Bob Curry pulled the large roof between Black Hole Sun and High
Hopes!
George of the Jungle (5.12b) - X'. Use the same start as Black Hole Sun/High
Hopes, but instead of skirting the imposing roof to the left or right, be a Man and
tackle it straight on! Tease some tree foliage along the way, but don't come off or it'll
be "Watch out for that tree!" This is Annapolis Rocks' first 5.12 climb (go
Bobby!!).
The next route is located around the corner to the left of Black Crack, also done
by Bob Curry a few years ago:
Ulterior (5.11b) - X'. So-named due to the fact that this is an overlooked route,
it came after the guide was actually published, has some hidden holds, and is next to
Cynosure (hence some name play :-). This route ascends the rock between
Cynosure and Illusion, as reported by Bobby Curry and Shawn McIntosh.
Start between the two climbs and scramble up to an overhang ~10' off the ground. Pull
through the 'hang (V2+/V3- boulder problem; hellhook right helpful), use a good handhold
on Cynosure for a moment, then off to crimps on the right, keeping between
Cynosure and Illusion until under the small roof/overhang. Finish by
pulling this between Cynosure and Cynosure Direct, using a sharp triangle
under/side-cling for the right (this hold will quickly tear one's skin off of the base of
the middle finger, so taping is advisable). All the large footholds near the finish are
"on", and you'll be glad they are. Due to the pump factor and nature of the
moves, this is one of the harder lines at Annapolis Rocks.
GPS coords:
Lat: N 39°34.370'
Long: W077°35.846'
Parking coords:
Lat: N 39°xx.xxx'
Long: W 077°xx.xxx'
Annapolis Rocks getting too crowded for you? Lately in the past few years it's seen a lot more traffic than
before. More and more people are braving the 2.25 mile hike to enjoy the fine quality rock that are there.
When this happens and your favorite routes are taken (or, heck, all the routes are taken!), a viable
option might be to continue on to Black Rocks. A 'mere 1 mile further down the trail', there are a number of
small outcroppings hidden in the woods. Most are actually pretty small - boulder problems mainly. But there are
routes which lend themselves to setting up a rope (which, in this day and age, some people still call
'boulder problems'). You might need to clean the spiderwebs from some of the areas, though; this place doesn't
see much traffic (other than the drag strip in the distance, and the drone from I-70, this place gives you a
good wilderness experience - have fun with the lichen! :).
There are actually two areas to Black Rocks. The
first reached (if approaching from the south) is the aforedescribed outcroppings in the woods, or the 'Woods
Crags'. If you want to get to the Main Rocks, the ones which you can see while eastbound I-70 coming from
Hagarstown, you need to continue north on the AT for another 5-10 minutes (you will pass a sign indicating
'Pogo Campground 1.6 miles'; it's ~5-10 minutes after this to the Main Rocks). You will come to small signs to
the left on some trees that say 'Black Rock View 25 yards'. Follow the side trail west and...in 25 yards you're
atop of the rocks! (you may have to bushwack a little through the undergrowth) Below you is the start of a
serious scree slope, which extends a considerable distance towards the north (right). There are a number of
cliff sections in this area. Much of the rock is lichen covered (for the obvious reason that no one goes there
much), and there is loose rock in this area (again, no one climbs here much, so the looser stuff hasn't been
broken off - so be careful, dammit!).
You have three options for getting to the rocks here. One is to park off of Rt 40 and hike north on
the AT for 3 miles until you come to the outcroppings. The second option is to go to the end of
Black Rocks Road on the east side of the ridge, park at the parking area at the intersection of
Black Rocks Road and Loy Wolfe Road (very limited parking options), and hike up the trail to the
Appalachian Trail. Turn left and head down to the Pogo Campground, then up from there half a mile
or so to Black Rocks.
The third (and perhaps best; at least, most oft used) option is to park at the top end of
White Oak Road on the west side of South Mountain, and take the Thurston Griggs trail
around and up the broad Black Rock Creek ravine to the Appalachian Trail. Once there,
turn right and head south
on the AT for approximately half a mile when you come to Black Rocks off in the woods to
the right. Note that while the parking area has been enlarged in the past years, it's
still somewhat limited.
Option 4 is to hike directly up the old fire road that cuts off to the right of the Thurston-Griggs
Trail until you are more or less below the rocks and scree field, then bushwhack your way up to
the rocks. Given the uphill bushwhack, this option is probably the least desireable to explore
unless you've got some minor masochistic action going on.
BLACK ROCKS - WOODS CRAGS:
GPS coords:
Lat: N 39°3x.xxx'
Long: W 077°35.xxx'
Dr ASCII School Of Heelhook (5.6 - 5.8*) - A 'high-ball' boulder problem. About a mile past the Annapolis
Rocks turnoff trail there is a sign for 'Black Rocks'. Shortly past that is a sign 'Pogo Camp 1.6 miles'
(or something like that). Take an immediate left and follow the faint trail to the first rock outcropping you
come to. This is it. Set a rope up to cover the general face with overhangs and roofs. It's a short cliff,
though - only 20 feet high. Once you get into the route, it's pretty much over. Sadly. A variety of ways up this
can be done. The lower right arete gives you an opportunity to practice a dyno move to the top (can be done static
if you're tall). The roofs, with their great handholds, lend themselves to beautiful heelhook moves. The easiest
way up this rock would be to weave your way between the 'hangs. Or walk around back. ;-)
Brian's Wedgie (5.7*) - just downhill from the preceding rock is another small cliffband. Most of this can
be 3rd and 4th classed, but there is one southfacing wall with a couple of 'hangs that is worthy of climbing.
Kinda pumpy, too, and about the tallest thing in this area. There are also a variety of ways to go up this one,
too. The cruxes can be avoided by scooting out around the arete on the left and 4th-classing it.
There is
more to be done here, but not a lot. There are outcroppings scattered in the woods here and there open yet to
exploration.
THE MAIN BLACK ROCK CLIFF AREA:
![[Image of Rock 1 w/climbers]](rock1-1.jpg) Climber fighting through foliage on Snap, Crackle And Pop Go Climbing; Learning Curve is
sunlit face to the right
Climber fighting through foliage on Snap, Crackle And Pop Go Climbing; Learning Curve is
sunlit face to the right
LOWER OVERLOOK:
GPS coords:
Lat: N 39°34.xxx'
Long: W 077°35.xxx'
The lower and leftmost of the main overlooks. Anchors for here use primarily pro/gear in cracks, though you can
wrap some of the boulders with long strips of webbing.
JESUS OVERLOOK:
GPS coords:
Lat: N 39°34.370'
Long: W077°35.846'
The next major rock outcropping from Rock 1, approximately 100' to the north. This is the southern of 2 overlook
rocks you come to when travelling north on the Appalachian Trail. It's directly perpendicular to the trail at the
point where a faded sign on a tree says "120 yds" to the Black Rock View. Follow the foot trail back and around
a short band of rocks by a mini-meadow-like area, to the rocks outside the woods themselves.
The main face is ~60' tall, starting at a ledge ~20-30' up from the scree field (from up top it looks to be over
100' to the base, giving one pause for thought about top-roping the routes here). From the top scramble around
down right to gain access to the belay ledge below. Alternatively go left, down around Rock 1, and then 4th-class
it up the 20-30' from the scree field to the decent belay ledge. There are points to anchor in if you so desire.
You can wrap a couple of huge boulders and slot some medium-large sized tri-cams for adequate for anchors.
Mind War (5.5*) - X' Set your rope to drop ~7-10 feet left of the 'Jesus...' writing grafitti.
By Any Means Necessary (~5.5) - A nice little climb, if a bit awkward at the crux, located ~10' right
of Mind War. Anchors here can be wrapping the huge boulder up top, plus pro placements of medium-sized
nuts, small tri-cams, med-small camming units. Best to have your rope drop in the corner to the left of Mind
War.
NORTH OVERLOOK:
GPS coords:
Lat: N 39°34.xxx'
Long: W 077°35.xxx'
No details available right now. Might not even be worth anything, depending on what future exploration finds.
Off-hand it looks 4th class all the way (except for the overhanging section at the very top). This is the northern
of the two 'scenic overlook' rock outcroppings at Black Rocks. You can identify it by finding one of the furthest
out slab/boulders with writing in red paint reading: "All mighty God is Jesus Christ" (and so on and so
forth; I guess vandals permeate even the Christian religion).
From here you can see to the north, low, through the tops of some trees, the upper blocks of The Tower of Babylon
rock, about 150-200' away. There is no real good path over there; you're bushwacking it. There is a faint path
which follows along near the top of the rocky outcroppings, but knowing where to drop down (and where the path
itself is) is the tricky part.
There is a short wall halfway between Rock 3 and Tower of Babylon on the
'ridge' which has a number of boulder problems on it.
THE TOWER OF BABYLON:
GPS coords:
Lat: N 39°34.xxx'
Long: W 077°35.xxx'
A shorter, somewhat detached outcropping with a pillar of slabs stacked atop of it like a squarish, steep
smokestack, a few hundred feet north of Rock 1. This rock is characterized by slightly overhanging faces seasoned
with a few roofs. The large left-facing open book on the west wall has two trees growing out of the bottom, with
an obvious offwidth crack above. The northern end of this rock is lichen-encrusted, however, but most of the other
faces are mostly lichen-free.
![[Image of 'The Tower of Babylon' rock]](babylon-tower.jpg) No Surrender, No Retreat goes through the roof and high narrow wall on the right side of the photo,
Epiphanies goes up the obvious inside corner just left of the photo center; Signs And Portents
deals with the roof to the lower left of the photo
No Surrender, No Retreat goes through the roof and high narrow wall on the right side of the photo,
Epiphanies goes up the obvious inside corner just left of the photo center; Signs And Portents
deals with the roof to the lower left of the photo
At the west-most pointed end of this outcrop is a wide roof, and above a sea of lichen wall. There may be several
routes in here, but pulling the roof is significantly harder than 5.10 (or at least it appears to be; if you
discover otherwise...). The next route is at the far left end of this roof/face. You can use trees for anchors
here.
Descent Route (3rd) - About 20-25 feet left of Between The Darkness... is a notch in the
wall. This is the easiest access area to get from bottom to top (or visa versa) for this area (the other is to
do an exposed 2nd/3rd class traverse on the west-facing wall by the boulder-choked chimney on the other side of
the Tower of Babylon rock. There are a couple of 3rd class steps that need to be negotiated to get through this,
but otherwise no problemmo.
Much of the rock bands in the woods above The Tower of Babylon are short (~10-15
feet high) with some interesting problems. These would basically be boulder problems, and probably too easy for
your True Boulderer, but as practice for the general climber, there exist a number of interesting problems. But
watch your landings; some of them have jagged, uneven rock below (personally I'm just as happy to rig a rope ;-).
GPS coords: (from atop of Water Bottle Wall)
Lat: N 39°39.847'
Long: W077°32.004'
Parking:
Lat: N 39°39.xxx'
Long: W077°3x.xxx'
This set of rocks is located some miles north of Black
Rock, along the northern portion of the Appalachian Trail. It is a grouping of broken rock bands, some of them set
back a few minutes up the trail from the road, some of them closer to the road but tiered in steps. There are some
interesting and easy routes in this area to play on.
In the summer of 2003, shortly after the
"Climb Maryland!" guide came out, a few locals (Steve Byrkit, Mike Miles, Brendan O'Connor, and Matt
Birmingham) began developing the main bouldering area here. They established 9 boulder problems (plus variations)
on the Roadside Bouldering Wall. No difficulty rating info is known at this time.
From left to right these problems are:
- Finger Swing - This problem is on the leftmost portion of the wall, along the hill slant. Share the
first couple of moves with Jammer then move up left on finger cracks until you can leg-hook the top.
- Jammer -
- Monkey Move -
- Cliff of Insanity - This is the tallest problem on the wall.
- V-Back Crackah -
- Slip and Slide -
- The Pinch -
- Da Cheat -
- Pokey Man -
- var 1: Corners -
- var 2: Hooker Love -
- var 3: Devil's Dyno -
- The Contraption - The big traverse! Start on Devil's Dyno and traverse all the way to the far
left end of the wall, using only the starting holds on each route in between.
GPS coords (from Wolf Rock):
Lat: N 39° 38.041'
Long: W077° 26.259'
Parking coords:
Lat: N 39°xx.xxx'
Long: W 077°xx.xxx'
Catoctin Mtn/Cunningham Falls is a deeply forested region located off of Rt 15, about 19
miles north of Frederick, near the town of Thurmont. Climbing in Catoctin Mtn is
draconianly restricted, which has led to friction and confrontation between the Park
staff and visiting climbers (be they roped climbers or boulderers). And due to the
confrontations between the Park staff and climbers, the Park decided to move the acquiring
of permits to an online reservation system. (see below).
While some of the rules have been relaxed (e.g., may only climb when the Visitor Center
is open), others are still in place. Currently the rules are as follows (these from the
NPS-Catotcin Mountain site:
www.nps.gov/cato/planyourvisit/rock-climbing.htm
):
A rock climbing permit may only be issued for Wolf Rock. All other areas within the
park are closed to rock climbing and rappelling. Reservation for rock climbing may be
made at www.recreation.gov. (ed note: this link does not work on the NPS page)
Climbing helmets are required. Climbing is permitted only during daylight hours. Limit of
25 people total (families, individuals) or 1 organized group not to exceed 25 members.
Permits are not issued on weekends in October due to high visitation parkwide, and are
not issued during snow/ice conditions or when conditions appear to be unsafe for climbing.
That from the NPS page. If you dig around enough, re-edit the URLs that fail from the
Park webpages, you CAN eventually get to the permit page. To save you the time and pain,
here
is the link. The rules and restrictions are reiterated there.
NOTE: As of late June, 2016, the Mid-Atlantic Climbers and the Access Fund have
worked with the Park Service to open up the Park to bouldering without requiring climbers
to register. One still must register to hit the roped climbing areas, but bouldering is
now more open and unrestricted. Applause to MAC and AF! More info
at this link here
Climbing at Cunningham Falls is also off-limits, like most of Catoctin Mtn noted above.
There are a number of areas in both these parks which have climbing (roped and bouldering)
potential, but as was noted above, climbing is not allowed anywhere except at Wolf Rock
in Catoctin Mtn Nat Park. However, if ever permitted, the adventurous climber would be
able to find some very nice walls and routes at Lower Chimney Rock (said routes go
undocumented at this time). Cat's Rock (really in Cunningham Falls State Park) has just
some short boulder problems and 3rd/4th class scrambling (more than exciting enough for
the non-climbers who visit). Bob's Hill Overlook South (another Cunningham Falls State
Park location) has some short to moderately tall walls worthy of a rope to play on. And
there are other outcroppings - small and moderate, mostly for bouldering - hidden away in
the woods here that no one talks much about (for fear of drawing crowds and thus unwanted
attention from the local authorities).
Access to both Catoctin Mtn Nat Park and Cunningham Falls State Park has finally bubbled
up to the attention of the Mid-Atlantic Climbers, and they, along with the Access Fund,
are attempting to work with the Parks to gain more openness to climbing in the parks (at
least initially for boulderers; roped climbing access options would hopefully follow
suit).
Now, that out of the way...
Wolf Rock is a long band of quartz is primarily composed of easy to moderate level
climbing (where 'easy' is 5.4 or less, 'moderate' tops out around 5.9), with a sprinkling
of 5.10 routes, though at the far right end there is a short wall which has some seriously
blank faces to short roofs for you to step past, and are a smidge harder than 5.10. There
are some other routes tucked away in the crevices on top of this band of rock. Although
most of the climbing here is short, there are some fun routes to play on. And if you go
and want to avoid the crowds who frequent the top of the rocks, I'd suggest dropping ropes
on the 'back side' of Wolf Rock, on or around the Ebola Monkey Wall area. Your general
hiker does not typically venture over to that section of Wolf Rock, preferring instead
the more exciting moments of hopping over some of the narrow crevices (which are deep
and dark enough to give some climbers a pause for thought, too).
This patch wilderness area tucked
between the Frederick Municipal Forest and
Cunningham Falls State Park, ~10 miles north of Frederick, offers a nice place to retreat from city life. It does
not offer a lot of climbing opportunities; the few areas tucked in the woods and hills are small, and in some
cases, fairly remote. There are more bouldering areas than top-rope areas (by 'bouldering areas' I mean where the
rock is 10' or less). There are a small number of top-roping areas in the Watershed.
There is a outcropping of rock behind the gun club that you pass just before entering the Watershed itself, but it
is closed. Why? Too many people who didn't ask permission to climb there, didn't notify the landowner when
they would be there, and then got freaked out when there was a scheduled gun shoot down below them (they went off
to call the police, saying that people were shooting at them; it made for a bad situation between the landowner
and the climbers who were considerate, so to prevent future incidents, the rocks are now closed - and since there
is now a house above the rocks, it is doubtful they
will ever be open for climbing again)
Note: parking is extremely limited in the Watershed! Visit in small groups or carpool in a single vehicle.
RIGHT FORK ROCK
GPS coords:
Lat: N 39° 32.471'
Long: W 077° 27.920'
Parking coords:
Lat: N 39°32.487'
Long: W 077°27.923'
After following the gravel road for nearly 1 mile even, the road will curve to the left and there will be a small
(1-2 vehicle) pull-off on the right, next to the small brook. Park here. Rock-hop (step) across the brook to
follow a path back downhill to the right. You will see rocks ~100' away from the parking spot.
The rocks here are smooth, almost frictionless, quartzy-type stuff. Holds are few and either sharp and incut, or
smooth and slopey. The rocks reach upwards of 30' in places. It is an outcropping of seperate sections of rock.
Some nice corner/finger crack climbs, some blank-looking faces. Nothing much in the roof department except across
the road where there is a small line of 10' high or less rock which has a 15' high section in the middle housing a
roof 8' off the ground. There may be 3 lines on this section across the road, but the rest is bouldering problems.
This area has possibly some of the hardest climbing in the Watershed.
DEATH ROCK
Lat: N 39°32.464'
Long: W 077°27.922'
The first outcrop of rock you can see from the parking area. Large, wide, flat landing area,
it is often full of glass from broken bottles from partiers, and the nearby firepit sees a
fair amount of use when climbers aren't around, as well.
BLOB ROCK
Lat: N 39°32.451'
Long: W 077°27.931'
Blob Rock is located between Death Rock and Piton Rock
Furious Angels (5.10a/b) - X'. Uphill to the right of The Boulder Problem is this fun
little problem. Start at the base of the wide chimney and layback up the left arete until you can
reach a left-leaning crack system. Slam a jam, crank, and fight your way up to a horizontal. From
there stand and the top is yours! Pumpy, stout, but short. Some might consider this a boulder
problem.
PITON ROCK
Lat: N 39°32.441'
Long: W 077°27.993'
Last outcrop of climbable rock in this stretch.
LEFT FORK ROCK
GPS coords:
Lat: N 39° 31.991'
Long: W 077° 28.484'
Parking coords:
Lat: N 39°31.980'
Long: W 077°28.520'
Travel down the road just about 0.75 mile and park in one of the few small pull-offs here. The closest pull-off
to the rocks here is on the left almost exactly 0.75 miles from the fork in the road, in the middle of an S-curve.
The rocks are barely 50' away from the road, and are readily visible from the road. This place is a myriad jumble
of house-sized rock with washboard featured cracks. There are easy routes, moderate routes, and hard routes,
'slab'-like rocks to overhanging faces and roof problems. The holds are pretty positive overall. A very different
type rock than that found at RIGHT FORK ROCK. Much more frictionable. Potential here for doing pretty easily
protected (but short) leads. The rocks reach a height of about 35' in some places. The horizontal cracks that
permeate the rock here may give Gunk junkies a momentary respite from not travelling all the way up to the Gunks
itself.
Tower Wall
Lat: N 39°31.986'
Long: W 077°28.489'
This is the rightmost outcrop of the lower tier of rocks, one of the first visible from the road as
you come up from Mountaindale. While not overly tall, there are a few decent lines on it worthy of
playing on.
Free-range Tofu (5.3) - 27'. Climb up the jutting blocks forming the sharp arete immediately
left of the tree, left of the main face, until you reach a ledge. Traverse right and finish on
Rock Zombie
Rock Zombie (5.5) - 27'. Start just right of the tree at the far left corner of the main face.
Shamble pretty much straight up to the final overhangs at the top. There are decent holds up there;
you just have to find them.
Karmic Koala (5.7) - 26'. Begin 4' right of Rock Zombie. Climb pretty much straight up
the middle of the main face to the top. Some of the moves offer a bit of a reach problem, and there
are not as many buckets as you might like. Meditate and pull through.
Games People Play (5.6) - 26'. Start a few feet right of Karmic Koala, at a low,
blocky left-facing corner. Climb up on rounded holds to the broad ledge. Angle left and finish on
Karmic Koala
STAIR WALL
Lat: N 39°31.998'
Long: W 077°28.499'
This is the main climbing area at Left Fork Rock.
Errata: The route Ladder is more accurately 5.2 than 5.4.
V Notch (5.1) - Climb/stem up the acutely angled corner with a tree growing out of the middle of it to the
block above. The crux is getting past the tree w/out using the tree (you are, after all, rock climbing,
not tree climbing!).
Lone Tower:
Lat: N 39°32.003'
Long: W 077°28.503'
This tower sits behind, or to the left of, Stair Wall.
Arguing With Idiots (5.1 G) - 27'. About 50' left of Greg's Birthday Gift stands a
lone tower at one end of an amphitheater of rock. Climb up the main face with a plethora of holds
to the top.
GOOD ADVICE ROCK:
Lat: N 39°32.021'
Long: W 077°28.501'
This outcrop is located about 100' northwest of Lone Tower. While the main face is broad,
due to the nature of the ledges, there are only a few routes here. The routes here are
described left to right.
Never Smile At A Monkey (5.4) - 27'. Locate the crack that bisects the center of the main
wall facing the road, the base of which forms a right-facing corner. 4th class it up through jutting
blocks and ledges to the final steep overhang. Follow the crack up a few moves to the top (and
the middle of a move). There are numerous variations on this wall. If you opt to top out, the
exit move is more on the order of 5.7 than 5.4. But fun.
Don't Poke The Baby (5.1* G) - 21'. About 25' to the right and just around the corner from
Never Smile At A Monkey. Climb anywhere up the face between the outside corner and the
left-facing corner near the center of the face. The plethora of holds and cracks makes this an
easy lead.
Never Pet A Platypus (5.7+) - 18'. Unless ya wanna be hurt. Begin a few feet right of the
left-facing corner marking the right end of Don't Poke The Baby, where a vertical
finger/thin-hand crack splits the rock. Follow the crack up to a wide horizontal. Creative jamming
will enable even shorter climbers to reach up high to a broad pinch. Grab that and move up (crux)
to increasingly better holds at the top.
GYMNASTICS WALL
Lat: N 39°31.995'
Long: W 077°28.483'
This is the main climbing block above and behind Stair Wall.
ROCK GARDEN
GPS coords:
Lat: N 39° xx.xxx'
Long: W 077° xx.xxx'
Across the road and creek from Left Fork Rock, is a hillside full of rock walls. Most are
short and would make for easy buldering, but a few are tall enough most folks will want
to drop a rope.
One way to access the rocks is to park at the top end of Left Fork Rocks, then find a way
across the creek. After that, push up the wooded hillside through the low outcrops of rock
200-300 feet until you get to 'First Wall'. Overlook Wall is another 200 or so feet further
up the hill.
Alternative access, park at XXX and take the Reanimator mountain bike trail down 0.3 miles
to the top of the Overlook Wall.
First Wall
Anchors here are mostly trees, but there are a few options where you can get some medium
to large gear in the horizontals to protect some of the routes.
tbd (5.4) - 22'. Begin midway up the gully on the left side of this rock, about
15' up from the outer corner of the wall. Climb straight up on big holds to the top.
tbd (5.6) - 27'. On the left side of the main face, locate the finger-thin S-curve
crack partially infused with a line of quartz that leads up to a sharp inside corner near
the top of the wall. Found it? Good! Climb up that through the corner to the top.
tbd (5.5) - 26'. Begin 15' right and downhill from the previous route. Climb up
and left of the low roofs of the next route to a ledge with a (currently) small
tree. Head up the overhang a move or two to gain a good had ledge and traverse right 2-3
moves until you can find holds to let you continue up to the top.
tbd (5.8+) - 23'. Start 5' right of the previous route. Surmount a set of
short roofs just above your head to a short hand jam crack then gain a ledge. Go up and
right, and make some interesting moves to get past the large roof to reach the top out.
tbd (5.?) - 23'. Begin below the large roof high overhead, 6' right of the previous
route, at the obvious crack/corner system in the center of the wall. Boulder up through
that and power through the first low roof, gaining a stance on a ledge. Step left then
power through the upper roof to the top.
OVERLOOK WALL:
Towering upwards of 30' above the ground, this is the tallest rock outcrop in the Garden.
And has a very nice view to the east-northeast. Like all the other rock in this area, it
is characterized by stacks of horizontal seams and cracks, many of the latter which can
be hand jammed as one climbs up (and often that is the better option than using the flat
or slopey non-bucket holds immediately around). There are half a dozen or so routes here,
described from left to right as you descend the hill next to the wall.
Anchors for this spot are long lengths of webbing or static line to some trees set far
back, or gear in a few places nearer to the edge of the wall.
tbd (5.?) - X'. Climb the wall to the right of the large debarked eroding tree,
furthest point left on the wall that still has something worthy to climb on.
tbd (5.?) - X'. Begin 5-10' left of the next route, climb up through an overhanging
bulge to a ledge, then finish.
tbd (5.?) - X'. Begin just left of the large roof. Climb up!
tbd (5.?) - X'. Campus start at the large roof off the ground just left of the
large boulder ledge. Finish on the wall above.
The next three routes share the same starting point, then quickly diverge, only to
meet again at the final ledge at the top.
tbd (5.6) - X'. Step up onto the flat boulder and onto the wall. Traverse left
5-8'then head up, trending left, climbing on large but sometimes slopey holds to the top
point ledge.
tbd (5.6) - X'.
tbd (5.7) - X'.
Jensen Extension (5.9) - 15'. This adds 15' to your overall climbing. Start at the
base of the wall below the large ledge at the base of the Overlook Wall. Climb up on thin
moves to the boulder ledge. From there walk over to the main Overlook Wall and finish on one
of the routes noted above.
WHITE ROCK
GPS coords:
Lat: N 39° 30.006'
Long W 077° 28.323'
Noted in the Climb Maryland! book as being within the Frederick Watershed,
this area actually lies on the border of the Frederick Municipal Forest (Google maps
shows aroad here where there is no road to be found; go figure) and private land. Of
course, the Municipal Forest is part of the overall watershed. But anyway... The rock has
a rich history of people visiting it, all the way back to the 1700s. But it is rarely
visited by contemporary climbers. However,
it is [b]heavily[/b] visited by partying spraypainters (as evidenced by the
artwork adorning the west side of the rock). There are a dozen routes that exist here,
but either the lines are very easy one-move-wonder climbs, or very difficult and overgrown
with greenbriar at the base. In addition, as of 2008, someone purchased property just below
and to the south of the rock band. Their driveway used to be one of the two pulloff areas
for this rock, and is part of the trail heading up to the rock. See "Note" below.
Parking:
Lat: 39° 29.868'
Long: 077° 28.450'
There is extremely limited access for parking at this pull-off. If you are creative, you MIGHt
be able to fit more than two cars here and stay off the roadway. Good luck. And do NOT block the
two driveways which are here. Park across from them, perhaps a little downhill.
Note: the rocks themselves are on private land, but the landowner is visitor-friendly and
graciously granted permission for climbers to climb here - as long as they know they do so at
their own risk.
And risk here is considerable. Not only do you have the standard inherent risks you assume while
climbing, but White Rock is also a well-known hibernaculum for the local population of Timber
Rattlers, copperheads, and a number of other snake species in the region. Take GREAT care when
climbing here!
One other request from the land-owner: please practice low-impact visiting. Leave no trace, pack
all your garbage out with you. And don't burn the woods down (seriously).
To get to the rocks, From the left driveway (you didn't block either of them, did you?), go past
the "No Trespassing" signs 30' up from the road and angle left into the woods. You should pick up
the faint Stoner Trail here, which continues to angle left and ascend the hill. The trail isn't
always evident at first, but as you near the rocks, it becomes more apparent. The real climbing
area starts where the spraypainted "bonedancer" skeleton figures are displayed.
The Frederick Municipal Forest lies just south of the Frederick Watershed lands, and merges
with the north end of Gambrill State Park. There are a few places within the FM Forest that
offer climbing potential.
WAVE WALL/J WALL
GPS coords:
Lat: N 39° 30.483'
Long W 077° 28.152'
Parking coords:
Lat: 39° 30.552'
Long: 077° 28.846'
Wave Wall and J Wall are two adjoining sections at the south end of this band of rock, and
offer the most climbing opportunity. The main vein of rock faces primarily east (J Wall faces
north), on the opposite side of the ridge of rock from the fireroad. There is not a huge amount
of climbing here, and most of it is pretty short, but what is here is well worth paying a visit to.
Many of the routes are quite stout given the length of rock you climb. The climbs on J Wall, especially
Jammin', are of a quality that if they were 2x-3x taller, the routes would be among some of
the classics in Maryland.
The easiest way to get here is to park at the coordinates above near the fire road trailhead, then
follow the fire road into the forest for 0.6 miles, bearing right when the fire road forks left. You
will eventually come to a band of rock a few tens of feet off the left side of the road. The far right
end is where Wave Wall and J Wall are located.
J Wall is a short, steep (somewhat overhanging) wall of bulletproof rock, very much like some of the
hard, compact rock you can find at Sugarloaf. There offers four distinct routes to play on. These
are:
Just Jaws (5.6) - 17'. So-named for the bloody fingers after finding certain holds while
climbing up. And yeah, there are a few sharp holds. Be tough. Climb the blocky left end of the face
to a high horizontal. ANgle up right to the terminus of the Jammin' crack.
Jeez, Can't Find My Knees (5.7) - 17'. Long name for short route! Climb the blank-looking
face between the blocky Just Jaws on the left and the obvious jam crack to the right, without
using either, to the top straight overhead.
Jammin' (5.8+*) - 17'. As the name implies, follow the thin hand crack as it rises and archs
to the left at the top. A beauty of a line that gives lovin' from start to finish. Damned shame it
is so short.
Juxtaposition (5.8+) - 21'. This route climbs the face to the right of Jammin', and
left of the corner chimney. You can use the right edge/arete that forms the left wall of the chimney,
but shouldn't use anything of Jammin'
Unnamed Chimney (5.?) - 23'. Follow the chimney in the corner between J Wall and Wave Wall
to the top.
Wave Wall doesn't have any real distinct 'lines'. More like 'sections'. The ones noted below are more
suggestions for routes rather than "you must climb here". Most routes stop at the bulge 23' up where the
anchors should be hanging. If you can pull past the bulge, you are in serious hardman territory.
If you want, you can make the climbs harder by not using various holds. Or by just missing them entirely.
Unnamed (5.9+) - 23'. Start a few feet right of the corner chimney, climb the sloping
quartz 'steps' up to a thin vertical crack in the bulge. Climb as high as you can before you hit
the sloping slopers above the bulge.
Wing And A Prayer (5.7) - 23'. Very technical. From below, find the square-cut notch at the top
of the bulge in the rock. Work your way up to it as you find holds to ascend with. The route ends
once you've grabbed the top hold in the notch.
Unnamed (5.?) - 23'. A little easier than Wing And A Prayer. Begin about 5' right of
the aforementioned route, climb up the quartz crystals with positive holds.
Unknown (project) - 23'. Climb the blanker face a few feet right of the preceeding route.
BUSHWHACK ROCKS
GPS coords:
Lat: N 39° 30.209'
Long W 077° 28.440'
This broken rib of rock runs parallel to the White Rock band south and east of
here. It lies within the northeastern confines of the Frederick Municipal Forest, not in the Watershed. It
is not tall heightwise (max 30 or so feet), but lengthwise it is extensive, offering a few dozen routes, and
is littered with boulder problems. In the mid/late-1990s there were a couple bolts placed on Old Timer Wall
for no discernable reason other than to just do it).
There is an enormous amount of bouldering to be had here. In 2011/2012 a lot of boulder problems were being
established. Consult Robin Close's
Bouldering Page blog for more info and some videos.
WARNING: this area is open to hunting during season - be aware of when the hunting season is
in effect and if you go here, dress accordingly!
WARNING #2: in addition to the above, or even superceding it, the rocks here are a known
hangout for timber rattlers and copperheads, as well as other, non-poisonous snakes (but do you really
want to get close enough to identify which is which?). In the warmer months practice extreme awareness
of your surroundings. Rattlesnakes will give you a warning rattle, but copperheads...not so much. And
you don't want to be bit by a baby copperhead...
Hamburg Road Parking: This parking area makes for a longish (half mile) walk to the rocks, but the hike along
the fire road is far friendlier. Though eventually you'll have to break from it to the right and bushwhack over
to the rocks - hence the name of this crag
GPS coords:
Lat: 39° 30.552'
Long: 077° 28.846'
The fire road/trailhead is located here:
GPS coords:
Lat: 39° 30.525'
Long: 077° 28.804'
It is possible, but usually considered a Good Idea to not park directly in front of the fire road
gate, though unlike other parks in Maryland, there is no sign suggesting otherwise. And people do tend to
park in front of it periodically. It's your call.
If you have a high clearance vehicle, it's easy for you to park across the road from the gate.
There are no trails to these rocks. No matter which way you come at this area, you will be
bushwacking for a bit. Be prepared.
A good point to turn off the trail and angle hard right to the rocks is here:
GPS coords:
Lat: 39° 30.448'
Long: 077° 28.511'
Otherwise continue following the fire road until you come to a ridge and rib of rock angling out into
the woods to the right. Climb up atop that and follow that out. This will bring you to the crag from
the top.
As the rock rib is extensive, the sections, and then routes, are described from left to right as
you face the rock.
![[Rough draft overview map of Bushwhack Rocks]](Bushwhack-Overview.jpg) Compliments of Todd Hill, a basic overview survey map of
Bushwhack Rocks. The locations in white boxes are climbing walls, the locations noted with yellow
boxes are boulder problems locations relative to the roped climbing walls. The last three
walls (Old Timers, Suk Me, and Led Zepplin) are not noted here, but should be findable easily
enough once you are oriented to this map. The map at a scale of 1" = 50, on a basic 8-1/2 x 11"
sheet of paper.
Compliments of Todd Hill, a basic overview survey map of
Bushwhack Rocks. The locations in white boxes are climbing walls, the locations noted with yellow
boxes are boulder problems locations relative to the roped climbing walls. The last three
walls (Old Timers, Suk Me, and Led Zepplin) are not noted here, but should be findable easily
enough once you are oriented to this map. The map at a scale of 1" = 50, on a basic 8-1/2 x 11"
sheet of paper.
WHITE FACE
GPS coords:
Lat: N 39° 30.248'
Long W 077° 28.450'
This is the leftmost extent of real vertical opportunities greater than 15' high on the
rock rib.
Hat's Off (5.5*) - 24'. This climb suffers the curse of Bushwhack Rocks: good
route, just too damned short. Climb the discontinuous set of cracks up the mostly
lichen-free face to the short roof with a left-leaning hand crack. Pull through the roof
(crux) and step up to the top. Don't lose your hat at the roof.
Unnamed (5.0+) - 22'. Climb the wide crack and right-facing corner just right of
Hat's Off to a blocky stance near the top. Step up to finish.
Lichen It Or Not (5.3) - 22'. Hope you lichen it. Begin at the lichen-encrusted face to
the left of the main vertical crack of the aforementioned route. Climb up discontinuous cracks
camoflouged by the sea of lichen.
CRYSTAL ARETE
GPS coords:
Lat: N 39° 30.229'
Long W 077° 28.436'
Bad Wolf (5.6) - 28'. This route begins at the boulder blocks around the corner left from the prominent
quartz face. Climb up on good holds past a sapling on its left. Continue up the blank-looking face that has holds
as you need them to the broad notch at the top.
Quartz Avatar (5.8) - 28'. Slightly contrived. Climb up the white quartz crystal arete shared with
White Line Fever until the quartz ends. From here, staying left of White Line Fever, continue
up the non-quartz crystal face to the top.
White Line Fever (5.7) - 28'. Climb the arete and quartz veins between Quartz Avatar and
White Lightning. The crux is in the first 10', but is still non-trivial as you follow the main quartz
vein up to the notch at the top.
White Lightning (5.10*) - 27'. Climb the main quartz face split by a broken crack to the top.
If top-roping, take care in the first 10-15' to not fall - or have a spotter or a crash pad to
prevent bashing into the projection of rock that would be behind you!
LICHEN WALL
GPS coords:
Lat: N 39° 30.228'
Long W 077° 28.440'
Back in the 90s some bolts appeared on this wall. Then after 2009 they were apparently pulled out. Otherwise,
this wall is very much covered in lichen. You'll need to scrape it away to find some of the desperate holds
you might need.
Angel's Punishment (5.10d) - 31'. Braille climbing at its best. Start at the left end of the wall,
clambor up blocks to a ledge. Staying on the left half of the face (and avoiding the large ledge to the right
partway up), stretch, friction, and crimp your way to the top.
Cartoon Physics (5.9) - 32'. Start as for Angel's Punishment, but diagonal up the face right until you gain
the top of Earth Dancer. Thin, but not as thin as Angel's Punishment. Variations exist for you to exit top early,
keeping the climbing stout.
Earth Dancer (5.5+) - 32'. Start behind the detached flake/boulder on the right side of the wall, where a
large fallen tree trunk is laying next to the rock. Climb up past a couple of horizontals and an undercling flake
to reach a right-facing flake system. Follow that to the ledge, then continue up along the vertical quartz lines
on the left to the top. All the holds are there, even if you might not see them. Escape Variation: From
the ledge halfway up, trend right past a small tree and white corner to the top.
MAIN WALL
GPS coords:
Lat: N 39° 30.216'
Long W 077° 28.439'
This is the main section that sees the most traffic. There are nearly a dozen routes packed in this section
alone.
TBD (5.2) - 28'. This route climbs the fractured face, cracks, and finger/hand ledges fully around the
corner left from the deep chimney at the left end of the Main Wall area. Gear anchors up top.
project (5.?) - 22'. This steeply overhanging face is just left of the deep chimney of the Main
Wall. Climb up by following the vertical crack and right arete to the small overhang above, using nothing
but virtual holds in some cases. Fight past the overhang and up about a body length until you can gain
happier, easier ground. The bulk of the route is the crux. You might consider 2-3 crash pads to protect
the climber from the rocks at the bottom in case they fall low on the route.
![[Michelle on Short But Sassy]](short-but-sassy-michelle.jpg) Michelle is Short But Sassy
Michelle is Short But Sassy
Machete With A Twist (5.9) - 24'. Slightly contrived in the beginning, otherwise 5.7. Start midway
back in the chimney and utilize chimney techniques (e.g., stemming) to get up to the top. The 'twist' comes
in where you might start facing toward the back of the chimney and end up turning about 180-degrees to face
out by the time you're halfway up. The crux really is the start. Variation is to start on The Way Life
Should Be... then bridge across to the other wall at your earliest convenience.
The Way Life Should Be... (5.7** G) - 24'. As the title says, and so sweet this climb. Start in the
back of the broad chimney. Climb up the right wall, working right under and around the low roofs to a
layback corner. Do a classic layback up the corner until it rounds over to the right. Step left onto the
face and make a couple of delicate moves to gain the top. One of the best routes in this area.
Short But Sassy (5.10a/b*) - 24'. Most definitely. Ascend the broad corner 5' right of
The Way Life Should Be.... Layback, stem, and very creative use of the outside arete will enable
you to keep this problem in the 5.10 range (w/out using the arete it's solid 5.11). The crux is right
in the middle of the route. Follow the corner to the top.
Bifurcation (5.11a*) - 24'. Start 4' right of Short But Sassy, climb up the fairly blank but
not quite featureless face to the overlap. Work up slightly left to the vertical incipient crack and
follow that to the top.
The White Rider (5.2) - 24'. Is Gandalf, who else? This corner is 7' right of Bifurcation.
Starting next to the nearly black boulder, follow the prominent quartz vein and the right-facing
somewhat overhanging corner to the top. Easier than it first looks.
Layback Crack (5.5) - 24'. Start 7' right of The White Rider. Climb the
corner, using the crack in the quartz vein and the right-facing flakes up on the left as
you go, alternating as need be. Pull through/over the small roof where the corner ends.
Then either continue following the thin quartz seam up right, or reach up and left to some
side pulls and hand ledges buried in the sea of lichen. A rather fun route that
unfortunately ends all too soon. You can make the climbing a grade or so harder if you
stick exclusively with the crack in the quartz vein and follow that up to the top, never
using the flakes off to the left.
Siren's Call (5.9-) - 24'. You may not want to go home again. Locate the thin
crack 5' right of Beginner's Crack. On good face holds follow the thin crack straight up to the
blocky overhangs and left side of the square notch (crux) straight up to the top.
Funemployment (5.7) - 24'. The fun of unemployment - more climbing opportunities! Starting a couple of
feet right of Siren's Call, follow the incipient crack up to/through the square notch above. Nice
two-move layback partway up this route.
Vision Quest (5.8) - 24'. Beginning 4' right of Funemployment, follow the
easy and gently sinusoidal crack punctured by a couple of quartz veins to the roof. Step
right around the roof, and make some tricky moves to gain the steep corner at the top.
Here To Kill The Pain (5.1) - 22'. Start 3' right of Vision Quest. Climb straight up the face
on a plethora of good holds to the top. No buckets, but none are needed for this route.
Sickle Edge Anemia (5.8) - 28'. Begin 10' right of Here To Kill The Pain,
just left of a tree by a fissure chimney. Climb up the wall on thin tips, angling a bit
left at the top.
Anduril (5.7*) - 28'. Start to the right of the tree at the base of the
quartz-lined finger crack and follow that to the top. Gets a little thin in the middle.
JEFF DUNHAM SLAB
GPS coords:
Lat: N 39° 30.204'
Long W 077° 28.443'
This is a real slab, with a real overlap in the center of it! Have fun. This section is actually one
broad slab split in two by a narrow chimney, and includes the short, easy wall on the right. The slab
left of the dividing chimney is the 'main slab'.
Silence! I Keel You! (5.5*) - 28'. Don't piss off Achmed! Or else... A classic slab-overlap problem.
Start at the leftmost end of the main slab. Climb up the slab past a short, broken cavity up to the widest
part of the overlap. Using the small, right-facing flake above, high-step and pull through the overlap
(crux). Continue on to the top.
Premature Detonation (5.4) - 28'. Begin in the center of the main slab, climb straight up to the
overlap. Step right and up through the overlap at its narrowest point. Continue on up on easy terrain.
Peanut-Fu (5.3) - 28'. Hi-ya! Begin just right of (above), follow the discontinuous crack system up
to a break in the overlap. Climb through the break and up to the top, following the crack.
Jose Jalapeno (On A Steeek) (5.5) - 28'. An interesting first half that, if longer, would be an
excellent little route. Begin 6' right of Peanut-Fu and delicately step up along two thin parallel
cracks, intersecting Peanut-Fu at the overlap. Step left and above the overlap, then finish on
Premature Detonation.
Suicide Bomber Training Camp (5.0-5.2) - 28'. It was a nice facility, until some idiot tried to
practice. Climb pretty much anywhere up the wrecked face of the slab to the right of the chimney bisecting
the two slabs mentioned earlier. It's difficult to make this harder w/out playing the "eliminates" game.
Dumbass! (5.2) - 24'. Walter's favorite expression. Begin 10' right of Suicide Bomber Training
Camp, at an open book to the left of a large, dead tree. Climb the shallow book up to and past a small
triangular overhang halfway up the rock. Scramble off to the right at any point.
ICE-NINE
GPS coords:
Lat: N 39° 30.192'
Long W 077° 28.439'
Ice-nine is a fictional material featured in Kurt Vonnegut's "Cat's Cradle" which could solidify any
water below 114.4 degrees F that it mixes with. Some of the early climbers here were playing on this
rock one winter and froze their hands numb before they could even gain the top of this short wall, and
thus they dubbed the rock name. The rock is marked by one of several free standing pillars or walls
along the ridge, and extends to the right along the vertical blocky wall to a short wall with a series
of vertical parallel cracks and seams. The best climbing is on the west face of the pillar. Most
top-rope anchors can be set by using trees on or behind the main rock ridge.
Indy's Harem (5.4** G) - 32'. Locate the downward-flaring chimney on the left end of the detached
pillar. Climb up the chimney using a variety of holds (and a jam crack in the back if you are so inclined)
until the chimney narrows and you are forced to step out. Continue up the easy face above to the top. Disclaimer:
I didn't name this.
Spellbound (5.7* PG) - 32'. This just draws your eyes right to it. Just to the right of Indy's
Harem is a left-leaning splitter hand crack. Jam, or layback, the crack that ends far too early, step
right, and climb past the brief bulge followed by a short slab to the top. There are very few options for
gear placements once out of the crack. Note: it is quite possible to climb this route and totally
avoid using the crack - but why deny yourself the pleasure?
Earthquake Prediction Theory (5.6*) - 32'. Named in honor of Steve Ahrens (1952-2009) who, in the
early 2000s, discovered a direct correlation between P-rings from earthquakes and where they cross fault
lines which seemed to seed the generation of new earthquakes. Using his (now patented) algorithm he had a
forecast accuracy greater than 90% for several years running (until he passed away), yet geologists (with
forecast accuracies of 0%) kept telling him he was "just getting lucky". Think they were jealous. Begin 7'
right of Spellbound, climb the quartz corner until it is possible to move left beneath the roof.
Climb up and through the short chimney, and continue on moderate terrain to the top. A fun climb, too
short by far.
![[Indy climbing Earthquake Prediction Theory]](earthquake-prediction-theory.jpg) Indy climbing Earthquake Prediction Theory
Indy climbing Earthquake Prediction Theory
Veronica's Open Book Test (5.4) - 32'. Same start as Earthquake..., but instead of moving left,
continue straight up through a sharp open book until it ends. Finish on Earthquake....
Nothing Worth Dying For (5.2) - 30'. Another one-move-wonder route. Start on the dark green boulder just
right of Veronica's Open Book Test, scamper up the blocky and ledgy green wall to the top. The crux, such
as it is, is at the start.
The M&M Route (5.4) - 28'. Won't melt in your mouth. Begin 8' right of Nothing Worth Dying For,
a couple feet left of a wide vertical quartz vein. Climb the corner and cracks to easier ground and the top.
It is possible to avoid the corner and cracks and climb up the quartz vein for a few moves before moving left,
but that makes this route two grades easier.
unknown (5.?) - 24'. Climb up the parallel vertical cracks until the vertical wall ends on extra-easy
ground halfway up. 4th class it from there to the top or scramble off right.
This wall offers some fun little traverse problems that start to the right of Veronica's Open Book
Test.
OLD-TIMER'S WALL
GPS coords:
Lat: N 39° 30.188'
Long W 077° 28.443'
A self-standing wall with a few moderate to somewhat difficult routes on it.
Brian's Way (5.4) - 21'. Locate the stark white and obvious quartz vein on the
left side of the main face. Climb the quartz line to a detached flake and then up to a
stance. Take care that at some point some of that detached flake may break off. May be
best to belay off to the side.
Dale Did It (5.6) - 21'. Begin immediately right of the quartz vein. Climb the
greenish face on incuts and ledges until the holds evaporate. Reach up left to snag the
detached flake and finish on the preceeding climb. Note the warning in Brian's Way
re: the detached flake and belaying.
Bill's Route (5.8+) - 26'. Start at the vertical crack splitting the wall up the center. Climb up
the crack and the face with some discontinuous horizontal and diagonal cracks, as the holds allow until you
can gain the high point on the rock. Note there are two old, rusty bolts (sans hangers) on the right half
of this route.
Hello Mr Fancy Pants (5.10c) - 26'. Start on the face just right of Bill's
Route. Climb up along the left side of the A-shape set of cracks to three parallel
horizontals. Crimp and delicately work a right-leaning right-facing crimp-corner to gain
a fourth horizontal. Big reach up right to a large horizontal then work the easier
finishing moves to the top.
SUK ME WALL
GPS coords:
Lat: N 39° 30.167'
Long W 077° 28.437'
This is the next wide (but short) band of vertical rock just ot the right and around the corner from Old-Timer's
Wall. At less than 20' high for most of its length, some might consider this a wall of bouldering problems. Others
(like myself) prefer a rope. :-D The routes are described relative to the "Suck Me Baby!" graffiti.
Golden Tour (5.7) - 19'. Begin about 16' left of the "Suck Me Baby!" graffiti, on a block ledge. Climb the
lichen-covered face, staying left of the large incut notch on the right halfway up, using horizontal cracks,
edges and other holds to gain the vertical splitter crack holds at the very top.
The Golden Hour (5.8**) - 18'. Start in the 8' tall notch-corner left of the "Suck Me Baby!" graffiti.
Stem up until you run out of holds, then creatively bridge over to another corner to the right, and/or gain
a crucial flake hold in the center of the face. Work your feet up on small somethings until you can snag the
large ledges overhead.
LED ZEPPLIN WALL
GPS coords:
Lat: N 39° 30.149'
Long W 077° 28.442'
This is the next extent of vertical rock on the rib. Again, not overly tall, but
some interesting problems do exist here.
Stairway To Heaven (5.1+) - 28'. Not quite a ladder. Climb up the blunt arete on
the left side of the prominent slab to the top. Good holds most all the way up make it a
fun little romp.
Houses Of The Holy (5.5-5.8) - 29'. A variety of options await the explorer of
this slab. Begin below the downward-flaring V-notch system. Climb up to a ledge, then
either head up right to a right-leaning right-facing flake/crack (easier) or straight up
on small features, slopers, and shallow dishes (harder). Either way you go, once you
reach the uneven horizontal near the top, the climbing tapers off to finish with a
satisfying couple of moves.
Looking For Cowgirls (5.5) - 29'. Start at the base of the offwidth chimney.
Either do the offwidth directly (awkward!) or work your way onto the face immediately to
the right, then follow that up, keeping the offwidth crack on your left. As the offwidth
crack ends at a ledge, continue straight up to an overhanging finish.
Here, There Be Dragons (5.3) - 25'. Begin at the prominent right-leaning crack
system 7-8' right of the offwidth crack. Climb up until you reach a roof on the right.
Then either continue up the corner and crack to another roof and traverse left to where
another right-leaning crack splits the overhang, or traverse left on a left-rising crack
line to the previously-mentioned right-leaning crack system. Continue up this second
right-leaning crack system to the top.
unfinished (5.hard) - 19'. Approximately 10' right of Here, There Be Dragons,
climb up to the large corner formed by an enormous block. Work up to a left-rising crack
system on the main face of the block above the overhang, traverse up and left until you
can reach the arete. Stand and you're done!
If you explore out to the west about 70-80' from Led Zepplin Wall you'll come to a small
clearing at the top of a rock wall. The rock is no higher than 17' in most spots, but
there are bouldering options to be had down there.
SOUTHERN COMFORT WALL
GPS coords:
Lat: N 39° 30.xxx'
Long W 077° 28.xxx'
A few hundred feet south of Led Zepplin Wall is this little outcrop of easy climbing.
This is the last bit of vertical rock over 15' high along this ridgeline. While pretty
far down for most people to hit, given the other routes in the area, it's worth a visit
or two if you're looking for some mellow action.
NATHANIEL'S PLACE GPS coords:
Lat: N 39° 30.317'
Long: W 077° 28.877'
This is another area not technically within the Frederick Municipal Forest but part of the
Maryland Department of Natural Resources lands. However, due to its proximity to (and being
nearly surrounded by) the FM Forest lands, it is included in this section. In this area the
FM Forest boundary stops at the creek below the rocks, and extends downstream for about a
quarter of a mile before the FM Forest lands cross the road to the east.
This parcel of land was set aside in memory of Nathaniel Marquez, a graduate of Frederick High
School who had passed away. On a website dedicated to him, his parents invite anyone who wishes
to help keep the area litter-free to visit. They tell a story of how he organized a huge
reclamation project that returned the area to pristine wilderness. Ironically, since then, much
trash (primarily from teenagers who hang out there) has re-accumulated.
Parking:
Lat: 39° 30.XXX'
Long: 077° 28.XXX'
The band of rock runs almost due north-south, facing west towards the stream. It is not
overly tall, but for those of you who are non-boulderers or not into borderline high
balling, you'll want to drop a rope. Between the taller sections of rock there is a
plentitude of short bouldering opportunities. Some of it very easy, some of it quite
challenging.
RIGHT OVERLOOK:
Lat: 39° 30.352'
Long: 077° 28.874
This short rock is located about 200' to the right of the chimney marking the Nathaniel's
Place foundation. It has virtually no poison ivy worth speaking of, unlike some of the
other rock walls here.
Donum Dei (5.2-5.4) - 23'. "Nathaniel" means "Gift from God". In Latin, it is "Donum Dei".
Starting at the lowest right-facing corner, climb up onto a short slab and aim for the
obvious crack breaking the light tan band of rock above. Go up either following the crack,
the face to the left, or the face to the right (5.4) for a few moves before you hit the
top. Alas, the route is entirely too short. If only it were 3x taller...
Pastel Roof (5.6+) - 23'. Probably the most interesting line on this wall. Starting at
the next right-facing corner up and right from Donum Dei, climb straight up to the middle
of the tiered ceilings above. Pull through and up left, reaching high for good holds (lower,
intermediate holds tend to snap off; belayers beware). Unfortunately, this route does not have
a nice finish, as the rock ends while you are trying to pull through the roof. Either top off,
or stop halfway through pulling the roof and lower.
Got Milk? (5.6) - 23'. Begin at the large, black right-facing corner just right of the elm sapling.
Climb straight up to the lower right end of the tiered ceilings. Pull past this lower roof onto
a featured face above, searching for the few small sharp holds that are offered.
Eet More Chikun (5.7) - 18'. Shortest line here, with the most awkward start, which looks initially
easier than what it is. Begin on the right end of the initial overhang at the top of a slab.
Pull through the initial overhang on so-so holds until you can stand again. Work up past a
couple of ledges until you get to a nearly flat, vertical, but featured face that offers very
few holds. Find an intermediate, work your feet up, then stretch for the broad finger ledge
high above, just below the top. Stand up and lower off or top out.
MAIN OVERLOOK:
Lat: 39#176; 30.308'
Long: 077#&176; 28.xxx'
This wall lies directly below the Nathaniel's Place foundation area. Caution as there is
poison ivy growing up along the primary anchor tree.
MATTRESS WALL:
Lat: 39#176; 30.xxx'
Long: 077#&176; xx.xxx'
So-named because of the huge foam 'mattress' that sits near the base of this wall.
OVERHANGING WALL:
Lat: 39° 30.302'
Long: 077° 28.xxx'
This is the last real section of climbing as the rocks peter out into boulders and butt up
against the stream. This also offers probably the hardest climbing opportunities in the
area, given the thin, sustained and steeply overhanging nature of the rock. You will need
to be creative with anchor options, as all the trees up atop of this outcrop are either
dead or rotting. There is also a plethoria of poison ivy all around the deadfall here.
Hidden in the northwestern sector of this part, well off of main trails, lies a low band
of rock that has some climbing potential. Mostly bouldering, but there might be some short
top-rope problems mixed in as well. This area also offers a nice view of Middletown Valley.
GPS coords:
Lat: N 39° 25.001'
Long W 077° 18.139'
This tall (~40-50'), severely overhanging rock outcrop is located along the
shores of Lake Linganore, in the private community of Linganore. Alas,
since this is a private community, it means access to these rocks is
off-limits. You can only go there as a guest of one of the few climbers who
live in the community. That said, if you do get an opportunity to check
this place out, be prepared for sharp holds on extremely overhanging (~45
degree) rock! There are around half dozen lines here, probably no more,
depending on how contrived you want to be. If you are fortunate enough to run
into an Old Timer climber dude named Bill, he would be your best source as a
guide to the area.
Note: the pump factor is HIGH on these routes! There are no rests - be prepared!
Trail of Tears - ~5.9/5.10. This route climbs up the severely overhanging
inside wall of the cave.
Sundance - ~5.10+. This climb dances up the line to the right of Trail of
Tears
Wounded Knee - 5.?. So-named from one of the first climbers who sliced his knee
during a fall on this route, but didn't realize it until he was down and preparing to
belay the next climber. This route runs up the face just right of the outside corner,
and is a bit shorter than Trail.. or Sundance.
Pale Face - 5.?. This route climbs the face to the right of Wounded Knee
The Gunpowder Falls River winds its way from the Prettyboy Dam region down to
the Bay. Along the banks of this lengthy river are scattered a handful of
crags, of which Route One Rock is part of. However, being so far
downstream, it remains in a seperate section below.
GPS coords:
Lat: N 39° xx.xxx'
Long W 076° xx.xxx'
Parking coords:
Lat: N 39° xx.xxx'
Long: W 076° xx.xxx'
On the northside of and immediately adjacent to the Prettyboy Dam is a two-tiered
rockwall. Access to these cliffs at this time is restricted (i.e., closed) but it is being
pursued with the assistance of the Access Fund. Little is known about routes on this
rock except that the lower tier hosts some very difficult lines, and there is at least
one old bolt midway up a route on the upper tier. Local firefighters have been known to
utilize these cliffs for vertical rescue practice sessions.
GPS coords:
Lat: N 39° xx.xxx'
Long W 076° xx.xxx'
Parking coords:
Lat: N 39° xx.xxx'
Long: W 076° xx.xxx'
Located just upstream maybe 0.15 miles from The Fin, this mini-amphitheater
of rock is tucked away out of sight behind a jumble of apartment and livingroom-sized boulders.
You cannot see it from the road. Parking is the same as for The Fin. You will need long
slings or webbing for anchors here, as the available trees are set pretty far back, and
the rock is not strong enough to really accept gear in the few places you might be able
to place something.
One word of caution/warning: copperhead snakes live in this area, and stay active fairly
late into the season.
Route 1: (5.Unknown) - Climb the short wall at the rightmost end of the wall to a ledge
(12'). Then follow the arete up and left to the highest point on this wall (also
the top of Route 3).
Route 2: (5.10?) - 19'. Climb the thin face in the center of the right wall to a
horizontal crack and finish a body length or two (depending on your height) at the
angled arete at the top. For a few extra feet of climbing, follow the arete up and left
a few feet to the top of Route 3.
Route 3: (5.hard) - 25'. Start below and right of a short fin-blade, left of the right
wall, beneath a small roof capping the top of the rock. Climb up through the rounded
groove corner and pull past the small roof at the end.
Chunky Monkey (5.7/5.8?) - 24'. Climb up to and through the broad shallow chimney with
vertical cracks and flakes in the center of the rock wall to the top. Somewhat harder
than it initially appears.
Route 5: (5.Unknown) - 25'. Starting 5' left of "Chunky Monkey", gain the sloping ledge
about 4-5' off the ground. Climb up to the left of the vertical fin, right of the roof,
catching a small horizontal crack just right of the roof. Blast past this another 5' to
the top.
Route 6: (5.Unknown) - 23'. Start in the corner to the left of Route 5, directly below
the roof. Climb up onto the ledge, then up the corner and face, skirting the roof on
the left wall. Finish the last few moves by either chimneying the crack or working up
the face.
GPS coords:
Lat: N 39° 37.072'
Long: W076° 41.403'
Parking coords:
Lat: N 39° xx.xxx'
Long: W 076° xx.xxx'
The Fin is located approximately a mile downstream from the Prettyboy Dam
itself. From the parking area you need to walk down the road to a trail or
bushwhack in from behind. Anchor set-ups are not always straight-forward. You
may have to be creative. Some of the routes, though, are straight-forward, and
thus are climbed the most (also, having one of the more friendly belay areas
helps ;-) .
GPS coords:
Lat: N 39° 36.802'
Long: W076° 40.556'
Parking coords:
Lat: N 39° 36.770'
Long: W 076° 40.337'
Bunker Hill rock is nestled right on the banks of the Gunpowder Falls river. It
is very scenic...but the rock quality is lacking, unfortunately. However, if
you can get past that aspect of the area, you can have a nice time here. AND
it's close to the cars (though not close enough to belay from the steering
wheel; sorry).
From the parking area cross the road and follow the river upstream for all of
maybe 4 minutes. The path is flat and easy. You will come to the rocks on your
right. If you miss them, you are looking for the wrong thing - they're only
30-40' tall at best.
GPS coords:
Lat: N 39° 37.104'
Long: W 076° 39.169'
Parking coords:
Lat: N 39° xx.xxx'
Long: W 076° xx.xxx'
This expansive band of rock is located nearly a mile downstream from where York
Road passes over the Gunpowder Falls River. It is set back a hundred or so feet
from the river itself, so not readily apparent unless you are looking uphill to
the left through the trees. You'll see a tall wall (~40') that looks quite
appealing, but climbing on it is....well, let's just say the rock is rotten.
You'll do better climbing the shorter sections that flank the main wall; they
are more stable.
GPS coords:
Lat: N 39° 37.047'
Long: W 076° 38.907'
Parking coords:
Lat: N 39° xx.xxx'
Long: W 076° xx.xxx'
Located about 700-800' downstream from Raven Rocks, this is a small outcrop
that boasts rather stiff, short problems. Almost boulder-problem like in
nature. The rock is made up of the same type of rock as Raven Rocks above,
and is prone to breaking, so take care when climbing here.
GPS coords:
Lat:
Long:
Parking coords:
Lat: N 39° xx.xxx'
Long: W 076° xx.xxx'
This crag is located ~700-800' upstream and across the river from Raven Rocks.
It is often overlooked as a potential climbing area due to its apparently
slabby and tiered nature, but you can find some problems on some of these
exposed faces. Most are probably what one would call "boulder
problems", but due to the landing area, a rope might be desireable.
GPS coords:
Lat: N 39° 38.133'
Long: W076° 24.753'
Parking coords (Main Upper Lot):
Lat: N 39° 38.104'
Long: W 076° 24.945'
Parking coords (Lower Rte 24 Lot):
Lat: N 39° 38.278'
Long: W 076° 24.752'
Parking coords (Chrome Hill Lot):
Lat: N 39° 37.907'
Long: W 076° 24.857'
Rocks State Park (also called Rocks of Deer Creek, although this name
has fallen out of usage) about located 50 minutes north-northeast of Baltimore. Rich in history, the
park used to belong to the Susquehannock Indians, who held ritual ceremonies up around the King
& Queen's Seat area. Now it is a place for many types of recreation - including rock climbing.
There is a fair bit of climbing to be done here at the main cliff (bring at
least a 50m rope for Breakaway Wall!) as well as some more secluded shorter
outcroppings tucked away in the woods. The rangers are pro-climber; they feel
that climbers are as legitimate a user-group as anyone else, and if you work
with them, they will work with you. Bearing this in mind, there are three
hard and fast rules that the rangers will enforce on you (and other
park users):
- THE PARK CLOSES AT SUNSET!! Please, please, PLEASE be down,
off the rocks, and OUT of the park by sunset! Sunset is published daily in the
papers, and there is an indicator at the top parking area what time the park
closes. The rangers like the climbing community, but they also want to keep
things safe for everyone. They also want to go home, too. If you are in
the park after dark and a ranger finds you, you will be issued a '$70
autographed invitation' (euphemism for ticket).
- No new pitons or bolts are to be placed in the rocks! If you feel for some reason that there
absolutely has to be a bolt/piton driven in somewhere - please check with the rangers
first! If you can make a valid case....maybe they'll let you. But don't bullshit them; some of the
rangers are climbers, too, and know the rocks pretty well. (it has come to light in 2014 that there
were new bolts placed on the route Chardonney without anyone's knowledge of this, and to
date no one has come forward to claim responsibility for this action)
- Pets! In the past park policy has been a strict 'no pets' rule, but this has been relaxed,
you can bring pets, but only as long as you have them leashed and clean up after them. Please
don't ruin it for other pet lovers, or make a nuisance for non-pet lovers (as they will report this
to the rangers who may then have to rescind the 'pets allowed' policy). There is a pet waste disposal
area at the upper parking lot.
Some other notes:
The rangers take a dim view of people throwing anything off the cliffs
here. This is a criminal offense, and the rangers will charge offenders (if
caught) with reckless endangerment and assault. So, if you catch any bastards
throwing things off, feel free to notify the authorities!
The park is a Trash Free park! If you pack it in,
pack it out. Bring a bagto put your trash in if you need to. And be helpful: pick up any extra trash
you find laying around. Other climbers and the rangers will definitely
appreciate it.
There is a weekend admission fee of $2/person if you park up top at Rock Ridge.
This is in effect from late spring until late autumn. During the week, however,
park usage is free.
There are copperheads in the park. They like the rock, especially to warm
themselves on during chillier days. The author has not yet (in 11+ years of
climbing there) encountered one (now next week I'm sure I will!), just some
evidence of their passing. Just be warned. Forewarned is forearmed, and you
don't want your forearms on the receiving end of a couple of poisonous fangs -
do you?
There is a micro-moss which grows on the rocks (what kind, I don't know; that's
not my balliwick). This moss, after it rains or mists, suddenly comes 'alive'
and causes the rocks to be slicker than oil. I know of at least one person
who face-planted while walking along the base of the cliffs here, but the moss
is not restricted to just the bottom. Be aware and extra careful when the
conditions are wet.
The rock here is of high-quality. There are a number of great and moderately
nice climbs here. The number of low-quality routes is lower on average than
elsewhere (your mileage may vary, of course). A 'real' guidebook was said to be
in the works back in 1994, but nothing ever came of it that I've been able to
track down, thus the expansion of my online guide for Rocks State Park. There
is a lot of history here, and almost every square inch of the rock has been
touched at one time or another. There are even some 2-pitch routes (the rock
here is over 100' in places). A few of the top-rope routes can be led here, and
I tried to give some semblence of a protection grade to those routes (eg, G =
Good pro, PG = Pretty Good, R = Runout/Danger Will Robinson!, and X = solo
time)
PLEASE CLIMB SAFE!! This should go without saying no matter WHERE you climb,
but bears repeating. People die at Rocks State Park almost every year. Until
the late 90s (1998 and 1999) these have not been climber deaths (just stupid people
doing stupid things). But the sudden demise of three climbers (two who were soloing, one who was
bouldering above the Breakaway Ledge) here has woken some people up to how dangerous this recreation
really is. KNOW YOUR LIMITS and TAKE RESPONSIBILITY FOR YOUR ACTIONS!
Self-rescue if possible. The rangers will assist in true emergencies, but they
are not baby-sitters. If you solo, know that if you fall you are going to get
seriously injured or killed. This could potentially jeopardize the future of
climbing in the park. No one likes to do body recoveries (been there, done
that). I'm not telling you not to do it. I AM saying be extremely aware of
the consequences your actions may have on the area.
Local Historical Note:
When you are first
walking out to the overlook from the King & Queen's Seat, note the faded tombstone on the last large
boulder you have to step over (note also a lot of the other grafitti etched in
the boulders around here from that era, too). The tombstone etch is dated 1837,
and the initials are "A.H.". Back in the 1800s off in the woods a
hundred or so yards away (in the old quarry) there used to be a mining/quarry
operation going on. There were the "acceptable risks" accidents and
injuries and death, but in one incident there was a collapse in the quarry, and
one worker was buried. His body was never recovered, so the other quarrymen
carved a tombstone in his memory on the boulder by the King & Queen's Seat.
It is faded from thousands of people walking over it lo these many years now,
but it is still visible.
Errata for Rocks State Park:
This section will contain any errata for/corrections to information in the
guidebook itself.
Route #3, Biceptennial, is drawn slightly incorrect in the second topo
photo. At the roof it pops left then up, when it should be reflective and curve
right then up the corner above the roof.
The route Toast, #36, should be listed as being 5.9+, not 5.8.
BREAKAWAY WALL:
![[Vertical Wall]](vertical.jpeg) Vertical ascends the crack/flake just right of center
through the small roof, then angles up and left to the top. Piney is
the roof in the upper right skyline of the photo. Mike's Finger Buckets
follows the line just left of center.
Vertical ascends the crack/flake just right of center
through the small roof, then angles up and left to the top. Piney is
the roof in the upper right skyline of the photo. Mike's Finger Buckets
follows the line just left of center.
This is the 'main wall' of Rocks State Park, accessible only by an exposed 5.1
downclimb scramble down past the Pinnacle. Please be very careful when going
down/up this area (especially when it's wet). A fall could be terminal (see
earlier note about body recoveries). Rope up if you have to, okay?
The wall is south-facing, and rises 65-80' high. There is a lower platform
and an upper platform (which also serves as the base for Epitaph Wall), a
height difference of 15'. The lower platform offers a tree and some cracks
(finger-sized to fist-sized) for pro. The upper platform houses a nice column
tucked in a corner, which most people use as a primary anchor for Breaaway
Right, Superbulge, and Mike's.... You'll want gear, though for
backup anchor, or for setting up Breakaway Left and other routes to the
left of that.
The Breakaway Wall hosts the longest top-rope routes in this guide, pushing 80+
feet in length. Be sure your rope ends reach the ground before trying these
climbs!
There are a number of other routes, lead only, exist between Green Subtrafuge
and the King/Queen's Seat area, varying difficulty levels, from moderate to
hard. Some are top-rope problems, but a handful two-pitch leads, or 120+
foot top-ropes are piled inbetween.
The following routes do not appear in the current edition of the book. The
first is located on the lower broad ledge at the top of Vertical. The
second next to Shark Tooth. The third is a new route put up by Nick
Crowhurst of England.
Blister 5.10c - X'. Mainly a boulder problem, but you'll want a spotter in
case you slip and stumble - it's a hell of a drop off the edge down
Vertical! So please take care. From the broad ledge at the top of
Vertical, below the Epitaph Wall ledge at the top of Breakaway,
find the large vertical crack in the corner. Climb up the thin face immediately
left of the crack. Using the edge of the crack for your right hand is
considered "on". The name derives itself from a crystal about 8-9' up
on the right that you lock your thumb onto as you are making the upper moves on
the problem.
Jumpin' Jack Flash 5.11a/5.11c - X'. Climb the short and fairly blank face
just right of Shark Tooth. If you do not throw for the right edge arete
at the crux, the climbing stays at 11c. If you use the right edge before the
undercling (beware that wasps use this as their home, too), the climbing is
11a. Be sure you're up for some seriously sharp holds.
Horizontal 5.8 (G/PG) - ~100'. In fine British tradition, a horizontal
traverse route! This was a vision of Nick Crowhurst, and put up by he and Indy.
While you could top-rope most of this from one anchor point above
Superbulge, this is probably best done on lead. Begin by climbing up
the gully/chimney of Green Subtrafuge until you are beneath the roof.
Begin traversing out right (there is no real good place to put gear in until
you are under the Green Subtrafuge roof). Hand-traverse the ledge of
Breakaway Left to the formidable Breakaway Block (protection here is
good), then stem/bridge beneath the Breakaway Block roof to gain the bomber
bucket hold on Breakaway Right. Continue following the horizontal line
of weakness right to another, smaller ledge that ends 20 or so feet above
Mike's Finger Buckets. Step up onto this ledge and traverse right
another 6-8' to the parallel Vertical cracks. Climb up another 4-5' to
the thin horizontal crack at the top of the parallel Vertical cracks.
Delicately continue the traverse right, following this seam around to the slab
face beneath the Piney roof. Just as things get really thin, there is a
large bucket hold you can reach blindly just past the corner. Continue
traversing right until you can step off onto blocks near The Pinnacle. If you
are leading you might consider setting up a (hanging) belay either at the end
of the ledge above Mike's or in the Vertical cracks.
Breakaway Direct - This was noted as 5.11 in the guide; it is more
correctly rated 5.12-.
Breakaway Bulge 5.13 (R/X) - X'. this is a slightly contrived route. Climb
Super Bulge until you are through the crux. Now, instead of continuing
on up, traverse left until under the Breakaway block roof, and finish by
climbing Breakaway Direct.
EPITAPH WALL:
The following few short routes are located above the Breakaway Ledge, and
access the summit section directly. Need medium to large pro to set up top-rope
anchors up top for these routes. There is a quick and exposed 2-move 4th-class
traverse (don't fall!) on the north side of the rock to access this broad
ledge.
Note: Be damned careful if you boulder the wall left of Slimey! At least
one person missed a hold, stumbled on their fall, and continued on down to the
base of the rock while bouldering (March 2003, in fact :-( ). Just be careful,
okay?
THE PINNACLE:
The only way to set top-ropes up here is to do a lead or solo. Easiest is to
clamber up the west edge route on The Pinnacle. Second easiest is the route is
to follow the crack left of Better Balance on the north face of the
Pinnacle (medium to large pro; watch for the loose block near the crux). The
anchors up top are a couple of bolts.
There are some easy cracks on the northeast side of the Pinnacle, left of
Better Balance, but almost no one climbs these anymore.
NORTH WALL:
This is the mostly rounded wall which most people either walk past without a
second look or set up some very easy stuff for beginners to play on. There are
some short but keep-your-attention routes here, also.
BEGINNER AREA:
This is approximately 70' uphill from the Pinnacle where the rock is a
low-angled round wall cut by a right-arching crack. This is a popular spot for
beginner classes to set up.
BICEPS WALL:
Located behind the King & Queen's Seat, on the west side of the
south-facing wall.
Anchors are generally off the boulders behind the King & Queen's Seat
block. Access to the base of the climbs descends down the steep erosion trail
to the right of the rocks, cutting back to the cliff face at your best
opportunity.
MOBY DICK WALL:
GPS coords:
Lat: N 39°xx.xxx'
Long: W 076°xx.xxx'
A seriously overhanging boulder problem. There are a couple of videos of people
working it (successfully) on youtube. One such video is
here
Another bouldering video here
SMOKE'N'ASH:
GPS coords:
Lat: N 39°38.069'
Long: W076°24.729'
This is about 300' south of Vertical, buried in the woods. When the
leaves are off the trees you can catch a glimpse of rock out there.
There are other routes on the main rocks of Rocks State Park. More info
will be added later. A rough online map exists at http://ourworld.compuserve.com/homepages/EM1/rocksair.html
GPS coords:
Lat: N 39°41.557'
Long: W076°25.608'
This is a small outcropping of rock immediately next to Falling Branch waterfall,
also known as Kilgore Falls, and at 19' is the second highest waterfall in Maryland. There is climbing here,
as I have talked to a few climbers who have visited this area during the drought period in the
late 90s, but route information is unavailable at this time. This park is a subsection of Rocks
State Park.
Directions:
Parking coords:
Lat: N 39°xx.xxx'
Long: W 076°xx.xxx'
GPS coords:
Lat: N 39°40.778'
Long: W076°29.914'
Just off of the end of Madonna Road, along Deer Creek, sits this subsection of
Rocks State Park. There is limited parking along the road. A trail follows the
creek upstream a little less than 1/2 mile to the climbing area. There is not a
lot of room at the base of the rocks for belaying, as the creek is right behind
you, so be aware with how you place your rope, gear, packs and other stuff
around so other people who are just walking through can do so without tripping
over your stuff.
Directions: From Baltimore follow MD 146 to an intersection with Rte 23
(complete with blinking red light, stop signs), about 16 miles north of the
I-695 beltway in Towson. Continue straight onto Madonna Rd and follow that a
few miles until it ends at a T-intersection with XXXX and XXXXX. Turn left and
park in the small area on the left. Follow the flat trail from the parking lot
to the rocks.
Parking coords:
Lat: N 39°40.836'
Long: W 076°29.534'
GPS coords:
Lat:
Long:
There is growing evidence that this section really refers to either the Conowingo Dam
area further upstream, or a private(?) crag further downstream on the opposite side of the river.
For what it's worth.
There is some climbing up and down the Susquehanna River in Maryland and
Pennsylvania. Much of this is on private land (90% of that you should steer
clear of!), but there is a little on public land. Specifically the old quarry
in the Susquehanna State Park.
The rock here is a granite, like that across the river at Port Deposit. It is
of pretty good quality, but there IS loose rock around - be careful!. There is
climbing upwards of 5.9 or so in difficulty. Probably not a destination for
your way-honed hardman climber, but a nice diversion from all the other places
around.
Access to this little crag is difficult for now. Either you can canoe in along
the river, or walk along the old canal tow path, following the railroad tracks
(be careful that you have to work around some questionable bridges). Please
keep clear of private property, and if confronted about trespass issues, please
don't get all up in arms with the nearby landowners. The Park is trying to get
a trail system in, and any antagonistic actions between you and the local
landowners will hamper their efforts.
Ultimately it is hoped that the Greenways Trail System will be finished to go
up/down the Susquehanna, and when it is done, the trail will take you right
past the rocks. Access at that point will be a LOT easier! Just be patient for
the time being, okay?
As with all Park property, there is NO bolting allowed on this rock.
TRAVELLER'S ADVISORY: as of Aug 2001, there have been numerous
break-ins of cars (convertibles seem most vulnerable) at the various crags up
and down the Susquehanna (whether the crags are on private or public land makes
not much difference). The Cauldron (a private land area and will probably
ultimately be closed to climbing in any event; the landowners are cracking down
on trespassers via the state troopers) has seen over 30 car break-ins in the
past 3-4 months - WARNING! Don't take valuables with you and leave them
in the car! Out of sight or not. This should go for most all areas, but it
seems the Susquehanna region is being plagued more with assholes who get off on
this sort of thing [breaking into cars and vandalism]. Thanks to Joanna of
Baltimore for the warning (who also suffered from the predations of these
[censored] [censored] [censored] people).
Note: the crags off of Cooks Landing Road (notably The Cauldron and Middle Earth)
are actually pretty much in Pennsylvania. The Middle Earth area probably straddles the
PA/MD border. There is rumored to be upwards of 80 sport lines here, but again,
access is a significant issue, as land ownership is debated between the railroad
and the power companies. In any event, this spot is not public land.
GPS coords:
Lat: N 39° 25.277'
Long: W 076° 26.008'
Parking coords:
Lat: N 39°25.663'
Long: W 076°26.607'
There is a small outcropping of rock east of Rt 1 in the Big Gunpowder Falls
State Park. It is not very big, it is tucked away a bit off the path that
follows the north shore, and doesn't see a lot of traffic. Some might
consider these boulder problems; others might want to drop a rope. More
detailed information to come in the near future.
There are 5 individual rock outcroppings here, noted as Rock 1, Rock 2, Toby
Rock, Starship Trooper Rock, and Rock 5.
ROCK 1
This is the first boulder that you come to from the Lost Pond Trail. The access
path splits left and right around this rock. There are a couple of short
boulder problems on the dirty face facing the Lost Pond Trail.
ROCK 2
This blocky clump of rock is located ~20' back and to the right of Rock 1. It,
too, has a couple of short boulder problems on the face facing the Lost Pond
Trail.
TOBY ROCK
This is one of the larger outcroppings in the area, standing nearly 15' and
over 30' wide. Its main feature is the large overhang that most routes start
with right off the ground. It is about 25' left of and uphill from Rock 1.
STARSHIP TROOPER ROCK
This is another large outcropping that rivals Rock 3 and is 30' to the left of
TOBY ROCK. It also starts as a low overhanging wall/roof, but rises a bit
higher up than TOBY ROCK does. It is about 20' at its highest.
ROCK 5
Nothing much is known about this outcropping. The trail over to it from Rock 4
is massively overgrown, as no one visits it any.
GPS coords:
Lat: N 39° xx.xxx'
Long: W 076° xx.xxx'
Parking coords:
Lat: N 39°xx.xxx'
Long: W 076°xx.xxx'
This small quarry lies in the woods next to the North Central Railroad
Hike'n'Bike trail near Sparks, Maryland. There is a definite trail system that
leads to the cliffs, and a fainter trail ~50' further down the NCRR trail that
leads to the top to set up anchors.
Anchor set-ups: Trees are fairly abundant up top; no need for gear. But 20'+
slings may be in order to set some routes up. Be extra careful when setting up
anchors for routes near the Sentinel Corner, as the terrain up there is an
extremely steep dirt/mud slope, from which a slip may be unrecoverable. There
are a few nice trees near the edge to anchor off on, but there are also trees
further back in the woods as well.
Don't forget to bring a wire brush to clean off the dirt & grit that's run
down from the tops after it's rained.
Warning: there is loose rock - some of it quite massive! - in this area.
Take extra care and caution when both climbing and belaying! One pair of
climbers, with just a gentle tug, pulled off a 1000 lbs boulder from
broadway face 2 just recently (mid-July, 2000) that would have crushed
the belayer had he been standing directly underneath. The quality of the rock
is not 100% great (it is an old quarry, after all!). TAKE CARE WHEN CLIMBING
IN THIS AREA!!
Warning #2: THIS AREA IS PRIVATE LAND! Access issues were being
investigated (Sept, 2000) but let to no real joy. Refrain from overt activity in this
area until access issues can be sorted out (that or just avoid this place altogether).
The rock here is mostly smooth, quarried from when the railroad was first put
in. There are some corners, some cracks, some overlaps, small roofs, and
overhangs. The cliff band averages 30-40 feet high, and is nearly 200 feet long
from end to bitter end. The place does not see a lot of climber traffic, though
there is some evidence of climbers on Che Schifo. Most of the hard stuff
(5.11+) appears unclimbed (the named routes are only 'place-savers', until
they can be climbed for real). Even though this is an old quarry, leave the
rock as it is. If it's too hard for you, either get better or let someone who
climbs harder take a crack at it. There's more than enough other rock around
to climb without modifying that which is here.
Note: the Sentinel Corner is often wet for a couple of days after it has rained
in the area. Kind of a bummer, but...
Warning: Beware of deer ticks that lurk in the woods! There have been no
known incidents of late, but this doesn't preclude the fact that they are not
there. Lyme disease...you don't want it !
Directions: From I-83, north of Baltimore (and Hunt Valley), get off at exit 24
(Belfast Road). Go east on Belfast road until you come to York Road (can't miss
it; Belfast Road ends here). Turn right and go south (back towards Baltimore)
for just about 0.4 miles and turn left onto Sparks Road. Continue down Sparks
Road a short bit until you come to a one-lane bridge. Immediately past the
bridge the road intersects with the North Central Railroad Hike'n'Bike trail.
Find a place to park (there are a couple of parking areas in the immediate
area). From here go south (downstream) along the path, paralleling the
Gunpowder Falls river. Please be courteous and share the trail with the other
hikers and bikers (bikers seem to make up 80+% of the traffic on the trail).
After about 5 minutes of leisurely hiking you'll pass a house on the left. 5
minutes later you'll come to a definite footpath heading into the woods on your
left. Enter the woods on this path, and voila`! Sieta qui! (you are
here!) The access trail to the top is a mere 50' past this on the main trail
(and is fainter; hunt for it).
The rock band can be divided up into several main sections: Slab Wall, Broadway
Wall, Back Wall. The Slab Wall is the first thing you come to off the NCRR
trail, and is blank ~80-degree 'slab' featuring a couple left-leaning cracks,
some overhangs, and a left-facing corner on the far right. The wall breaks at
another, larger left-facing corner. The Broadway Wall starts at this large,
left-facing corner (Dirty Dihedral) and goes for about 120' to the left,
passing a smaller left-facing corner to a mostly blank wall (with a couple of
small cracks/seams and a shallow arch halfway across) to a broad and shallow
right-facing corner/wall (Sentinel Corner). After an overgrown section, the
Back Yard continues with broken and blocky corners. Routes are described from
right to left.
Some of the routes named are 'working names' (eg, Jeanne d'Arc, Joan Left, the
Stellar names, Fixed Line). Better than saying 'unknown route x' each and every
time. When the route is freed or the first ascent party is found, the name will
be updated to the route's given name.
SLAB WALL:
This is the first rock face encountered on the right as you stumble up the path
from the NCRR Trail.
sparks slab 1 (5.?) - Follow the face up next to the first left-facing
corner using cracks and shelves and whatever is available.
sparks slab 2 (5.?) - To the left of NCRR-SLAB-1, right of the second
left-facing corner, go up the face using friction, cracks, ledges, etc.
 The
Queen Spider corner on the right end of Broadway Wall; Che
Schifo goes up the face immediately to the left in the center of the
image. The 1000 lbs block formed by the cracks in the upper left corner was
pulled off the wall with just a gentle tug.
The
Queen Spider corner on the right end of Broadway Wall; Che
Schifo goes up the face immediately to the left in the center of the
image. The 1000 lbs block formed by the cracks in the upper left corner was
pulled off the wall with just a gentle tug.
BROADWAY WALL:
This broad wall starts with Dirty Dihedral and continues left to the
Sentinel Corner, ~120' away.
Dirty Dihedral - Climb the large, 10-foot wide blocky corner to the top.
There are three ways to go:
Dirty Dancing (5.3) - 20'. Use a variety of techniques to dance your
way up the rightmost corner with the smooth face. Almost a flaring chimney in
spots, with some interesting, inobvious moves. If it's feeling awkward, you're
missing something.
Dirty Mind (5.3) - 20'. Wear a hat to keep your mind (and head) clean from the
dirt above. Climb the middle of the three corners/flaring chimney-like lines up
to the top. Easy moves on inobvious holds makes for some interesting climbing.
Dirty Laundry (5.3) - 20'. You will need to do laundry after climbing this
grungy route! Plow through the dirt up the leftmost blocky corner next to the
face up to the 'gully' above. Be careful (both you and your belayer!) for loose
stuff (rocks, dirt, twigs) funnelling down from above.
broadway face 1(5.?) - climb the face left of Dirty Dihedral.
The Queen Spider (5.6) - 25'. Climb up the flaring chimney/left-facing
corner ~15 feet left of Dirty Laundry. Surmount the block above to
gain a ledge. From the ledge follow large, horizontal cracks up and left to the
overhanging headwall (crux) at the top. Good holds. Watch for a large spider in
the big cracks above.
Che Schifo (5.7**) - 25'. An Italian phrase, pronounced 'ke skee-fo',
this route is nowhere near as disgusting as the translation would lead you to
believe. Climb the face on good holds a few feet left of The Queen
Spider corner to a large horizontal crack. Trending to the left
momentarily, yard up the left-facing flakes using great holds until you gain
the left-leaning flake/crack system above. Follow those for a move or two then
cut right when they are about to end to finish on the overhanging wall above.
Good but inobvious holds allow you to top out if you want.
broadway face 2 (5.11?) - 30'. Start 7 feet left of The Queen
Spider, just right of the mini-roof formed by the horizonal crack 5' off
the ground. Follow the slightly rust-colored water streak through slopers to a
small ledge. Step up and claw your way up the steep wall above (V1). Note: a
1000 lbs boulder was pulled off the the ledge, narrowly missing the belayer.
Be careful in this area, hear?
- V1 (5.?) - At the ledge step right and finish using the
left-leaning cracks of Che Schifo.
broadway seam (5.13??) - 35'. Several feet left of broadway face
2. Follow the left-trending seam on slopers to the top.
Jeanne d'Arc (5.12/5.13?) - 35'. Start in the middle of the Broadway
Face, below the highest point of the shallow arch and above where the green
rusted-out hulk of an old automobile is buried. Be careful where you step.
Climb up the almost blank face to the arch at it's highest point. Turn the
arch and continue on nothing to the top.
Joan Left (5.11d/5.12a) - 35'. 10 feet left of Jeanne d'Arc,
follow the thin, left-leaning crack/seam through the arch to the top. Totally
blank and smooth. There is a single bolt at the top of the seam, several inches
to the right.
broadway face 3 (5.12?) - 35'. Begin 15 feet left of Joan Left,
between two sizable trees. Desperate moves up the face with a sloping ledge and
a small left-facing 'corner' yields to a small bulge in a blank wall above.
Bob's Route (5.?) - A working name route. Start on the mud-encrusted
face directly behind the tree left of broadway face 3. Climb up the
wall to the overlap halfway up, then traverse left to the end where the overlap
becomes a seam. Finish on Three's Company.
Stellar Atmospheres (5.10/5.11) - This rarified route doesn't have a lot
of positive holds on it. Start 7' left of the large tree on the left of
broadway face 3, at the base of the boulder/dirt ramp that rises up to
the Sentinel Corner. Climb the brown face full of very shallow pockets to the
blank wall above. Pull around on the right when you reach the overhanging
blocks above. Warning: these large blocks may be loose - be very VERY
careful when climbing this route, both as the climber and belayer!! Take proper
precautions in case of rock fall! (and a helmet isn't going to do it all
alone - not if one of these 1000+ lbs monsters drops on you!
Three's Company (5.11d/5.12a*) - 35'. Starting 5' feet left of
Stellar Atmospheres, on the first block partway up the boulder/dirt
ramp leading up to the Sentinel Corner. Tricky moves at the bottom are avoided
by stepping onto the higher block up left to bomber handholds. After this the
climbing gets stiff, fast. Working on good and marginally good holds, follow
the black streak studded with bumps and rounds holds up next to the tan,
mud-encrusted line to a horizontal seam halfway up. Be careful that some of the
good holds may break on you. At the seam find tiny slopers and sloping
finger ledges to work the blank but slightly undulating face above to the next
horizontal crack that starts the overhanging wall. Yard on up through the
overhang using good holds in the cracks. This wall is often soaking wet after
it has rained, unfortunately (water seeps through the ground above and out the
cracks in the overhang). Warning: some of the large blocks may be loose -
be very VERY careful when climbing this route, both as the climber and
belayer!! Take proper precautions in case of rock fall! And a helmet isn't
going to do it all alone - not if one of these small-car engine-sized monsters
drops on you!
Stellar Conquest (5.10/5.11) - This route lies halfway between
Three's Company and the Sentinel Corner itself. Starting 5' left of
Three's Company, battle your way up the undulations and features in
the face to the overhanging blocks above. Pull through the 'hangs, or step left
to go around them. Warning: these large blocks may be loose - be very VERY
careful when climbing this route, both as the climber and belayer!! Take proper
precautions in case of rock fall! (and a helmet isn't going to do it all
alone - not if one of these 1000+ lbs monsters drops on you!
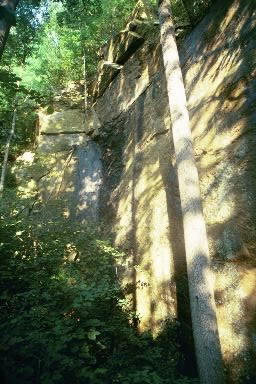 Sentinel follows the shallow, wet
corner; A Simple Kind Of Life goes up the wall along the left edge
of the wet section
Sentinel follows the shallow, wet
corner; A Simple Kind Of Life goes up the wall along the left edge
of the wet section
SENTINEL CORNER:
The Broadway Wall ends here with this right-facing corner face. Past this is
a section of overgrown blocky rock before you come to the Back Yard,
approximately 50' away. It is unfortunate that the corner itself, as well as
the rock upwards of 5-10' on either side (particularly on Broadway Wall)
stays wet for days after it has rained in the area.
Warning: the large blocks atop of the routes here may be loose - be very
VERY careful when climbing these routes, both as the climber and belayer!! Take
proper precautions in case of rock fall!
Sentinel (5.10*) - 30'. Be on your guard if the wall is wet! (and it
often is after a good rain). A double-* route if drier. Following the shallow
and thin crack in the right-facing corner, step left when you reach the
overhanging blocks above and finish (V1) on welcome (and sharp) holds formed by
the blocks and cracks.
- V1: Sentinel Direct Finish (V1) (5.10*) - Instead of stepping left
at the overhanging blocks, work up the right corner past the steep face.
A Simple Kind Of Life (5.10a*) - 30'. Not so simple a climb, although
fairly straight forward when you know the moves. Start near the center of the
face, just left of the micro-nut thin crack several feet left the
Sentinel corner. Use inobvious face holds (finger ledges in most cases)
and the thin crack to welcome holds at the horizontal break 20' above you
(there was a 'downed' tree immediately left of this route in the 1990s, still
hanging on with a few roots in the first horizonal break, hiding a few nice
'exit' holds from the face; the climbing's not that much harder if you don't
use them to get off the face). Finish past the blocks on the last few moves of
Sentinel.
sentinel face 1 (5.10) - 30'. Starting at the far left side of this wall,
several feet left of A Simple..., layback up the small right-facing
corner, arcing over to gain the horizontal breaks above. Traverse right and
finish past the blocks on Sentinel.
THE BACK YARD:
There are only a few routes worth climbing in the back half of this quarry.
Most of the rock back here is block and/or heavily overgrown with vegetation.
Setting top-ropes up on many of these routes is nigh impossible (due to the
slope of the ground above and the fence which seperates the mowed property with
the woods). ~30 past the Sentinal Wall is a stack of broken rock and a large
boulder that form a small 'cave' or cavity. This starts The Back Yard.
Fixed Line (5.?) - another route with a working name until I can learn
what the first ascent people are calling it. Just left of the cavity at the
start of The Back Yard is a finger crack that jaggedly works its way up the
wall. Follow this past a bolt or two (first bolt may be a rivet) to a second
horizontal seam (just past the upper bolt). Step right around the outside
corner and go up the friction wall past two bolts (upper bolt may be the rap
station). Gear to lead this consists of small nuts, camming devices, RURPs.
GPS Coords:
N 39°30.059'
W 076°39.128'
When time is short, your non-climbing significant other is demanding retail therapy
and you need some rock time, drop him or her off at the Hunt Valley Mall, then pop
over to the northeast corner and get vertical! As this crag is short, you won't be
"stuck" halfway up two pitches while your SO waits impatiently by the car. You'll
easily be able to meet him/her for lunch at one of the local establishments.
Along McCormick Road, barely 200' west of the intersection of McCormick and York Roads,
is an outcrop of solid quartzite that offers some of the best friction climbing in the
state. You have options for bouldering or doing top-rope problems. The crag faces south,
so even on those nippy late fall and early spring days you can still get out to play.
Note: you are not coming here for a wilderness experience!
Further along McCormick Road is another exposed band of rock. This, however, is a rotten
schist formation, and is just crap for climbing. The rock flakes off on you as you try to
work it. Not worth climbing on, this area of rock will not be covered.
Park on the side of International Road halfway between York Road and the crag. 100' up
from McCormick the road is gated closed (private). Try to pull off of the road as much
as possible so as to not block any potential traffic that may come down/go up this side
road.
Parking:
Lat: N 39°30.063'
Long: W 076°39.083'
Note: as the police and county trucks sometimes use this side road pull-off area, optional
parking can be found across McCormick Road in the Mall parking area behind what used to be
the Wal-Mart.
Fauna note: Due to the tall grasses, and the, ah, 'wilderness' environment atop of the
hill, you should be aware that deer use this place for overnighting. Deer means ticks.
Ticks means...you should be more dilligent than most places to check yourself over after
having climbed here, esp if you were up top setting any anchors.
THE BOULDER:
Located halfway up the steep hillside, this is the first boulder on the right end of this
rock band. It is short (15'), and offers one or two boulder problems with a not so
optimal landing (if you slip, you're gonna tumble a good distance before you reach the
bottom of the hillside - the there's another boulder to hit down there).
THE SLAB:
This is the first large rock on the right end of the roadside outcrop, just left of
Boulder 1. It offers a few routes that can either be bouldered or top-roped. Anchors points
are a couple of pine trees 30-40' up the hill from the top of the slab.
Yet Another Roadside Distraction (5.9+) - 28'. Start in the center of the main wall,
below the overhang 10' up. Work up and right (using the boulders on the ground keeps the
start within human norm difficulty) until you can grasp the overhang. Pull up through the
broad V-notch, step high, and reach a small sharp fingers-only handhold. This is as good as it
gets. Finagle your way through the overhang (crux) and onto the slab. If you are bouldering,
you might as well walk off to the right here, as the main excitement is over. Otherwise walk
up another 10' on 3rd class slab until it steepens briefly to a 5.4 friction section. Two or
three moves and you're at the top.
Cell Phone Drivers (5.10c) - 28'. While you are sitting there waiting your turn to
climb, or taking a rest from bouldering problems, count the number of cars going by that
have drivers on their cell phones. Better yet, count the number of cars going by whose
drivers are NOT on their cell phones! Start as with Yet Another Roadside
Distraction, but instead of trending up and right, head straight up to the left side
of the overhang. Pull it. Finish on Yet Another... or walk off to the right.
Snart (V3) - 28'. Really a boulder problem, rating is for the standing start. Begin
a few feet left of Yet Another Roadside Distraction at the white buttress between a
couple of vertical drillholes. Work up the white buttress and slap onto the slab. Either
finish going up the slab or walk off right. The sit start is a naturally a couple grades
harder than the standing start.
THE WALL:
This rock is immediately to the left of The Slab. Routes here range from 22-25' high, and
offer more vertical options. Like The Slab, the anchor options here are set pretty far
back from the rock.
Nerd Powers Unite (5.7) - 25'. Start 5' left of the rightside bottom outermost
corner of The Wall. Climb up onto a ledge, then up angling slightly left, passing the deep
cleft on the left side, until you gain a smaller ledge. Continue up another move or two
until you can reach the edge of the ramped arete. With hands on the arete, work yourself
up left along the face in a rising traverse until you get to the top.
Wall Street (5.4) - 22'. Start 10' left of the rightmost edge of the wall, by a short
left-right upward angled crack, 5' left of the previous route. Climb up until you can stand
on a small ramp. Drift up and left through a brief blank section until the handholds
improve once again. Two or three more moves and you're at the top!
GREY FACE:
The next rock to the left of The Wall hosts a steep 33' tall dark grey wall with a set of
tiered overlaps about halfway up. While the anchor options are more plentiful, that's not
saying much. Be prepared to go a ways back to get to a decent-sized tree. (Note: there are
two bolts at the top here, but one - as of spring 2014 - is very loose and pulls halfway
out, so do NOT use it)
![[Milton on Avoid The Temptation]](milton_avoid_the_temptation.jpg) Milton toughing it out on Avoid The Temptation
Milton toughing it out on Avoid The Temptation
Banks of McCormick (5.10d*) - 30'. Named (and graded) in honor of renowned British
climber Mike Banks, known locally for his 1962 first ascent of Carderock's Silver
Spot. Starting on the right half of the face, work through thin slab and crumbly
crystals until sidepulls and underclings make it possible to move past the overlaps, then
ride the right arete to the top.
Suckered In (5.6+*) - 33'. Pretty sustained for its grade. Start on the left side of the
grey face below where the overlaps rise to their higher range, immediately left of the large
hole in the ground at the base of the rock. Climb straight up the face using the arete as you
need it.
Avoid the Temptation (5.9+**) - 33'. A very enjoyable route, and really, a contrived
variation to Suckered In. Climb up the left side of the grey face without using
the arete. Employ any and all the horizontal grooves, compression wrinkles finger pockets,
divits, side pulls, crystals, cracks, and undulations offered on the route. At the overlaps, be
delicate as the rock sands away between the harder layers. Near the top there are a couple of
ledge handholds up left to help you get past the final overlap. Without them the climb is that
much more challenging. Great friction climbing.
Daylight Dancer (5.9*) - 31'. This used to be a nice 5.7 until some of the critical face
holds sheared off. Now it's a nice 5.9 route. Begin in the broad corner in the center of the rock,
just left of the sharp 9" wide right-facing corner capped by a small, long roof. Either climb
the arete and west face to the top, passing a small prominent roof low down, or work up
just left of the sharp corner until you can tag the arete for a couple moves. Reach left
to a fingerhold, then up to another hold and continue upwards on ever improving handholds
until you reach the top.
Oh Sunny Day! (5.5) - 32'. The actual climbing is a very short for being on such a
long stretch of rock. Climb up the face next to Daylight Dancer. One tricky move
(crux) 10' up from the ground where the vertical transitions to slab needs to be negotiated
before the climbing dramatically eases off and finally becomes 3rd-4th class scrambling to
the top. If you keep on the ramp next to the broad left-facing wall of you can
squeeze a few more easy 5th class moves out of it. Entirely too short a route. You might
consider bouldering it if you have a pad and/or a spotter.
Tree In My Way (5.6) - 32'. Climb the short vertical stretch of rock 5' left of
Oh Sunny Day!. Beware of the tree branch stretching across the top of the vertical
section (if it is even still there when you climb this). Once on the slabby 3rd class area
you can either walk up the groove tube-like feature or climb the short stretch of easy
5th class slab straight above you, then walk up to the anchors. Another entirely too short
of a route
GROOVE TUBE ROCK:
This is the slab uphill from the tree in the middle of the crag. There are a couple of bolt
anchors at the top of Tunnel Vision. The fair-sized tree hiding the rock from the road
provides welcome shade during those slightly too warm, sunny days.
Tunnel Vision (5.6+** PG) - 34'. Great friction climbing, and one of the closest things
to a western desert slot canyon you'll find on the East Coast. Walk up into the cavity formed
by the left end of the Grey Face rock and the clay-muddy lower block to the left by a tree.
Without using the back wall, head up the groove tube towards the top. The challenging crux will
find you when you least expect it. Stay focused!
Adopted By Default (5.6*) - 39'. Start on the left side of the clay-stained block
to the left of Tunnel Vision. Scamper up the block to a stance, then with a couple
of modificed (or full-on) layback moves (crux), continue up the V-corner until it ends.
Finish on easier ground to the anchors.
Panic Attack (5.5** PG) - 42'. Start as for Adopted By Default. Once up
10' and on the block ledge, traverse a few feet left to the thin finger crack. Follow the
gradually widening crack up to and past a small tree until the crack ends. Continue straight up
using good feet to the right and hands where you can get them. The crux of the climb is starting
the crack. The name of the route comes from the first ascent party who did the climb in trad
style - and discovered why there exists an "R" rating.
PIONEER ROCK:
Named after the Pioneer spacecraft, this short rock is located on the upper half of the
hillside, above a broken slab section, between Groove Tube Rock and Serpent Rock. Anchors
are 30-40' back. There is a drill hole at the very top of the rock that a small blue #2
tri-cam will fix just perfectly.
Hubble (5.6) - 21'. The Hubble has given the world views of the universe that were never
before suspected. As is the case with the giant quartz block on this route, which you
don't necessarily notice from above or below. Begin on the pointed step next to the large
thorn bush. Make a few tenuous moves to reach the arete on the right and step over onto the
friction slab. The large quartz deposit will be above you. Climb up the slab, passing the
quartz knob, to the top.
MESSENGER (5.9*) - 21'. The gem route on this rock with a variety of problems for you
to puzzle out in just over 20 feet of climbing. Dance up the face to the left of the large
left-facing corner in the center of the main face on a series of thin finger ledges. When
you get to the last one (not even halfway up), doing a mantle or an 'iron cross' style mantle
might prove helpful. But the fun isn't over! On round holds, pass the small, pointed roof
directly and layback the final buttress-like section to the top.
FUSE (5.7) - 21'. Named for a little spacecraft that could. Begin at the left end of the
rock. Climb the face, using the left arete if necessary, until the left arete leans over to be
ramplike towards the right. Follow the ramp up to the final block. A couple of bear-hug moves
will get you within reach of the top.
SERPENT ROCK:
This is the leftmost rock in this quartzite outcropping. So named because of a black snake
found tucked in a crack halfway up the rock during one of the first ascents.
Use the trees (~30 feet back) and rocks to set up an anchor. A #4 or #5 C4 will fit nicely in
the large crack about 10 feet back from the edge.
Snake Skin (5.4) - 24'. Start on the bulbous looking face 6 feet to the right of the
large bush at the base of the rock, which is the start to Copperhead Venom. Climb
straight up on not so good rock. Rock is soft and rotten. Once near the top, traverse left
and finish on Copperhead Venom.
Copperhead Venom (aka, Book of Serpents) (5.6) - 22'. Start directly behind the large
bush at the base of the rock, power thru the large right facing flake and mantle the open book.
Continue up on the right side face of the book to the top.
Mucalinda (5.6+) - 22'. The name of the mighty king of serpents who protected Buddha from
the elements as he meditated for days under the Bodhi tree. Begin a few feet left of Copperhead
Venom, next to a thin crack, and below the large dark brown slanted roof. Climb up and right,
following the trend of the roof (crux), until you can turn it and reach a bomber flake. Above this
step onto the slab and turn left. A quick one or two lay-back move up the slab at the outside left
corner of the large open book will gain you the top of the block. The route is not really much
harder than Copperhead Venom (though some might think it is), but the start is more
awkward and poses an interesting challenge.
There are a number of crags and boulders strewn about the watershed property here. Unfortunately,
it is Baltimore City property, and they are not wholly receptive to climbers. That said, there is
a small group of local climbers working with the Access Fund to negotiate with the City the option
of opening the watershed up to climbing. With fingers crossed this will hopefully be the case. In
the meantime, the noted areas and routes herein this guide are for historical purposes only.
GPS Coords:
Lat: N 39°29.355'
Long: W 076°36.562'
This lonesome outcrop of rock resides just north of the Warren Road bridge,, between the upper and
lower set of Warren village ruins (of which only the foundations remain for the most part). Much of
this rock is seriously overgrown with several types of vegetation, including poison ivy. Take care
when poking around this area! Fishermen sometimes use the base of the rocks as a platform for fishing.
Try to be courteous.
There are fair-sized parking pull-offs immediately east of the bridge over Loch Raven Reservoir on
Warren Road. The northern parking lot (the smaller of the two) puts you right near the rock. The southern
parking lot, while larger, requires you to negotiate crossing Warren Road. Sometimes a little challenging
during peak travel hours.
Parking:
Lat: N 39°29.374'
Long: W 076°36.548'
The crag faces primarily south, but the five established routes here (so far) face east.
Unknown (5.?) - 15'. Start directly beneath the squarish roof 8 or so feet off the ground. Climb
straight up to the roof, pulling past it on good but sideleaning holds on the right. Once past the roof,
stand up and move up the final few feet to the top by a large tree. Shortest of the routes here.
Oh Shit (5.6/5.7) - 23'. Climb up the wall to the left side of the roof. Turn it on the left and follow
the crack that splits the left-facing corner. Instead of stopping at the tree on Unknown, drift left
and continue up broken blocks. Step left and finish on Sneakers to the top.
Sneakers (5.3) - 23'. So easy you can climb this in them. Begin at the featured wall just left of the
Oh Shit overhang, and climb straight up to the top.
Watch Out For The--- (5.1) - 23'. Starting a 4-5 feet left of Sneakers, follow the blocky,
narrow left-facing corner up right to the top.
Unknown (5.?) - 23'. Somewhat contrived middle section. Starting on the overhanging wall just left of
Watch Out..., climb straight up through the hanging poison ivy to a featured face just left of the
Watch Out... corner. Staying off the Watch Out... corner, continue straight up to the top where the two
climbs merge.
There is more potential beneath some of the carpet of foliage to the left of these routes. But that will
require gardening, and for the most part gardening is frowned on in state park lands. There are also a
couple of small bouldering areas on the opposite side of the bridge.
There are a couple of bouldering areas to the west, on the other side of the bridge. Best place to
park for them would be:
Lat: 39°28.874'
Long: 076°36.898'
Do NOT park along the grassy stretch on the right side of the road as you approach from the
above parking coordinates!! This is a known accident zone, as routinely people coming west
over the bridge tend to lose control coming too fast around the curves, especially when the road is
wet and slick. They always end up plowing through this grassy zone (note any grooves of tire tracks
from the most recent people to have inadvertently taken their car 4-wheeling).
Bouldering Area 1:
Lat: 39°29.235'
Long: 076°36.689'
Tucked off the north side of Warren Road, out of side from passersby, lies this little outcrop
of short boulders facing northwest towards the reservoir. Some worthy problems to play on, but
bring a spotter, as the landings are not always ideal.
Bouldering Area 2:
Lat: 39°29.203'
Long: 076°36.683'
This only offers a couple of quick-move problems. You can almost stand and reach the top of
this boulder if you are tall enough.
GPS Coords:
Lat: N 39°29.400'
Long: W 076°37.039'
At no more than 15' high, this small moss- and lichen-covered outcrop looks larger than it actually
is when you look up the hill at it from the trail. There are only a few lines here, and it is best
climbed from late fall to early spring, before the foliage explodes and keeps the immediate area
humid, promoting growth of the moss and lichen on the rock face.
If you don't feel comfortable bouldering the routes here, there are sufficient trees up top to secure
some anchors.
The rock is so-named due to a vulture that sometimes uses the cave-like opening on the lower left end
of the rock for a nest.
Parking
Lat: 39°28.874'
Long: 076°36.898'
From the parking area, it is a 3/4 mile hike back to the rock. Take care crossing Warren Road. The
trailhead is off to the left in the bushes, an old gated fire road. Cross the stream and follow the
main trail along the shore of the lake. As you round an inlet and cross a minor stream over boards,
take the higher trail to hop over the projecting penninsula, picking up the shore trail on the other
side of the hill. Keep then to the shore trail, hopping over fallen trees as required. When you get
close, the rock will be uphill on your left about 80-100'.
GPS Coords:
Lat: N 39°30.056'
Long: W 076°37.275'
Just south of the Papermill Road bridge, in the woods on the east shore of Loch Raven, lie several small rock
outcrops with a plethora of boulders strewn about.
The rock type here is a Loch Raven Schist. Beware that poison ivy exists near most of the rock here.
Parking is limited along Papermill Road. There are three nearby options, and then more further away if you don't
mind a hike. The three nearby options are noted here:
East Bridge Parking:
Lat: N 39°30.147'
Long: W 076°37.299'
This is the nearest parking spot to the crag, immediately past the bridge. If you are judicious in your
parking, you should be able to squeeze upwards of five cars/pickups here. Be VERY aware when pulling
out of traffic coming across the bridge!
West Bridge Pullout:
Lat: N 39°30.079'
Long: W 076°37.447'
This is a small parking pull-off at the west end of the bridge. Again, not much room for many cars, and be
VERY aware of traffic coming across the bridge when pulling out. If you park here, walk back across
the bridge on the north side (facing oncoming traffic) as the shoulder here is 7-8' wide. The shoulder on
the south side of the bridge is only a few feet wide. You could walk across the old white grated bridge, but
there are 'No Trespassing' signs on it. Best you don't utilize that avenue of access (plus if you drop anything
here, it's likely to go straight down into the water below).
Main Parking:
Lat: 39°30.269'
Long: W 076°37.093'
This is the largest of the nearby parking areas (there are other places down the road a quarter mile that
offer more parking opportunities). But be considerate and try to park in such a manner as to maximize the
number of vehicles here. Climbers are not the only users of the reservoir lands. Fishermen and hikers far
outnumber climbers on most any given day. Don't give them a reason to resent you being there. Note, take
care while walking along the road back to the bridge during high traffic periods. There isn't a lot of room
on the shoulder for you and the cars.
FISHERMAN ROCK
GPS Coords:
Lat: N 39°30.102'
Lon: W 076°37.310'
Located down by the water, approach by following the fisherman trail down from the east end of the old bridge.
This will be the first rock outcrop after you pass the boulder with the severely overhanging start wall (sit
start boulder problems). The crag is maybe 12-18' tall? There may be 6-7 lines on it. Good flat ground for the
base.
There are often fishermen hanging out at the shore of the lake, fishing.
Boulder #1 - as you go down the fisherman trail you will pass on your left a boulder with a severely incut
overhanging face at the start. This offers some sit-start problems. Just uphill and behind to the left of
this boulder stands another boulder with one or two short problems.
THE FINS
GPS Coords:
Lat: N 39°30.056'
Lon: W 076°37.275'
This outcrop of rock probably has the most potential of the three areas here. There are perhaps a dozen lines
on this rock. There are several boulders immediately around and behind it that offer their own problems and
challenges. The main rock itself is composed of two parallel 'fins' of rock, stacked against a cluster of
large boulders between them. The main walls of the two fins face north and south. The sections are thus
named accordingly.
Outer North Wall:
The Historian (5.7) - 24'. Located on the left end of the outer north-facing wall. Start below the
prominent detached left-facing flake. Climb straight up through an incipient crack until you can reach the
top.
Time Of The Profits (5.8) - 24'. This climb follows a series of flakes on the north facing wall, just
to the left of the large oak tree, a few feet right of . Start where the small boulder (V1) sticks up
out of the ground directly below a left facing flake. Using the boulder makes the first crux easier. Avoid
it if you want to keep a stiffer challenge. Small crimpers, slopers and an undercling will get you to the
flake (crux). Power up to the top of the first flake and head to the right aiming for a small right facing
flake on good but small crimpers (crux). Once you make it to the right facing flake, work your way over to
the left to another left facing flake at the top.
Time Of The Profits V1 (5.10c) - Climb the same route, but do not use the boulder at the start. That
one little change makes all the difference.
project (5.?) - X' Climb up onto the large boulder. Continue up the face just a few feet right of
the large two-trunked tree.
Fly From The Inside (5.7+) - x'. Clambor onto the large boulder. From the center of the boulder,
about 8' right from the large two-trunked tree, work straight up and slightly right as holds present themselves
until it is possible to step left and tag the large boulder at the top of the climb.
(5.5) - x'. Climb up the right corner of the boulder. Continue up the face just left of the right-facing
flake/crack system, intercepting the flake/crack system as the wall lowers in angle. Head up left to the top.
Inner North Wall:
The Remains Of Mankind (5.9 R) - X'. Start 7' from the right edge of the rock. Climb up past
a small right-facing corner (crux; V1) to a ledge. Follow the ledge with your hands (taking care not
to dislodge the small rock) left and up, working your feet on what seems like a blank wall, heading for
the large right-facing flake/corner. Once in the corner; layback, jam, work the face or stem your way
to the top. Rated R because the bottom half is unprotected.
V1: Dawn Of Mankind (5.7) - Instead of making the 5.9 move off the ground, move to the far right and work
up the edge of the arete till you get to a small upward facing flake, on small holds work
the small flake over to the left until you met up with.
unknown (5.10?) - x'. Start 6' left of unknown, directly below the right-facing flake/corner
system. Tricky moves on slopers and angled holds (and nigh non-existent feet) gains easier ground on which
you can then finish on unknown
P2 Project - Follow the large chimney/large offwidth to top.
The Fins Boulder Field:
There are actually several boulders immediately around The Fins that host a handful of problems. Two of
these boulders are next to each other to the east of the main rock, and the other is a lichen-covered slab
just east behind the crag.
ISOCOLESE BOULDER:
More of an oblate right triangle than an isocoles one. The main face has three problems on it. Walk off the
steep ramp left when you finish a problem.
The Quiet Sun (V0-) - 11'. Start at the base of the shallow, right-leaning corner/ramp. Head up the
brown face, passing a sharp white quartz handhold on the left, to the arete. Traverse up and left a few feet
until you hit an easy top-out.
Why Don't Goldfish Bounce? (V2) - 12'. Tougher than it looks at first. A nicely sustained problem,
from start to finish. Start as for The Quiet Sun, but follow the shallow ramp/corner up right, passing
the white quartz hold on the right, until you reach a small crack. One or two moves to the arete from here.
Top out.
Noisy Cricket (V1) - 14'. Locate the thin, left-facing flake 5' to the right of The Quiet Sun.
Climb the flake straight up to a detached upward-facing flake near the apex of the wall. One or two
creative moves gains the top. Take care that the detached flake near the top will be pried off
one of these days (and the difficulty will probably go up).
Boulder #3 - Uphill from The Fins sits a tallish rock forming a cave beneath it (something lives in the cave).
There are a few potential bouldering lines on this.
HERO WALL:
GPS Coords:
Lat: N 39°30.036'
Lon: W 076°37.241'
Just past and diagonally uphill from The Fins is this long-ish short (height-wise) wall. The right side of
the wall offers the taller problems. The left side is pretty covered in moss and has at least one section which
is prone to water drainage from the ground above.
If you set up any top-rope anchors here, be aware that the nearest tree anchors are a good 2-30' away,
up a steep 3rd/4th-class ramp. Take all the proper precautions so no one has to carry you out of here.
Routes are described right to left.
Black Canary (5.4) - 20'. At the right side of the main wall, climb up the lichen and moss-covered ramp to
flakes and blocky dark quartz lumps to the top.
Vision (5.6) - 20'. Start immediately left of Black Canary, below the slightly overhanging
right-facing corner . A few moderately difficult moves with thin feet gain you somewhat better holds towards
the top.
Wolverine (5.8*) -24'. A climb you can really sink your claws into. Start a couple feet left from
the right edge of the main wall. Follow a sinusoidal-ish right-facing flake/crack system until you can
reach over left to a prominent left-leaning crack. Follow this second crack left and up until it turns
vertical, and finish.
Sylar (5.10a) - 23'. Start 5' left of Wolverine at some obvious right-facing flakes. Climb
up the face on thinner sidepulls until you can reach the top of the left-leaning crack of Wolverine.
Pretty sustained most of the way up.
Elektra (5.10a) -22'. Start on the blunt arete, 8' left of Wolverine, just right of the
Digrunashafuposh chimney. Climb straight up to the right side of the detached block at the top.
Tough start.
Digrunashafuposh (5.3) - 20'. Dirty, grungy, nasty, sharp, etc. Struggle(!) up the offwidth chimney
to the top (but really...why?). More pleasant and somewhat easier if you instead stay out of the chimney.
THE GREAT WALL
GPS Coords:
Lat: N 39°29.996'
Long: W 076°37.266'
This is a long bouldering wall located downhill and 'downstream' from HERO WALL. Though short, it offers
a number of problems: an overhanging wall with slopers, juggy faces, cracks, etc.
Past here are a fair number of boulders scattered in the woods on the hillside that have at
most 1-3 problems on them. Unless there are notable problems, they won't be tracked here.
GPS coords:
Lat: N 39°18.309'
Long: W 076°41.705'
Parking coords:
Lat: N 39°18.270'
Long: W 076°41.632'
Partway up the hill past the abandoned white building (an old bathroom) to the
west of the parking area, is the outcrop. In the middle of summer it will
be a little difficult to see, but once the leaves thin out a bit, it'll
be fairly obvious.
In the summer months (well, spring, fall, whenever) watch for ticks in the area. The first ascents in
this area belong, as far as your author knows, to
John Kelbel and Mike Grims back in late 1988 and 1989.
Travel Advisory - I was informed that
recently (spring '94) some climbers who went to visit Leakin Park in search for
some climbing were confronted and told by a substantially-sized cop that "the
only time we see [white] folk around here is when we find 'em in the park and
hafta put 'em in body bags". Bearing this in mind, please be aware that
"the natives may not be friendly and apparently do not ascribe to conventional
morality regarding the preservation of life. Accordingly, the suggested rack
includes quickdraws, nuts, a variety of camming devices, and a Heckler & Koch
MP45." (quotes from said visiting climbers)
Now, that said, understand this occured over 15 years ago. The park has gotten
a serious face-lift and undergone a lot of rennovation since that time. It is
a much nicer, safer place than it was 15 years or more ago, although the stigma
of that time still lingers in the minds of most people who are not familar
with the area as it is now. It may not offer a lot for the average climber
(come on, the rock outcrop is BARELY 25' tall, and boasts only 5 routes!), but
there are a lot of trails to hike and explore, as the Greenways Trail has been
completed, this is now the largest metropolitan park east of the Mississippi.
The above "Traveller's Advisory" is left here as part of the
history to the place.
Note: in the past few years (between 2005 and 2009), some very large and very dead
trees had fallen near and around the crag, making access to the rock...a little more
of a deadfall bushwhack. Fortunately, most of the routes are unaffected (though setting
up any top-rope anchors will be MUCH more challenging!). Only Feather is impacted
by some of the deadfall, but that can be broken away to clear the route if you so wish.
In any event, probably the best way to access the rock is to walk in from the parking area,
cross the bridge and turn right towards the old building. Pick up the Old Fort Trail/Nature
Center trail behind it to the left. Cross the first footbridge (nice to have, as the ground
here can get VERY muddy/swampy!), and go 1/3 of the way across the second foot bridge. At
this point turn right and follow the small foot path up the ridge. You can then either continue
to the top and swing around to the right to get to the crag, or halfway up turn right and
bushwhack through the deadfall to get to the rock. Your choice.
Patapsco State Park is a relatively long and winding park west of Baltimore which follows the
Patapsco River. And within its boundaries lie a myriad of small rock outcroppings, some large,
some small. Only a handful of these are covered here and in the "Climb Maryland!" guide. The
bulk (nearly all) of them are covered in John Kelbel's
online Google Earth-powered guide. Check it out.
Lots of cool stuff here.
GPS Coords:
Lat: N 39°14.390'
Lon: W 076°45.109'
Parking (inside the park):
Lat: N 39°14.478'
Lon: W 076°45.040'
Parking (Landing Road):
Lat: N 39°13.810'
Lon: W 076°45.640'
Located just downstream and approximately 80' up the western hill from the main falls stands a
silent crag, often overlooked by everyone. And unless you are making a lot of noise or commotion
at this crag, most anyone coming up to the falls will never notice you, as the falls draws their
visual and auditory senses away from the rock.
Warning: watch for poison ivy at the tops of some of the routes. Particularly Classic Route
and the rought to the right of Popular Route
The routes are described left to right as you approach the cliffs face. Look for the large,
lichen-covered left-facing corner that bisects the wall off to the right as a landmark.
unnamed (5.10a/b) - 29'. On the left end of the crag, climb up the flakes, ledges and corners to
reach the top of the very overhanging wall. Fairly strenuous, and a tough finish.
unnamed (5.10d) - X'. Start as for unnamed above, scramble up onto the ledge 10' off the
ground. Then climb up the center of the large overhanging wall next to the shallow left-facing corner.
Popular Route (5.8) - 33'. Almost everybody does this one. Start at the left of two open books at
the base of the rock. Climb up the right side of the overhanging wall through a series of easy angled
ledges. The crux comes at the last ledge before the top, when the buckets vanish to small, sharp holds
and feet are scarce.
unnamed (5.?) - X'. Start at the right of two open books at the base of the rock. Climb up the finger
crack in the open book to the shelf above. From there climb straight up the face and outside corner right
of the large left-facing corner
Climb The Tango (5.10c) - X'. Begin just left of Classic Route. Climb up the steep face (crux) to
gain the lower-angled section above (still non-trivial). Continue straight up and intersect the last few
moves of Classic Route
Classic Route (5.10a/b**) - 29'. Probably the best route on the wall, hence the name. Begin 6' left
of the large lichen-covered left facing corner, work good (but small) hand- and footholds up the steep face.
Be sure to not miss the undercling flake! (different then the undercling on Power Play) Without it,
the crux move will be a LOT more difficult. WIth the undercling in hand, reach up high left to a small and
sharp finger bucket (but not buckety enough to hang on forever) just below the ledge. Keep moving up,
bump the left up a few more inches to a larger rounder hold if necessary, and slap up high right for a
decent hold. Roll onto the ledge, and angle left to finish the final few moves to the top.
Power Play (5.10c*) - 29'. Begin 3' left of the large left-facing lichen-covered corner in the middle of
the main wall. Step up on the wall and catch an undercling right. Power up for a long reach to a small, flat
hold left. Without losing momentum (crux), grab for a small undercling about 20" under you left hand, reset
you feet and reach for a good side pull up and right. Finish on easier, but still non-trivial, ground.
unnamed (5.6+) - 29'. This climb can be contrived to be more interesting in a few different ways.
The basic route ascends the large lichen-covered left-facing corner/ramp system, stemming off the main wall
when necessary, until it is possible to turn left and clambor up onto a ledge. From there a final few moves
gain the top. No harder than 5.6, the "+" comes into play by either stemming more, or leaving the ramp
earlier to climb up the steep face to gain the ledge, but getting much nicer, bucket-ier holds than the
normal route - but at a cost of steeper walls, fewer footholds, and more difficult climbing. Well worth
exploring the other opportunities.
Pillar Climb (5.4+) - X'. Climb up the detached flake/pillar formation. Then downclimb it, as it
doesn't quite reach the top of the wall behind it. Alternatively, stand atop the pillar, step onto the
wall and make the last few moves to the top.
unnamed (5.?) - x'. Climb someplace up the wall to the right of the pillar, left of the large left-facing
corner with a large tree in it.
unnamed (5.?) - X'. Locate the huge left-facing corner with a large tree growing out from the top of
it, 30' right of the large lichen-covered left-facing corner ramp route. Climb the face on the outside right
of the corner to the top.
GPS Coords:
Lat: N 39°14.808'
Lon: W 076°45.656'
Bloede's Dam (pronounced "blerda") was built by the Patapsco Electric and Manufacturing
of Ellicott city in 1906, fully operational in 1907, and was the world's first underwater
hydroelectric plant (i.e., the power plant was actually housed beneath the spillway). The
dam was named after PE&M's president, Victor Gustav Bloede.
There are three areas to climb right near the dam: Bloede's Dam Rock, Bloede's Dam Crag,
and Bloede's Dam Wall.
Rock Type: For Bloede Dam Rock and Crag, the rock is identical to that of Ilchester. For Bloede
Dam Wall, it is something more shale-y and brittle.
Directions:
From I-95 south of Baltimore: Go to exit 43B and head West on Rte 100 for ~1/2 or 3/4 miles. Get off
onto 103 (Exit 4), bearing right as you exit. Go 1.4 miles to the 2nd traffic light and turn right onto
Ilchester Road. Continue 1.9 miles, eventually going down a steep (18% grade) hill to the bottom.
The parking is off to the left just as you come to the railroad overpass.
From I-70 and points west of Baltimore: From I-70 exit at Exit 87A onto Rte 29 South. Continue for a 2-3
miles and bear left onto Exit 22 to get to Rte 100 (East). Either follow 100 to Exit 4 and follow the
directions above (going through 2 traffic circles that bracket the Rte 103 bridge spanning Rte 100)
or get off at Exit 2 for Rte 108/Old Annapolis Road. Turn left at the light at the end of the off-ramp,
then left again at the next light onto Rte 104. Pass over Rte 100, go halfway around the traffic circle,
and continue for 1 mile to a third light. Bear right onto 103 at this light and go 3/4 miles to yet
another light. Turn left here onto Ilchester Road. Follow the last part of the directions above.
From Baltimore and points N/NE of Baltimore: Take I-695 to exit X [and use the same directions as
you would for Ilchester]. Once passing the Ilchester parking area, continue on through the narrow,
winding road. It will start to drop, steeply, and remain very narrow. Take care for oncoming traffic,
especially in areas where the rocks on the side of the road are painted red (you can easily smack
them with your vehicle). At the stop sign near the bottom of the hill go left, pass under the railroad
bridge, and park on the right.
Parking:
Lat: N 39°15.005'
Lon: W 076°45.877'
From the parking area, hike up the road towards the south, away from the RR overpass, passing X road
coming in from the right, until you come to an inobvious trail on the left (if you reached the end of
the guardrail, you went too far; turn around!).
Trailhead
Lat: N 39°14.947'
Long: W 076°45.930'
Follow the foottrail, passing over, under, or around fallen trees, until you reach the end of the old
roadbed near a short bouldering wall to the right. Bloede Dam Crag is up the hill beyond the bouldering
wall. Bloede Dam Rock is immediately next to the dam. And Bloede Dam Wall is downstream a bit.
An alternative approach would be to take the main trail across from the parking area, over the footbridge,
and down to the swinging bridge, 1 mile away. Cross the swinging bridge then come back upstream along the
River Road Trail for 0.6 miles until you reach the dam. But...why would you do this? You're here to go
climbing, on shortish walls, not walk all over the park! If you're going to walk this far to climb, you
might as well to go Annapolis Rocks or to the Far Wall area of The Narrows. Sheesh.
GPS Coords:
Lat: N 39°14.800'
Lon: W 076°45.667'
This outcrop is on the south side of the dam, which incorporates the rock into its
construction. Because it is more hidden from view by passersby on the path above,
and because it forms part of the dam, most climbers have ignored this little wall
for years. But it has some worthy things to play on.
Left 5.8 - 30'. climb the left side of the face.
Center 5.7 (but with a 5.10 top-out) - 32'. Starting at, on or next to Left
wander up the center section of the main face until you are very nearly at the top.
Then the climbing becomes extremely difficult (5.10). Stop here or fight your way
up the last body length of rock to the top.
Right 5.9 - 32'. Start in a deep pile of leaves under the overhang in the bottom
right corner of the rock. Climb out through the short chimney and step left onto the
face. Topping out is about 5.10, like Right. Hint: lay back facing right using
underclings with the left hand and reach right around the right side of the overhand
for a lip.
GPS Coords:
Lat: N 39°14.777'
Lon: W 076°45.690'
100 feet west of and upstream from the dam, pass a boulder with one cool high ball problem
on it, head up into the woods to an overhanging face. This overhanging face has a really
good 5.9 maybe 5.10 climb up the center of it, These were established in the 70s or 80s
and were named. Unfortunately I don't know it. The right side of this rock is low
angle and offers many good lines from 5.3 to 5.9 the harder stuff toward the right.
From "back in the day" this was also refered to as "the rock above the dam".
Routes are described from left to right, as you approach the rock from the trail below. These
first three are on the steep overhanging wall facing the river. The rest are to the right around
the corner.
unknown (5.?) - <20'. Climb the short wall to the left of the tall overhanging wall.
Blood Sacrifice (5.10a) - 26'. Start near the 'HEaD'(?) graffiti. Very steep. Overhangs a good 6'
in 20-some. Climb the right-rising ramp until it gets vertical. Continue up (crux) to a ledge,
then finish on the overhanging wall above.
unknown (5.?) - 26'. Hard. Begin 7' right of Blood Sacrifice climb up and past the
vertical incipient crack until the easier 5.10 holds are reached. Finish by surmounting the
ledge and climbing the final headwall to the top.
The next set of routes are located around the corner on the slabby west-facing wall.
C Cup (5.9) - 28'. You'll understand the name for this route when you find the hold. Layback the
arete until about halfway up when you reach blocky-ish holds on the right face. Pull over and aim
for going straight up the blank-looking face above using a flake and a hand ledge. Finish at a broad
ledge up top.
Beginner's Crack (5.3) - 28'. Starting a few feet right from the arete, follow the left-leaning
hand crack until it ends. Step up, reach up, and pull to the victory ledge.
Beginner's Route (5.3) - 30'. Start as for Unknown above, Climb straight up the face, climbing
along a right-facing corner on great holds that appear as you need (or search for) them. Buckets all
the way up. The crux is at the very top when the buckets get a little sparse, but the climbing remains
fairly reasonable. Just look around.
Friends and Lovers (5.7) - 35'. Begin a few feet right from the 5.3. Climb up the wall, staying
right of the right facing corner. Climb up on crimps, crystals and rounded holds until you reach a
right-facing left-leaning corner ramp. Step up that and a few final thin-ish moves gains you the top.
Crystal Madness (5.9) - 33'. A little contrived, especially as you near the top. Start a few feet right
of Friends and Lovers, on a ledge that meets the erosion step in the hillside. Climb up the thin face
on plagioclase crystals and crimps, doing some creative face moves along the way, and staying off of the
right-facing left-leaning corner ramp of Friends and Lovers. Sustained moves in the beginning lead
you to the final crux moves at the top.
unknown (5.?) - X'. Start further up the hill to the right of Crystal Madness. Climb the thin
face to a crack near the top.
GPS Coords:
Lat: N 39°14.799'
Lon: W 076°45.580'
Located 400' downstream from Bloede's Dam is a rock wall just off the right side of
the trail. It ranges from short top-rope problems to moderately tall boulder problems.
The rock here is fairly brittle and prone to breaking off as you climb on it, unlike the
bullet-proof plagioclase and amphibolite of the other two nearby crags.
The climbs are described left to right. The first few routes ascend the short, flat west-facing face 10-15'
uphill from the River Trail.
Glitch In My Brain (5.10a) - X'. This route begins at the left end of the main west-facing wall,
just left of the tree, at the left-facing corner. Battle your way up the corner until you can stand on
its upper section. Work the few face moves available until you can snag the arete to the left. Walk up
using the arete for hands to the top.
Have You Seen John Lately? (5.10c) - X'. This might be his kind of route. Start as for Glitch In
My Brain, but totally avoid the arete, sticking to the rather featureless face until you reach the top.
Really a contrived variant of Glitch..., but a challenge nevertheless.
Anorexic Thin (5.10b) - X'. If you want to do a problem with thin moves that sometimes verge on
imaginary, this route won't disappoint. Start a couple feet right of Glitch In My Brain
The next three routes follow lines up the center of the main north-facing wall.
Sand In Yer Eye (5.4) - X'. What you'll have if you look up while climbing this route. Begin a couple
feet left of the lowest point of wall. Climb up onto a couple of ledges, then step left and shoot straight
up, passing the Dirty Feet roof on its left. Angle slightly right once past the roof and finish next
to the overhang at the top.
Dirty Feet (5.6) - X'. Probably the nicest line here. Begin at the lowest point of the rock wall,
directly below the square roof 2/3 of the way up the face. Climb up to the roof (the face immediately below
the roof is the crux), pulling it on good holds (watch, though, for lots of dirt!). Finish up the
blocky section to right side of the overhang at the top.
A Way Of Life> (5.8+) - X'. What climbing is for many of us. Begin a few feet right of Dirty Feet,
climb up the pillar-like protrusions on the rock face with some...interesting moves (crux) until you reach
the roof above (to the right of Dirty Feet). Pull through the roof, step left, and continue the last
few feet to the top.
GPS coords:
Lat: N 39°15.038'
Long: W 076°45.770'
Parking:
Lat: N 39°15.175'
Long: W 076°45.611'
Joe McManus, Mike Endicott, and Rob Savoye are some of the few who pioneered
most of the routes in this area back in the 70s and early 80s. Mike Endicott
did the first ascent of Friction Wall, as well as a number of routes in the
Rocks State Park area (Mike's Finger Buckets, for example). Rob Savoye lives
now out in Colorado and can still be found plying the 'Net (rob@cygnus.com was
the last I heard he could be reached at).
Ilchester itself is an 80' wide, 35' tall outcropping
of rock up and left of the railroad tunnel that leads to Ellicott City.

Geology of Ilchester
"The rock at Ilchester is described as part of the Mount Washington
Amphibolite formation. It is from the Baltimore Mafic Complex and is of
Cambrian age. It is characterized as generally a fine to medium grained
massive amphibolite with pyroxene. Amphibolite is a crystalloblastic rock
(has a crystalline texture due to metamorphic recrystallization).
Amphibolite mainly consists of amphibole and plagioclase. The rock will be
sharp and rough on your hands due to the mineral structure of the
plagioclase." - Don Mullis
This west-facing cliff can get very crowded during the weekday
afternoons! It's not overly large: the cliff is barely 35' high, and hardly
100' wide. It's not uncommon to see 20 or more people here on a late afternoon
during the week. Anchors for the top-ropes are few. There used to be some iron
shafts poking up (and bent over) out of a concrete column in the rocks (this
anchor system was apparently put in by Catonsville local and climbing
instructor Mike Carroll), but it is no more (rumor has it that it was taken out
by the same Mike Carroll who plans on replacing it with a better one - now mind
you, this is now third-hand information, so take it for what it's worth). Until
it is replaced (IF it is replaced!) I suggest you bring plenty of long lengths
of webbing for anchors. Also, there used to be a huge tree over the north wall
for Midnight Lightning and Renaissance, very useful for anchors,
but a few years ago it was taken out.
The local climbers have done a good bit of trailwork here, and I'm sure they
would appreciate any extra help anyone decides to lend during future
projects.
Also, be warned, that while I have not had this experience, there are stories
of non-friendly anti-climber types who occassionally come in and sabotage the
top-rope anchors (like putting a cup and candle (lit) under your webbing). Just
keep an eye open for such antics. I'll even help you pitch them off the cliff.
However, on the otherhand, there are a lot of non-climbers who do visit
these cliffs for the view. Be courteous; some of the hiker/visitors are
themselves friendly to climbers (and may offer you some food, drink, or, um,
other stuff...).
From the parking lot on Hilltop Road, follow the obvious trail (used to be a
footpath, but suddenly in '98 it became a 5' wide herd highway!), staying with
the main path as it goes back through the woods then curves and heads downhill.
At the end of the path is the top of the rocks. Access the climbs by
scrambling down to the left or right (most people go right; just easier)
 Dan Jacober
hanging out on Blood Finger
Dan Jacober
hanging out on Blood Finger
The back of the boulder left of Beginner's Corner has a couple of nice
problems on it (the overhang and the north face), as well as a myriad of
variations (including several 'hands-free' problems - one of them backwards).
Traversing left along the overhang on the back side using toe/heel hook
combinations then working up the thin arete is known as Blood Finger
There is a nice traverse (High Traverse) of the main face that starts with
Middle Climb and ends up at the start of Beginner Slab,
traversing through the start of Omega (crux). Be careful that a fall,
especially early on, could bust an ankle or two. There is also a harder, lower
traverse (Perverse Traverse) that parallels High Traverse until they meet at
the start of Omega Direct. Both of these traverses are much harder going
from right to left instead of left to right. And apparently there was a local
climber who some 20 or so years ago used to do laps on these traverses (10 or so laps
without touching the ground - if you're feeling spot-on one day, do it!).
Book Errata:
One of the smaller details that got dropped when writing the book was
the name of "Ancient Bob" who did the route Special
Kay. He is Bob Lincoln. Sorry about that, Bob.
Another item is that the route Captain Crunch was first done by
Pat Egan, not Chris Schenking. Chris was the second person to send it,
months after the FA.
GPS coords:
Lat: N 39°15.861'
Long: W 076°47.509'
Parking:
Lat: N 39°15.983'
Long: W 076°47.688'
An old quarry, the rock here is very different from Ilchester.
Most routes in this area are top-ropeable, though quite a few new bolts have been added by
some 'new' climbers in the mid-90s (not the original pioneers).
Errata for Friction Wall:
There are a few errors in this chapter in the book. After further research (i.e.,
additional feedback ;-) the route Four Bolts (#16) is in reality
Dirty Dog (5.6). Said route does not finish where the route is indicated
to end, but rather continues up the upper portion of route line #17. What #17
is, then, is unknown at this time.
For the record, the routes listed as the "Eagan-Schenking Bolt
Routes", Pat Egan had nothing to do with #s 1, 3 or 4. He put up
Unknown-FW-2 on top-rope (and is actually called Interzone,
12d/13a*). He later bolted it to protect it from "drill monkeys"
in order to establish it as a legitimate route. The other three unknown
routes surrounding it were put in (bolted/drilled) by Troy Desworth and
Chris Schenking. The moves on Interzone are pretty hard to see from
the ground, and require some creativity to pull through them. If you
climb at this level, definitely give it a go.
The directions are also a bit off.
The printed directions to Friction Wall from Columbia say to turn left on Oella Avenue,
but (as the directions from DC say correctly) you need to turn right. (Also -- though
this is pretty obvious -- that undercut tree hanging over Friction Wall looks like it
will take the plunge soon.(note as of Nov 2007))
The area still has room for a few more new routes. One went in late in 2007,
and is noted here:
Blood on Tracks - A2. 30-40'. Gear: pitons (knifeblades) and stoppers.
This route is located in the corner of the wall 15' to the left of What We Did
Was Harder. The route goes straight up the corner, then little to the left,
exiting at the 45deg. dirt slope. Had to chop many steps with a hammer in that dirt
in order to get to the nearest tree - this is a reason for the name. General
impression: dirty, like real life:)
Update for What We Did Was Harder. It is more A3 rated now, that weathering and
repeated ascents have weakened some of the flakes. Eventually they will bust off. Be careful!!
GPS coords:
Lat: N 39°16.104'
Long: W076°47.547'
Parking coords:
Lat: N 39°1X.XXX'
Long: W 076°47.XXX'
This wall is part of an old trolley line cut through the rock when the original
trolley line was built. The line has since turned into a 'rails-to-trails' path, and with parking not very
far away, easy access to get to. There is an assortment of bouldering options here, as well as
some top-rope lines to play on (getting up to the top to set the ropes, however, may prove tricky;
please don't fall.
GPS coords:
Lat: N 39°19.010'
Long: W076°48.197'
Parking coords:
Lat: N 39°18.924'
Long: W 076°47.601'
If your heart is up for a little adventure but time is pressing and you cannot
get very far away from Baltimore, and either you've climbed-out the
Ilchester/Friction Wall areas or they are too crowded for you, there is still
hope: Alberton Road Rock! Located in Patapsco State Park, along the Patapsco River,
on the border of Baltimore and Howard Counties, this little outcropping of rock
has some quite infrequently travelled rock (as is evidenced by the amount of
green lichen, spiderwebs, and foliage covering the rock). A leisurely 10-minute
walk from your car puts you at the base of the 50' tall rocks.
For ease of descriptions, the main crag can be divided into 3 sections: The Green
Wall, River Wall, and Left Wall. The tallest section of rock is the River Wall,
and boasts the most number of lines.
The Green wall has the shortest routes, practically boulder problems that go up
through the light green dust-like lichen. Route descriptions are from right to
left. There is a faint but detectable steep path ~30' left of where the River
Wall and Left Wall meet that takes you to the top. A better path goes up from
the main roadbed 30' right of Green Wall. Fight your way through the pricker
bushes up top to set anchors (some routes are easier to set than others; bring
extra-long runners for the harder-to-set routes - and avoid the dead
trees!!). Most of the routes on River Wall are probably the best ones here.
WARNING: Beware of deer ticks that lurk in the area! There have been some
local residents who recently picked up Lyme disease from deer ticks in these
woods, SO BE CAREFUL! Lyme disease...it's not a pretty thing.
WARNING #2: Beware that copperheads DO live in the area, and have been seen on/at
these rocks.
WARNING #3: Take care on what you use for TR anchors. A few of the more reliable
anchor trees have died since 2000. And the rock is not conducive to putting in bolted
anchors at the top (plus enough non-climbers visit these rocks that you really probably
don't want to put in any hardware where they can get to and mess with).
THE GREEN WALL:
So-called because of the dusty-like lichen which so covers
the lower half of the rock here.
The blank short section of all on the right end of this crag sports a few
boulder problems. Be sure your landing doesn't take you into the thorny
bushes of wild roses.
THE RIVER WALL:
The tallest routes are here. Most routes are fairly easy to set up using the
trees above (caution with the dead trees!). This wall is characterized by a
series of large and small roofs, plus a couple of oblong 'cavities' partway up
at the tallest section. The lower 'cavity' has a pointy rock projecting out of
it; the upper 'cavity' has not. Over all the wall, watch for spiders...
Two Tips (5.11?) - A thin variation to Alberton Roof. Start as for Alberton
Roof but head right instead of straight up, to the blank section of roof just left of
Dai!. Find the two-tip flake, get your feet high, then pull, crank, and reach up to
something better. Finish on the upper section of Alberton Roof.
Kelbel's Klimb (5.11d) - Until John comes up with a better name. Start as for
Alberton Roof, but once you hit the center point of the main roof, instead of
traversing out right, head straight up and trend left on crimper holds, toe/heel camming
at the inner point of the main roof. Claw your way up a few awkward moves until you can
snag the jug that was just out of reach a moment ago and continue up to the top.
Just upstream around the corner from Walk in the Park, on the left side of the
crag, are several routes ranging from 5.8 to 5.10.
Apoptosis (5.8) - x'.
Copperhead (5.10c) - x'.
Portable Ketchup (5.9) - X'.
In addition to the above, there are several
bouldering areas prior to reaching the main Alberton Road Rock. Two of them are as follows:
ALBERTON BOULDER A
GPS coords:
Lat: N 39°18.905'
Long: W076°47.766'
This somewhat popular bouldering wall is located just off the Alberton Road, reached in
just a few minutes from the parking area. The approach is about as friendly as it will
ever get for rock. Problem information is unknown at this time.
ALBERTON BOULDER B WALL
GPS coords:
Lat: N 39°18.927'
Long: W076°47.810'
A few more minutes down Alberton Road sits this severely overhanging rock partway up the side
of the hill. The main wall is a steep face that overhangs 13' in 16'. Not quite at a 45
degree angle, but damned close. There is a shorter, 10' tall at most, wall below and in front
of it as you come up from the road. There are a good half dozen problems on this rock.
Be very aware that the top of this outcrop is a veritable meadow of poison ivy! Roundup anyone?
GPS coords:
Lat: N 39°19.042'
Long: W076°48.246'
Parking coords:
Lat: N 39°18.924'
Long: W 076°47.601'
High atop the hill overlooking the Alberton Road trail, just
west of Alberton Rock, sits a broad outcrop of rock. Nearly 200' long, this broken wall
of rock ranges from 20' to nearly 40' tall. For years various climbers have looked at it,
however, it wasn't until the mid-2000s when a group of local climbers started cleaning up
sections of it and establishing routes. Most of the rock in the middle stretch is 3rd/4th
class terrain, but on either end there are sections of verticality worthy of dropping a
rope. Most notably on Pieces of Eight Wall.
SHORT WALL:
This is the long...and short...section of Upper Alberton. It makes up the entire left half
of the crag. Routes are noted from left to right.
No Knees Pleeze (5.3) - 22'. Starting at the leftmost end of the crag, climb up the
blunt juggy arete to the top shelf. At this point you are pretty much at the end of the
climb. The top of the rock is just above your head.
Bill Me Later (5.2-5.4) - 24'. Begin 5' right of No Knees Pleeze. Scamper up the
juggy overhang to an awkward move (5.4) onto a shelf (skirting around to the right makes
this easier). Stand up, touch the top.
Climbus Interruptus (5.7) - X'. Start 5' right of Bill Me Later, climb up to a ledge
below the final overhanging wall. From here continue up by following a thin crack. The climb
unfortunately ends in the middle of pulling through the overhang, so either stop here and
lower, or top off. You can add variety to your climb by opting to reclimb the route and try
an alternative angle through the final overhang. If only there were another 10-15' of vertical
rock above the end of the overhang, this would be a cool little route.
The next two routes are on the short wall to the left of Diagonal.
Pocket Change (5.3) - X'. Start below the blocky set of overhangs. Climb up and through
them on large holds until you reach the 3rd class ramp at the top. Yet another "if this were
only longer..." routes.
Elbow Grease (5.4) - X'. Start 4' right of Pocket Change. Climb up the
slabby face broken by a few overlaps. The somewhat awkward crux is getting past the middle slab
section.
PIECES OF EIGHT WALL:
Exit Stage Left (5.5+) - 30'. Begin just right of the break in the rock wall, under
the overhanging wall above. Climb up and left through the overhanging wall on juggy flakes
to reach a ledge with a tree. Get onto the ledge and a few more moves up gains the top.
Liberal use of the rock face to the left for feet makes the lower section easier.
Diagonal (5.9*) - 30'. Steep and sustained. Start as for Exit Stage Left.
Climb up the steep wall on good holds, aiming for the finger crack overhead. Excellent
moves through the crack will gain you to positive holds above it.
No Eye In Team (5.8) - 30'. Really a variation to Diagonal. Instead of aiming
for the finger crack, climb up and trend more aggressively right around the crack on the
face then bank left and up to the top..
The Next Jenneration (5.8*) - 37'. Staying just right of the foliage up the wall,
climb up through the bulges as you work your way up to the top.
Poison Ivy Alley (5.7*) - 35'. Climb up the face between The Next
Jenneration and Pieces of Eight. Weaving through the blanker sections of the
wall keeps the climbing no harder than 5.7. Missing holds or moves will bump it up to 5.8.
Pieces of Eight (5.8*) - 35'. Start directly below the large multi-trunked tree
at the top of the cliff (great anchor point!). Climb up the steep wall on good to moderate
to good holds, making faith reaches when you need. Staying just right of the bushy tree
growing out of the middle of the wall, follow the thin finger crack/flake up and surmount
the overhang with good holds off to the right. A few more moves and you are at the top!
Handle With Care (5.9) - 34'. This route is 43' from the right end of the rock outcrop.
Start at the right-facing block corner where a prominent crack splits the base of the
cliff. Climb up to the left-leaning overhanging ramp. Lieback up the ramp until it ends a
few moves later, then find the thin hold to get through the next few feet until better
holds can be attained. Finish on good holds up the final steep section to the top.
There is a short but challenging set of boulder problems at the far right end of Upper Alberton
GPS coords:
Lat: N 39° 19.880'
Long: W076°52.376'
Parking coords:
Lat: N 39°19.xxx'
Long: W 076°52.xxx'
Enjoy beautiful clean rock with good, Yosemite-like holds - buried
somewhere underneath all the grit, moss, spiderwebs, and dirt! This
small crag is by the railroad tracks near Woodstock Road, north of Rt 99. It is
somewhat larger than Ilchester, but doesn''t see as much traffic (you can tell
after your first visit). It has far more roofs and overhanging problems then
Ilchester, is somewhat taller overall than Ilchester, but due to the lower
numbers of visitors, it is dirtier than Ilchester. This north-facing crag is
just a 2-3 minute walk down the tracks west of Woodstock Road.
Much of this rock was climbed over in
the 70s and 80s by Rob Savoye and others local to this area, but most of the recorded information didn't
come about until the early 90s by John Kelbel. John has continued developing this rock,
and there are a ton of variations that he and others have come up with over
the years. These numerous variations are not covered here.
Local spirits: there is a tavern,
Ye Old Woodstock Inn, across the street from the parking area where you can get a drink (beer or whiskey)
or some food (a non-climber local praised the ham&cheese sandwiches and the greasy pizzas). It
is usually frequented by a rather rough crowd, so if you want quiet, your best
option would be to head north on Old Court Road 6 miles until you come to
Liberty Road. Heading either left or right on Liberty you will find a
collection of fastfood and sit-down restaurants scattered about.
From the parking area walk on the left side of the tracks to the west. When the
2 sets of tracks merge together at the switching station (first small building
you come to on the left), look uphill to your left. You will see up in the
woods a substantial shadow of rock. The path rises steeply up from near the
small building to the rocks. These can be top-roped, led, or solo'd (a lot of
people 'boulder' these routes).
The Cave - Possibly some of the cleanest stuff here, this spot sees
far more traffic than the rest of this outcropping of rock. Probably owing to
the fact that this place stays dry even when it's raining hard outside and the
rest of the north-facing rock takes a while to dry, due to the large numbers of
cracks which cut the rock, allowing water to seep out everywhere (however,
after extended periods of rain, even the Cave gets wet). The Cave is located on
the left end of the outcropping, around the corner and up hill from the main
wall. There are innumerable variations in and around the cave.
Note: there is a bolt most of the way up the face above the cave that ballsy
climber can try to lead to. Be warned that you face imminent crater potential
until you clip that bolt! (and said bolt is not the best, or placed in the
best place on the rock; just be warned).
GPS coords:
Lat: N39°21.928'
Long: W076°54.466'
Parking coords:
Lat: N 39°21.882'
Long: W 076°54.498'
This hidden 'outcrop' of rock is located a few hundred feet uphill and off the road into
the woods, above what was once an old quarry (where there is a large and chossy slab) in
what is now part of Patapsco State Park. There are a number of bouldering opportunities
nearby (on boulders named Marriottsville Silver and Marriottsville Bronze,
but this webguide is only going to cover the established rope routes on the main outcrop
of rock.
Parking is available directly across the road from the foot path up to the crag, room
enough for a half dozen cars. Be very aware that Marriottsville Road 2 is heavily
travelled, especially during rush hour. Don't go blocking traffic.
Directions: From I-70 get off at exit 83 onto Marriottsville Road
(those coming from Frederick direction will need to get off at Rte 40 and take
that to the first light, then turn left onto Marriottsville Road). From
the offramp go north 3.4 miles to some railroad tracks (remember, if you came
from Rte 40, add a bit more to the distance travelled). 0.2 miles later will be
Marriottsville Road No. 2 on the left. Go 0.9 miles, and being aware of traffic around you,
park on the left side of the road.
Routes are noted left to right.
Syncrhonize Your Dogmas (5.5) - 26'. Climb the leftmost arete a few feet left of
Journey
Journey (5.7) - 28'. This is the classic line at the crag. Climb the crack system
on the left side of the main cliff wall, taking care with the semi-detached flake halfway
up. Might be wise to have the rope and belayer off to the side in case it comes peeling
off.
Sharp Enough to Shave (5.10b) - 28'. The name is descriptive of a couple holds
you'll find on this route. Begin in the center of the main face. Reach up over the bulge
for a good horizontal and work your way straight up the right side of the hollow flake
noted in Journey. Same caution with respect to the rope and belayer applies.
Barn Storming (5.10) - 28'. Climb the outside corner left of the chimney between
Sharp Enough To Shave and Ride the Barn Door.
Ride the Barn Door (5.9) - 28'. Begin on the right side of the main face, a few
feet right from Sharp Enough..., and just left of the chimney. Reach high for two
good handholds (you'll know them when you find them!) and 'ride the bard door' into a
layback. Follow the right-facing flake up to the top.
Thorny Cat (5.?) - 27'. Climb up the chimney to the top.
Impassable Tower (5.9) - 30'. A challenging puzzle on one of the tallest routes
here. Be sure to give it a whirl. Step into the V-notch leading to the chimney and ascend
the wall on your right near the right edge to the top without using the wall on the left
(or behind you). Note: take care to watch your head for the wall behind you if you peel
off!
Plausible Pillar (5.8) - 31'. Climb the arete immediately to the right of
Impassable Tower
Return to Sanity (5.3+) - 31'. Climb the center of the main face of the tower to
the top.
Keep Fear Alive (5.1) - 31'. Begin a few feet right from Return to Sanity.
Climb the right side of the main face of the tower up to and along a right-facing
left-leaning corner/ramp system. Much easier than it first looks.
No Need for Cheating (5.0) - 26'. Climb the left edge of the slab just left of
Keep Fear Alive to the top.
No Need for Painting (5.1) - 24'. Climb the slab by or with the inside corner on
the right.
Level of Cheating (5.8+ - 5.10) - 24'. Climb the vertical wall to the right of the
No Need for Painting slab, using a short finger crack formed by the flake, then
scootch right a bit to reach the top. Depending on how much stemming you use on the left
and right wall is the level of 'cheating' you do (and thereby the easier the grade of the
route). Another way to 'cheat' is to do a right-facing layback at the base of the finger
crack and use the crack at the back of the flake on its left end. Many variations
possible, but only one goes "cleanly" at 5.10.
GPS coords:
Lat: N39°22.627'
Long: W076°53.585'
Parking coords:
Lat: N 39°22.342'
Long: W 076°54.063'
This small outcrop is nestled in the woods right next to Liberty Reservoir,
just west of Baltimore off of MD 26. Nothing is higher than 20' here (said it
was small!). However, while for most this would be bouldering, there are others
who might visit and would prefer to drop a rope (after all, a fall, even from
15' up, could hurt!). There are some anchor options in the woods above the
rock. You will need a system reaching 40-60', though.
John Kelbel discovered this crag in 2001 while hunting for an old quarry he
spotted on a topo map one evening while browsing Terraserver's online topo maps
of the region (his later find of the quarry turned out to be not a very
appealing climbing location, unless you're mega-desperate). He noted the
location of the old quarry, then headed out to Liberty Dam a day or two later
to orientate himself with the dam and a map. Drawing a line between the dam and
the quarry he headed off into the woods. As he was walking, he came across this
little gem. He began working the ground around it to be more "climber
friendly" (meaning the jutting rocks that would be Bad For You If You Fell
(while bouldering) were moved to the side, and a small stone wall constructed
for people to rest on ("The stone wall is not very stable, so please help
maintain it for this is your climbing area, too" - John). He also donated
a small carpet to the area for visiting climbers to clean their shoes off with
before getting on the rock. It is tucked in one of the cracks. Please, if you
go here, try to have the courtesy for the next visitors by replacing said
carpet, okay? Thanks.
Directions: From I-70 get off at exit 83 onto Marriottsville Road
(those coming from Frederick direction will need to get off at Rte 40 and take
that to the first light, then turn left onto Marriottsville Road). From
the offramp go north 3.4 miles to some railroad tracks (remember, if you came
from Rte 40, add a bit more to the distance travelled). 0.2 miles later will be
Marriottsville Road No. 2 on the left; take it. Go 2.2 miles to an intersection
with Ridge Road (you have no stop sign for your direction). Turn right and
travel another 0.6 miles to the top of the hill (be sure to wave at the cows on
the farms just before you head uphill). You will see a paved drive heading off
to the left with concrete barriers hosting various warning signs. You park
here, on the side of the road (either side, but please, do not block the
driveway on the right! safest if you park on the left side of the road - just
be sure your vehicle is fully *off* the road, okay?).
If you are coming from Liberty Road/MD 26, your directions will be slightly
different. From the Baltimore direction, you will take MD 26 west towards
Frederick. You will cross over two bridges that span Liberty Resevoir. After
you get off the second bridge, there will be a road going off to the left 0.6
miles later (Old Liberty Road). Turn left there. The road is a wierd access
road to the residential area off 26 here. Turn left again 0.1 mile later onto
the next road you come to (Sunset Drive; it will turn into Marriottsville Road
No 2 later). You'll follow this road through the residential area for 1.6 miles
until you come to the intersection with Ridge Road. Turn left onto Ridge Road
and go to the top of the hill, 0.6 miles later. Park as noted in the previous
paragraph.
If you are coming from the Eldersburg region or points further west, head east
on MD 26, passing the intersection with Rte 32. 1 miles past Rte 32 will be
Ridge Road on the right. Take this and follow it for 1 miles until you come to
the intersection with Marriottsville Road No 2. Continue another 0.6 miles
onward and park as noted two paragraphs above.
From the cars hike on down the paved drive, passing the concrete barriers. A
couple hundred feet down the drive turns sharply left. There will be a roped
off fire road before you. Hop the rope and continue down the fire road. After
about 5 or so minutes there will be a trail/gravel "road" heading up
left (if you come to another set of concrete barriers, you missed by a hundred
feet or so; turn around and look to your right). Follow this trail for about
780 feet to a 2-3 foot high grass-covered mound on the right (after cresting a
gentle hill) next to the trail (pay attention for this; this is your only
landmark to navigate by here). From this point, using the trail direction as
"12 o'clock", bear off between 1 o'clock and 2 o'clock into the
woods, doing some minor bushwhacking as you go. A couple hundred feet later you
will come to a drop. You will either have come to the crag itself, or be just a
little uphill from it. If you are uphill from it, work your way through the
broken boulders and look down to your left. The crag will be evident.
The crag has two "faces" to it: a rusty brown one on the right, a
grey-green moss-covered one on the left. The two are seperated by a deep
chimney fissure. The rock is extremely rough, so if you are not used to this
kind of coarse material, your fingertips will let you know after pulling down
on the routes for a while. There are currently 6 established routes. Most are
on the right face. The routes are described from right to left.
Dirty Vegas (5.9+) - A traverse of the main face. Start from the
extreme right end of the rusty-brown colored face. Get on the rock here (it's a
5.9 move off the deck) and traverse the easiest line to the Candy Corner
arete on the left. You can obviously make this more challenging by not
following the easiest path from right to left.
Right Face (5.5 - 5.9) - Starting next to the relatively large tree,
climb up the center of the rough face on jugs to the top.
Trade Folk (5.7+) - Find the obvious jagged left-rising crack in the
center of the rusty-brown face. Climb it. The tilted nature of this route
ensures that straight-on jams won't always be obvious, yet face climbing it is
not trivial either. This was the first route climbed at this crag.
Left Face (5.9+ - 5.11) - Climb anywhere up the face between Trade
Folk and Candy Corner, without using the corner arete or the crack
(note: using the upper final move or two of the crack is legal if you need).
Crimpy, crimpy.
Candy Corner (5.1) - Look, all you Seneca junkies: Maryland's own
"Candy Corner!" Despite how easy it is rated, this is a fun little
route! Named for some candy that was found on the routes here. Jug your way up
the arete following the jagged blocks to the top. Be aware that one is
loose...
Unnamed (5.?) - This route climbs the grey face to the left of the
fissure chimney, to the right of the cavity in the rock 2/3 of the way up the
face. You can make it as easy or as hard as you want but using or not using the
corner or cavity.
GPS coords:
Lat: N 39°28.015'
Long: W076°58.167'
Morgan Run Natural Environment Area is a small little
place off of Klee Mill Road. The rock is not tall - 20' or so high - but it offers
a quick area to get to (maybe 100' from the parking area) plus a small
collection of random boulder problems tossed around the little river valley here.
The main slab hosts only almost a dozen top-rope problems.The rest of the climbing
in the area is bouldering. Mark Profeta and John Brunson spent a few years developing
the bouldering in the area. You can find their
bouldering
guide to Morgan Run here
Beware that ticks infest the woods during those warmer months. Use whatever
means necessary to prevent these nasty buggers from sucking on you and possibly
giving you a present back that you really don't want (e.g., Lyme
Disease, Rocky Mtn Spotted Fever).
![[Megan climbing <i>Gamma Flake</i>]](morgan-run-megan.jpg) Megan Moore climbing Gamma Flake
Megan Moore climbing Gamma Flake
Most of the routes on the main wall were named once, but the gentleman who
named them had vanished from the area prior to my being able to track him down,
and the person who knew who he was also disappeared, so the names given are
contemporary names, subject to being changed to historical names should I ever learn
what they are.
Directions:
(note: the road name "changes" between "Klee Mill" and
"Klees Mill", depending from what direction you get on the road;
whichever, it's just a minor issue so Klee/Klees is the same road throughout).
From northern Baltimore take I-795 west towards Westminster until it ends
(~8 miles from I-695). Follow Rte 140 towards Westminster for another 3.75
miles and turn left at the intersection of 140 and Rte 91 (stop light). Take
Rte 91 ~3.5 miles to Rte 32 in Gamber, and turn right onto 32. Take Rte 32 for
1.4 miles to Klees Mill Road and turn left. Follow Klee Mill Rd for 1.1 miles
and just before the bottom of a windy, relatively steep hill the park
will be on your right. The main wall will be visible off to the right as you
pull into the parking area.
From Columbia region and points south: Take I-70 west from Rte 29 and get off
at the exit for Rte 32. Follow 32 north for 13.5 miles to Klee Mill Road
(you'll pass through Gamber and by Rte 91 after 12 or so miles). Turn left onto
Klees Mill Road and follow the directions in the paragraph above.
From Frederick and points west: Get off at the exit for Rte 97 and head
north (turn left). Go 7.6 miles to Rte 26, and continue on 97 another 1.8
miles to Bartholow Road and turn right. Follow Bartholow Road until it ends
0.75 miles later at Klee Mill Road. Turn left and go another 1.7 miles to
Morgan Run Natural Environment Area.
Parking coordinates:
Lat: N 39°28.002'
Long: W076°58.200'
Local Eats: After a pleasant afternoon of climbing or bouldering and you're
hungry, there is a recently opened restaurant just barely a mile away at the
intersection of Klee Mill Road and Rte 32 called the Triple Creek Cafe. While
the food is not world-class, it is fairly decent and the prices are reasonable.
A perfect place to stop for eats (unless you know someone in the area for a
homecooked meal!) before any drives home.
The Main Wall: There are a handful of top-rope lines on the main outcrop of
rock, located just a hundred feet or so away from the parking area on the
hillside. The wall is short (~25' or so tall), but fairly obvious through the
trees from the parking lot as a broad slab.
While you'll approach the rock from the right side, the routes are described
from left to right due to ease of landmarks used for some of the
descriptions.
Angry Potato (5.7) - 29'. This route is at the far left side of the main
wall. Climb up between the left-facing corner/arete and the 7-inch diameter
hole ~5' off the ground. You can use the hole for a handhold, but using the
arete makes the route a lot easier. A couple of high step and thin finger moves
gets you to increasingly larger ledges until 25-30' or so up it becomes 2nd/3rd
class terrain. The rock is 34' to the very top here, but the climb was only
measured to where it seemed reasonable the route would end.
Conspiracy Theorist (5.10a) - 29'. Locate the 7-inch diamter hole 5' off
the ground, about 8' right of the left end of the wall. Note a smaller finger
hole a bit higher up to the right a few more feet. Climb up the wall between
these two holes on thin yet fairly sharp finger ledges (foot holds are almost
imaginary). Once halfway up the holds (both foot and hand) get more reasonable.
Crux is short, almost (but not quite) reminiscent of Mike's Finger
Buckets at Rocks State Park.
Morgan Run It (5.5+) - 27'. This may be harder if you are on the height-challenged
side of life. The route starts about 7' right of Conspiracy Theorist,
at a step at the base of the rock. Run right up
the face on inobvious finger flakes to the top.
Gamma World (5.9) - 27'. Bit of a contrived route, climb the more blank
face between Morgan Run It and Gamma Flake, sharing a couple of
holds on the left with Morgan Run It. When you reach the easier ground
above, finish on Morgan Run It.
Gamma Flake (5.7) - 22'. Begin ~7' right of Morgan Run It, below a
tall left-facing crescent flake. Climb up to - and through - the left-facing
flake to the top. To extend the climb, continue up left and finish on Morgan
Run It.
You can do a harder(?) variant by staying to the right of the flake and working
up right on some small holds (almost nothing for the feet, though). Just if you
want a different challenge.
Tactical Grace (5.9+) - 21'. Begin ~5' right of Gamma Flake. Climb
up the thin face to an overlap halfway up. Continue past the overlap to reach a
slightly detached flake then scamper up the last few feet to the bushes above.
It will keep your attention most every step of the way.
Club Ninja (5.9) - 19'. Start immediately right of a vertical crack
at the base of the wall. Delicately climb straight up on thin holds through the
apex of the arcing overlap in this section of the rock. Stay to the left of the
right-leaning crack above the overlap. Thin, balancy moves below and above the
overlap. You can power your way through them if your fingers are strong
enough.
Smooth Ride (5.7) - 19'. Starting a few feet right of Club Ninja,
climb up to the small detached flake below the overlap. You might or might not
share a couple holds on the left with Club Ninja here. Pull
through the overlap onto a small but welcome ledge, then easily finish the last
few more or less moderate moves to the top.
GPS coords:
Lat: N 39°xx.xxx'
Long: W 077°xx.xxx'
There is more bouldering downstream across the road. There are various outcrops
along the way, but the good stuff is a solid 10-15 minute walk from the road.
The Nose (V3) - One of the first rocks you come to when you hit the
"boulder field" downstream from the road. It is a single standing
rock apart from the others, rather thin and flows outward to a point. An area
favorite.
GPS coords:
Lat: N 39°xx.xxx'
Long: W 077°xx.xxx'
The Wedge V3 - Located just to the right of The Nose is a very
large slab with a large triangular-shaped hole in the bottom left corner. That
hole is the route. Follow the large flake on the left up to the apex and lean
out and grab a large block, working your way out through the wedge. If you
start to the right of the hole it is a V2 variation.
Unnamed V0 - In front of the rock there is a small piece of rock next to
a large tree. At the top of this rock is a very weather-worn slab that has this
V0 problem.
Finally, down the trail is the largest piece of rock in the area. It used to
have a V6 problem on it, but a key handhold snapped (the rock is a bit brittle,
so be careful!). The gentleman working this problem has it in project mode
right now and hopes to get to sent soon. (well, as of early 2000s, anyhow)
GPS coords:
Lat: N 39°24.379'
Long: W 077°38.350'
Parking coords:
Lat: N 39°xx.xxx'
Long: W 077°xx.xxx'
As you travel along northward on the Appalachian Trail out of Gathland State
Park, you will come to a ridge rising on your right a couple hundred feet from
the trail about 3/4 mile north of the Park. This ridge is populated with
periodic boulder fields that eventually give way to short boulder problems, and
finally some taller stuff. The rock is all part of the Weverton Formation
Quartzite that is predominant up and down South Mountain (i.e., it is the same
type of rock as at Annapolis Rocks). The strata layering is horizontal along
the ridge here, creating massive roof problems.
Directions: Take I-70 west to Frederick, and get off at the exit for Alt 40
just west of Frederick. Turn left at the light and go 4 miles to Middletown,
turning left onto Rte 17. Follow Rte 17 6 miles to Burkittsville. In downtown
Burkittsville turn right onto Gapland Road. Follow that for a mile to Gathland
State Park. Turn right at the intersection there, then a hundred feet or so
later turn left into the parking lot. From the parking lot walk past the burned
out ruins of a building to get on the Appalachian Trail. Follow that north for
a mile or so.
TOWER OF POWER:
GPS coords:
Lat: N 39°25.684'
Long: W077°38.308'
At over 30' tall, this is the largest of the outcrops
along the trail here.
There are some seriously daunting roof problems to be tackled. This outcrop is
1.5 miles from the parking lot. Currently only two lines have been established.
Double Exposure - 5.9 (29'). This Gunks-like roof route ascends the
'chimney' between two stacked projections of roofs on the right side of the
rock. And for a chimney, with everything overhanging so much, you get a decent
amount of exposure. Start behind the large slab block and climb up between the
large chimneys. Pay attention as a fall through here will net you some big air
time. Climb up to the large, imposing summit roof above, then turn left to get
onto a shelf in whatever manner elegant or not you can. Stand up and finish the
last move or two through the weakness at the top of the rock.
Lichen Or Not - 5.7+ (34'). This route begins on the left side of the
large slab to the right at the base of the cliff, ~8' left of Double
Exposure. Climb straight up the slightly overhanging blocks, following the
path of least resistance, to the final roof. Then either pull the roof directly
at the narrow notch (crux) (be careful your rope doesn't get wedged in the
notch), being careful of the lichen above (lest you get it in your eyes as you
reach for a hold) or, slightly easier, turn right and come up on large holds
and a step. There isn't a lot of room from where the rope can drop down and
where the lip of the final roof is.
GPS coords:
Lat: N 39°26.816'
Long: W077°37.938'
Gathland State Park Parking coords:
Lat: N 39°24.379'
Long: W 077°38.350'
Reno Monument Road Parking coords:
Lat: N 39°28.231'
Long: W 077°37.064'
AT Crossing of Lambs Knoll Access Road Parking coords:
Lat: N 39°27.453'
Long: W 077°37.584'
Lambs Knoll is another example of Weverton Formation quartzite along the
hill top of South Mountain. Unlike most crags along the AT,
this one is tucked away in the woods, off the trail, and offers no good views of
anything other than more trees. The rocks are barely visible from the AT during
the winter months when there are no leaves to block the view. In the summer
months, forget being able to see it at all from the trail.
This band of rock is short and broken, but offers some interesting routes if
you can deal with the greenbriar. There is a free-standing pillar here as well,
which offers some interesting climbing opportunities.
The crag is located 2.8 miles due north of Gathland State Park (as the crow
flies), and 1.8 miles south of the AT trailhead at Reno Road. if coming from Gathland
State Park, after an initial steep uphill climb out of Gathland to the ridge, the trail
is a nice, level, mellow run punctuated by the occasional small up-and-down. As you near
the rock band, the trail will turn sharply to the left then trend around to the right
again. You should keep a sharp lookout for a uplift rubble of rock on the right side of
the trail. Once you find that, get on top of it and seriously bushwhack a few hundred
feet over to the top of the rock band.
If you are coming from the north/Reno Road, the trail is shorter, but there is noticeably
more up and down as the trail climbs up near the summit of Lambs Knoll itself before
dropping back down again. Once you get to an overlook (which is nice, and has climbing
potential, but to my knowledge is unexplored as yet), continue on about
500 or so feet, looking for a line of partially covered boulders on the left that lead
off into the woods as the AT takes a right turn (N 39°26.835', W 077°37.901').
Break off the AT here and bushwhack a couple hundred feet over to the top of the rocks.
Note #1! The bushwhacking here involves rocky rubble covered by leaves, holes covered by
leaves, plenty of undergrowth, and...brambles galore. In addition to your regular
top-rope gear, you may strongly consider to pack some leather work gloves and a pair of
garden shears or hedge trimmers so you can clear the top of the rocks in order to set
anchors - or even clean out cracks which may have suddenly sprouted new brambles since
the last time somebody was climbing here! The base of the rock is even worse for rubble
and brambles, despite the best efforts of those who do visit periodically to at least
keep the overly prolific brambles in check.
Note #2! Lambs Knoll is known to be very active during hunting season. Take all the
proper precautions when you are out playing here (even though no deer in their right
mind would come wandering around these rocks; see also Note #1 above)
Directions: Take I-70 west to Frederick, and get off at the exit for Alt 40
just west of Frederick. Turn left at the light and go 4 miles to Middletown,
turning left onto Rte 17. Follow Rte 17 6 miles to Burkittsville. In downtown
Burkittsville turn right onto Gapland Road. Follow that for a mile to Gathland
State Park. Turn right at the intersection there, then a hundred feet or so
later turn left into the parking lot.
Pick up the Appalachian Trail North to the side of a ruined building and start
marching uphill a bit. Once you finish the uphill part (steep, but nowhere near
as steep as the section leading from Rte 40 to Annapolis Rocks!), the trail is
more or less flat and pleasant, punctuated by a few rocky areas (how the people
in "The Blair Witch Project" supposedly got lost up here I'll never
know!). After ~2.5 miles the trail will make a sharp, 90-degree turn to the
left (there will be a blue-blazed trail coming in from the right at this
point). You are close (if you were feeling masochistic, you could continue
straight into the woods and bushwhack to the cliffs from here!). The AT will
slowly bend right as you continue onward. In a few minutes you will reach
another noticeably rocky area. This is the western terminus of the outcrop. The
climbing area is 600' to your right. I would suggest following the rocks and
boulders uphill rather than staying low, unless you are impervious to
jungles of thorns (or just like pain). Bushwhack from here to the rocks. You
will be atop of them. The easiest way to find things would be to go to the far
end of the rock band and find the free-standing Pillar. The climbable cliff
pretty much ends at this point.
The bottom area between the segments of cliff is choked with greenbrier and
loose rock, much of the latter covered with leaves and long-dead downed trees.
Feel free to cut back the intruding greenbrier so you can navigate w/out being
sliced to pieces (don't worry, it'll grow back! :-/ ). There are a few areas
which will allow relatively 'easy' access to the base of the cliffs. The most
obvious is to slide/scramble down the far east end of the outcrop. You can also
come down between Unknown roof and Face Hugger. There is some 5.0
scramble downclimbing you can do between Anti-Gravity Crack and
Kindergarden Blocks. There is another scramble/slide between some of the
[currently] unrecorded segments further west. In all cases beware the
greenbrier. And in the warmer weather days, beware of ticks as well!
The routes are described from right to left, starting at the far right end at
the Pillar. There are nigh two dozen routes in this area.
Deception (5.9* PG) - ~25'. This route ascends the tall, south-facing wall of
the Pillar by following the wandering thin crack to the top. You may need to
use the right arete a couple of times in the latter half of the route.
Committing moves don't look so bad from the ground.
The Confessor (5.8) - ~20-25'. This route climbs the shorter, east-facing side
of the Pillar. Not quite as committing as Deception, but not trivial,
either.
Restricted Access (5.5) - ~15-20'. This is one of those one-two move wonder
routes. It offers the easiest access to the top of the Pillar (unless you want
to leap across the gap from the main wall!). Start in the 'chimney' formed by
the north side of the Pillar and the main wall, climb up the line of weakness
to the top.
The next set of climbs ascend the wall next to the Pillar.
Aqua Crack (5.8) - <20'. Climb the short crack at the far right end of
the wall to the sloped-off top shelf. The crux is getting off the ground.
Neubauer-Reinhart Right Crack (5.7*) - 20'. Work your way up the gently
left-leaning finger crack to the top.
Neubauer-Reinhart Route (5.8) - 22'. Climb the face in the center of
the wall between the two crack systems to the top. Try not to use the left or
right cracks if possible (you may have to at some point halfway up, though).
Neubauer-Reinhart Left Crack (5.6) - 22'. Climb the prominent
double-crack system on the left side of the main wall.
High Voltage Soulchild (5.10d) - 24'. Start below the arete on the far left
end from the main corner left of Neubauer-Reinhart Left Crack. Climb the
face and arete, following a shallow, left-facing corner (of sorts) partway up the
face. Starting from the ground makes this a solid 10d route; stepping on the block
and boulder to get onto the wall drops the rating to a comfortable 5.10b.
Unknown roof (project) - ~20-25''. Just around the corner and up the hill to the left
of the Pillar is a block of rock criss-crossed by cracks, capped with a jutting
block roof. A smaller, similar-looking block to The Prow at Sugarloaf.
Climb up the center vertical crack to the roof, then pull around/through it to
the top.
Face Hugger (5.10a) - 22'. Shades of the 'face hugger' from the
"Alien(s)" movie series. Start at the large, flared crack in the
center of the outcrop and pull onto a ledge at head-height. From there climb up
the rounded wall to the right of the crack, hugging the face where you can find
purchase, laying back left on rounded holds to the right when you cannot.
Eventually gain some flat holds and finish the final moves happier than you
were down low.
The Kneepad (a.k.a. The Kneeler) (5.6) - 22'. The start might be the
crux, particularly if you try to not use your knee! Climb onto said
ledge about chest or head high (depending on how tall you are) to the left of
the wide, flaring crack. Follow the crack as you can, and climb up the rounded
arete as the holds direct you to the top. If you stay off the arete and climb
the face proper, it is more 5.8 in nature.
Anti-Gravity Crack (a.k.a., Plumber's Crack) (5.8) - 15'. Short but
funky. Gravity doesn't seem to work normally here as it does elsewhere in the
world, as you want to fall left, not down, while going up. Follow the
nice-looking finger crack (it isn't) to rough slopers (good friction, though
you may have a raw palm or two after the fact) at the top. Stemming off to the
left is illegal (and would drop the rating down to probably 5.5 or 5.6). If
this were a longer route, this could be a classic wierd line. An alternate
start to give you a few more feet of climbing begins below and right of the
wannabe finger crack. You gain said wannabe finger crack after your feet leave
the ground.
Kindergarden Blocks (5.2/5.3) - 27'. To the left of The Kneepad
about 30-40' is a wall broken with cracks and blocks. Climb the right half of
this wall pretty much anywhere on jugs everywhere.
Bear Hug (5.7) - 31'. Start at the lowest section of the wall just to the
left of Kindergarden Blocks and follow the hand crack up and right to a
cleft in the middle of the wall. Reach up right to a downward pinch and climb
up through the slightly bulging section to the top.
Stretch (5.9) - 31'. Start at the same spot as Bear Hug, but
instead of following the crack right, go straight up the wall, using the arete
as needed. A reach problem; this will be more difficult for shorter people.
Note also that not all the horizontals are going to be as nice as you'd like
them to be, but there generally are finger ledges nearby. The crux is at the
top.
Angela's Face (5.10b) - 31'. Start to the left and around the corner from
Stretch, at a left-leaning crack. Climb the crack to a ledge about 7'
up. From there climb the smooth, nearly featureless face to the triangular roof
overhead without using the arete until you can reach the roof. The crux is the
few moves immediately below the roof to pulling through the roof. Finish on
increasinly better holds to the top. If you use the arete prior to gaining the
roof, the climbing drops down to about 5.9 or 5.8. This is a reach problem
route; the crux is notably easier if you are 6'+.
Gert's Route (5.4) - 32'. Start as with Angela's Face, but climb
the blocky face to the left, following a crack to the top.
Phil's Chimney (5.5) - 30'. Climb up the deep chimney using blocks in
the back until you are forced to actually go into "chimneying mode".
Follow the thin crack on the left wall up through the narrow portion of the
chimney to the top. You might find facing left easier at the top than facing
right.
Pressure Under Grace (5.8+*) - 35'. One of the tallest routes here. Climb
the wall just outside the deep chimney, following the featured right-facing
corner and crack system without actually going into the chimney. Gain some
ledges and make some delicate moves in order to finish on easier rock. Not many
places to put a cam (or anything else) on this route if you want to lead it.
Addietude Direct (5.9) - 33' Climb the face to the left of Pressure
Under Grace straight up to and through some "bear-claw" grooves
near the top.
Addietude Arete (5.8) - 33' Start at the base of the blunt arete and work
your way to the top, climbing the arete and face on either side as you find
(or don't find) holds.
Exoplanet (5.10a/b*) - 31'. Start at the of a deep cleft in the base of
the buttress in the center of the face a couple feet left of Addietude
Arete. Climb up to (crux) and through the short overhang and lieback the
vertical flared crack to gain a stance. Breathe, then continue up the wall to
the top on small holds. You'll need to be perceptive in order to not make this
bit any harder than 5.8 or 5.9.
30' left of Exoplanet is the last tall-ish outcrop of rock. Everything
past this point to the AT is either a boulder problem &#lt;10' high, or just
a small protrusion of geologic interest.
Unknown Crack (5.5+*) - 23'. Fun! Challenging. Committing. Begin at a short
vertical crack at the left end of the wall, just right of the outside arete. Climb up a
move or two, then stretch over to the big fat crack on the right. You can struggle up
this as an offwidth, OR...commit to a serious but fun layback. A few moves up attain a
horizontal crack and reposition to stretch right again for the next segment of the big
fat crack. Follow it up to the top.
Unknown Face (5.10) - 22'. Climb the lichen-encrusted wall that currently
lies beneath the dead, inverted tree.
Pokey (5.2) - 25'. Climb the buttress around the corner left of
Unknown Face on exceptionally large holds.
Tiger (5.3) - 27'. In the deep corner left of Pokey, climb
the left face as holds present themselves. There are some incredibly nice,
friendly side-pulls here to play on halfway up.
Panther (5.5*) - 28'. Starting just uphill left from the lowest point of
rock, left of Tiger, climb over bulging rounded rock until you can gain
the flat, almost lichen-free, apparently featureless face. Finding good holds,
ascend to the small roof. Pull through the roof using holds left and high right (crux),
then reach high to finish. One of the better routes of its grade here.
Unknown Chimney (5.?) - 22'. Climb the chimney around the corner left of
Panther.
Unknown (5.?) - 15'. Climb the rounded blocky wall left of the chimney.
There are a few more (but shorter) routes further to the left from these. They
are unrecorded at this time.
GPS coords:
Lat: N 39°19.920'
Long: W 077°40.593'
Parking coords:
Lat: N 39°19.984'
Long: W 077°41.000'
This outcrop sits on the southernmost shoulder of South Mountain, barely 400'
away from the Appalachian Trail (the sign, however, claims it is 300 yards; do
not be dismayed!). There are only a few recorded routes here at the moment, but
there is room for more. The ground below, though, is not the most friendly to
be moving around, being a mix of burnt out trees and overgrown bushes (thorn
bushes), along with lots of loose rock. Some of the wall is in good condition,
other parts of it is loose. Take care when climbing here.
Elk Ridge is the northern extent of the Blue Ridge Mountains in Maryland. The ridge is
located to the west of South Mountain and runs roughly parallel to it from Rohrersville,
in the north, to the Potomac River across from Harpers Ferry, West Virginia, in the south.
Across the Potomac the ridge continues as Blue Ridge Mountain in Virginia and West Virginia.
The southern end of Elk Ridge, which is part of Harpers Ferry National Historical Park, is
known as Maryland Heights. There is a plethora of climbing to be had on Elk Ridge. You just
need to want to get out and Do It.
GPS coords:
Lat: N 39°19.496'
Long: W 077°43.071'
Parking coords:
Lat: N 39°19.498'
Long: W 077°42.954'
Be sure to pull off to the side as much as possible. First of all, the locals in Sandy Hook
use this place as a turn around. Secondly, there are Other Users (fishermen, hikers, etc) who
also park here on the weekends, and even this turnout can get...overcrowded.
Balcony Rock is a "hidden" gem of an area right outside
the community of Sandy Hook, just upriver from Maryland Heights. It has a
rather expansive cliff that tops out over 80' tall at its highest point. There
is a good bit of untapped routeage here for one to explore. People have been
coming here for some time, as evidenced by the chalk and bolts on the main
cliff. Parking is a problem, however, for this place: mainly, there almost
isn't any. The nearest place to park is a turnaround pull-off a 100 yards or so
away, immediately outside of the Sandy Hook community. This is the school bus
turnaround, and there is a No Parking sign there. During the weekdays, don't
even think about using this for parking - you will be ticketed and/or
towed! During the weekends, as long as you keep yourself well off the
road so people can still turn around (the locals use this as their primary
turnaround spot, too), you should be okay. If you block them from being able to
use it, though, you could find yourself with a nasty surprise at the end of
your climbing day. This south-facing rock is an ideal place to play during the
chillier months of the year (provided it is sunny out).
Getting there: Coming from Frederick, MD, follow Rte 340 15.7 miles until the
highway part of 340 ends and you come to an intersection just after you crest a
small hill. Turn left at the intersection onto Keep Tryst Road. About 0.3 miles
later turn right onto Sandy Hook Road. Follow that down a hill and through the
community until you come to the turnaround pull-off, 1.1 miles later.
From there walk down the road about 100 yards until you come to a line of white
boulders and a couple of gates that close off an old and now very unused
turnaround/pull-off. 5 boulders right of the first gate is a faint trail that
leads to the hill, and up some stone steps.
ACCESS NOTE:
Public Service Announcement. I have recently learned that the National Park Service
considers the crags Balcony, Balcony Jr, Skink, and Stone Fort as 'off limits' to
climbing. They only recognize climbing on the main Maryland Heights walls (Union Wall,
Confederate Wall, AB Ramps, Sign Wall, Gully, and some of the other outcrops just left of
the Gully) as 'legit'. (contrarily, bouldering is allowed throughout the ridge and
hillside) The Mid-Atlantic Climbers are working with the Park rangers to resolve this
access issue for roped climbing, resolve the discontinuity between roped climbing being
illegal and restricted and bouldering being open-ended, and gain legal access to all the
crags. Furthermore, the short walls just outside of town along the road are no longer
legal to climb at. Nor is Jefferson Rock.
Trailhead GPS coords:
Lat: N 39°19.473'
Long: W 077°43.077'
Follow the steps up, then continue on the faint trail to the rocks. By this point
you can't miss it! The main cliff is right here - there is more off to the
right (shorter, not often as visited).
Alternatively, an unofficial trail has been slowly developed that will enable you to
avoid walking along the road. From the turnaround, go up the overgrown fireroad for
about 30-50', then pick up a faint foot trail rising to the left. Follow that up and
over to the base of the rocks.
From Harpers Ferry, take Rte 340 to Maryland, taking the first exit you come to
after you cross over the Potomac River. Go About 0.3-0.4 miles and turn right
onto Sandy Hook Road. Follow that down a hill and through the community until
you come to the turnaround pull-off, 1.1 miles later. Follow the rest of the
directions in the paragraph above.
![[Brian climbing at Balcony Rock]](balconyrock.jpg) Brian Walker gets jiggy with it at Balcony Rock
Brian Walker gets jiggy with it at Balcony Rock
The routes will be described from left to right as you look at the rock.
Thumb Press (5.8) - 40'. Near the far left end of the cliff is a broken quartz
vein trending up and right. Follow this up to a very blank shallow corner.
Vigorous stemming will gain you the top. You can anchor on trees above.
Thumb Press Right (5.8) - 41'. If you want a more continuous challenge, start
anywhere on the right-facing corner/ramp down and right from the quartz vein
and climb up to the detached layback flake just right of the quartz vein. Haul
yourself up that until you join the quartz vein, and finish on Thumb
Press.
Gold Medallist (5.10b) - 41'. Starting at the base of the ramp just right of
Thumb Press, climb up the ramp and reach up right to a small detached block.
Getting your feet on nothing, smear over and reach up right again to a decent ledge (or
follow the rather thin finger cracks straight up for a couple of moves). From the ledge
trend up and left, aiming for the noticable U-slot in the huge detached flake above.
Grunt through the slot and continue up on somewhat thin moves on the face above until you
can reach slightly better (if sloping) holds on the right and pull up to another stance.
Easy climbing from there gains the top.
Silver Medalist (5.9+) - 43'. Start ~10' right of Gold Medalist.
Climb up the blocky face and cracks and small left-facing corner passing a couple of
ledges until you are at the base of a large left-facing corner. Climb the blankish wall
up and left and pull through the U-slot (stemming off the corner will ease the pain of
the blank face; not using it pushes the grade to a 10a or perhaps 10a/b). Once through
the U-slot, finish on Gold Medalist.
Bronze Medalist (5.8) - 43'. Climb Silver Medalist to the ledge at the base
of the large left-facing corner. From there ascend the corner to it's top. Step
right a few feet until you are below and to the left of a boulder on the shelf
above with a bush growing out from under it on the left bottom side. Climb the
short crux wall here (height-dependent problem) to rounded holds and eventually
better stances. Finish on Gold Medalist.
Cliff Monster (5.8*) - 81'. Approximately 30 or so feet to the right of Thumb
Press is another right-facing corner/ramp system. Climb up the finger crack
to a small corner, and follow the corner up to a small ledge 5' higher. Hop up
to the next ledge, then climb the nearly dead-vertical face to a large, spacious
ledge. While not the top of the rock, it basically is the top of the climb. Anchors
are gear, wrapping boulders/trees, or perhaps (at your own risk) clipping the
single bolt that is up there on the ledge (and a little to the side). The black
section 2/3 of the way up with the green lichen is referred to as "the
Fairway". You can climb through that, but the rock is a bit rotten there.
You are better staying to the right of it. There are many variations
that you can play on around the "pure line" of this route.
![[Heather Ortiz working the start of Crown Of Thorns]](heather-ortiz-crown-of-thorns.jpg) Heather Ortiz is about to find the Crown Of Thorns
Heather Ortiz is about to find the Crown Of Thorns
Cliff Monster Direct (5.8+*) - 81'. Instead of climbing the ramp/corner, start on
the face about 5' to the left. Climb up the steep face until you gain a stance
and eventually join Cliff Monster, finishing as above. Be careful of the
dead tree should you fall and swing on this lower section.
Crown Of Thorns (5.6**) - 65'. A neat route that climbs the inside corner
system 20' right of Cliff Monster. Layback the crack in the corner, then
work your way up rounded ledges, aiming for the large, detached block above.
Chimney behind the block a few moves, then aim left up the left-facing
overhanging segment to the broad notch at the top, putting you on a large ledge
with bushes. A variant start climbs the outside arete of the corner (5.7-ish)
to a ramp, after which you maneuver to rejoin the main route. Many other
variations exist by climbing pretty much anywhere up the face. Anchors are gear
placements.
Sceptre Of Might (5.8) - 65'. A mid-route variation to Crown Of Thorns
that will keep your attention. Harder if you are taller (one of those few times
when it's better to be shorter in climbing ;-) ). Climb Crown Of Thorns,
but instead of heading up inside the chimney formed by the detached block,
climb up the left-facing corner outside that same detached block to a roof, and
traverse left to gain the top of the block. Finish on the steep,
outrageous-looking wall to a spacious ledge. Try not using the blocks
behind you to the right when working the steep wall; all the holds are there.
Fun.
Popeye's Left (5.10d) - 61'. To the right of Crown of Thorns is a
jagged arete in black rock, just left of the white-streaked black rock. Climb
this arete through a large, blocky left-facing overhanging corner. Staying
right of the tree, climb the corner to the ledge high up.
Popeye's (5.10b*) - 61'. This is a reach problem for shorter folk. Climb the
white-streaked black rock using occasionally good holds to a small roof.
Undercling in the crack to reach a pair of "bucket" holds, kick a
little bit and reach up to another flat hold in order to get fully past the
roof. The fun isn't over. Climb up non-trivial rock past the bolt to a wide
ledge. From here you can either trend left (5.10a), go straight up past two old
bolts (no hangers; 5.10+), or step right and work your way up the blockier
stuff (5.8). Finish the last moves on easy ground.
Unknown (~5.9?) - 61'. Starting ~10' right of Popeye's, climb the
right-facing wall of black rock to the top.
Around the corner to the right the cliff band continues, albeit shorter than
the main face.
Unknown (5.10) - 34'. There is a large, protruding "pillar" block
around the corner from the main face and up another level. Climb the main face
up a very shallow corner to a blank section before topping out. Two bolt and hangers at
the top for anchors. Otherwise you need some moderately long webbing or static line to
hit a tree 20-25' back, or large gear a bit further back than that in the short rock
wall past the tree.
To the left of Unknown is a longish band of short rock. Mostly overgrown because
most people who come here tend to understandably gravitate to the taller routes on the
left half of the outcrop, but there are a couple established lines on this wall.
Hound Of Hell (5.9+/5.10a) - 22'. Approximately 30' right of Unknown 3
is a black and brown section of rock broken by a set of ramps and overhangs,
all below a sizeable slab-boulder resting in the woods above. Climb up through
the overhangs using nasty slopers and aggressive layback techniques. Pulling
through the final roof onto the final slab is the crux. Beware the loose stones
at the top of the cliff.
The Education Of Ben (5.6+) - 22'. Immediately right of Hound Of Hell is
a right-facing corner. Romp up the blocky lower section to the steeper part
halfway up. Using holds on the right, drag your way up the notch at the top of
the corner to the top. Alternatively, pull around to the left and climb that
slab to the top (a body length and a half either way).
There is more rock further to the right of these routes.
The hillside is also strewn with boulder problems. As you come up the trail from
the road, the first significant rock you pass is known as has a very overhanging face
with several problems on it.
The Doc Boulder is located in front of the main wall. Standing in front of Crown
Of Thorns, with your back to the main wall, before you are some large boulders.
One has a significant left-facing overhang with a razor sharp edge. There are several
problems on this and the ratings are just approximate.
Doc Ock (V3/4) - start at the lower left edge of the steeply
overhanging rock and work your way to the edge in a couple moves. Pinch the
edge with the right, grab a side hold with the left, keep your feet high, then
palm/smear your way up the ramp to the top. This is also problem #14 on Conrad Schaefer's
Balcony Rock Boulders
The Goblin (v4) - Start as for Doc Ock, but once you reach the razor-sharp edge,
traverse right to the end, then go up. Take care that you don't fall backward into the next boulder
and crack your head open! A spotter or multiple pads are nice.
Problem #12 (V1) - Climb the short, relatively easy south-facing face left of the Doc Ock
roof. This is also Problem #12 in Conrad Schaefer's
Balcony Rock Boulders
At the far east end of the rock band is another blocky roofy boulder problem
next to a large tree. The fall here is not forgiving if you have no
spotters to keep you from going over the edge!
The Notch (V1) - Climb up the overhanging wall just right of the tree,
aiming left for the square notch. Climb up through the notch and squeeze past
the tree and the rock at the top. This is the same as problem #25 in Conrad Schaefer's
Balcony Rock Boulders
Gravity Kills (V3/4) - Start just right of The Notch and climb up, using a toe-hook
to keep yourself in after you reach out right and back to a fairly decent side-pull hold at the
end of the overhang. Climb up onto better blocky holds and top off. Try not to fall. If you do,
hope your spotter(s) is quick enough to grab your shirt and haul you back in before your balance
takes you over the edge. This might be problem #26 in Conrad Schaefer's
Balcony Rock Boulders
GPS coords:
Lat: N 39°19.515'
Long: W 077°43.194'
Parking coords:
Lat: N 39°19.498'
Long: W 077°42.954'
The parking is the same as for Balcony Rock above. See also the associated note about
parking there.
Balcony Jr is no "junior" to it's better known cousin, Balcony Rock. If anything, there
is more climbing surface here than Balcony Rock provides! It's just a little bit higher
up the hill, weeding out the less-hearty or less-driven. The best way to get to the rocks
is to go straight up the hill above Balcony Rock, then once at the power line cut, turn
left and follow that until you come to the rock wall on your right. You can't miss it. It
is quite...extensive.
The rock is about 150' long, and tops out around 70'. Many of the routes here are very
steep and pumpy. There are challenges from moderate to rock master.
Balcony Jr is also south-facing, like Balcony Rock, but with the power line cut right in
front of the rock, there are no trees blocking the sun from baking it in the winter time.
While not so great for mid-summer outings (not only heat, but foliage overgrowth at the
bottom), this would be an ideal spot for those sunny mid-winter climbing days.
Conrad Schaefer and friends had put a few lines up here, and discovered an old RURP in
one of the lines. Further research turned up no information on the identity of the
climbers who pre-dated Conrad. It will likely remain a mystery for the rest of time. So
while, yes, some lines had been done up here decades ago, most of the rock is newly
developed. Enjoy the area, as crowds will be few and far between.
The routes are described from right to left, as you would approach the wall from Balcony
Rock. "Top anchors" = bolted anchors up top.
Groovin' Up Slowly (5.5+) top anchors - 30'.The easiest route here, but don't let that fool
you. If you miss a hold, the crux can get significantly more interesting. Climb the blunt
arete to a spacious ledge where the climb basically ends. You can continue the climbing
by traveresting left onto The Founder's Forge and head up from there.
Mojo Filter(5.7) top anchors - 44'. Begin below a ledge just left of Groovin' Up Slowly.
Climb up and pass the first roof on the left. Continue up, staying right of
The Founder's Forge, weaving around or climbing through bulges as they come, until
you reach a ledge. Step left and finish on The Founder's Forge.
The Founder's Forge (5.9+/5.10a*) top anchors - 44'. Start 5' left of Mojo Filter at
the left end of the ledge thigh high off the ground. Follow up the white-streaked
shallow groove to a white knob at the top. An excellent route.
The B&O Burn (5.9/5.10, bolted) top anchors - 50'. Begin 10' left of The Founder's Forge. Bold
initial moves gain the rounded rock above. Climb over/around/between/through bulges,
overhangs, and grooves. Don't burn out before you hit the top!
Potomac Power Plant Pump (5.10d/5.11a) top anchors - 50'. Begin the same as with The B&O Burn,
but trend somewhat left as you pump up the wall.
The Paymaster (5.11d/5.12a** bolted) top anchors - 50'. Like so many of the routes here, steep and pumpy.
Begin 10' left of The B&O Burn, where the left-leaning left-facing corner comes
down to the ground. Climb up the wall immediately right of and above the corner, angling
for a notch at the top.
Forearm Furnace (5.11d/5.12a) - 50'. Start 20' left of The Paymaster, just
right of the large black 5' tall boulder by the wall. Climb up the wall and left-facing
corner to a ledge below the roof and finish on non-trivial terrain. There is an
unfinished project variant that moves right at the ledge below the roof and skirts the
right orange wall to go up at the corner.
Salty Dog Saloon (5.10c**) - 65'. Excellent route. Begin 20-25' left of
Forearm Furnace, next to the black 3' tall step. Climb up to and around the
inverted ramp roof to the left (alternatively, pull the roof directly). Traverse up and
right to gain the left-facing corner then run to the top.
Project (5.?) - 65'. Begin 15' left of Salty Dog Saloon, at the broken tree below
the stepped ledges. Climb up to the roof between Salty Dog Saloon and
Cold Steel Corner. Pull through and climb the steep face above to the top.
Cold Steel Corner (5.9*) - 65'. Begin 10' left of Project. Climb up the
ledge to a blocky ramp system (alternatively, start 5' right and climb the wall straight
up to the ramp). Follow the ramp up and right until it ends below a roof. Step left and
work your way up and back right (V1), following the corner as closely as possible until
you gain the top. The crux is right as you pass an old RURP with a wire attached.
V1: Cold Steel Face (5.9*) - Instead of working up and back right to the obvious
corner, move a bit left and continue up the face to the top. A little steeper and more
technical than climbing the corner. But no less fun.
John' Project Route (5.11a) - 67'. Start at the same point as Cold Steel Corner,
but head straight up the face instead of right up the ramp, keeping to the outside of the
large left-facing corners. The crux is a dyno in the middle, but the lower and upper wall
sections are stout and pumpy in their own right.
Serious Callers Only (5.10b/c*) - 67'. Sustained climbing from the ledge to the
top and the wall is steeper than it looks. If you fall low, odds of you getting back on
at the fall point are low. You'll have to reclimb up to it. Work your way up to the main
ledge 10' off the ground in whichever manner possible. The route really starts here.
Climb up the face and left-facing corner to gain a ledge. Step right to the rose-colored
area, breathe, then head left and up, following the face and the left-facing corner as
the holds direct you.
Gravitas Free Zone (5.6) - 47'. Have a nice romp! Begin 15' left of
Cold Steel Corner, scramble up ramps to a large ledge. Move left to a shallow
left-facing corner system and climb it until it ends. Trend up and right to the broken
blocky corner at the top.
Harpers Ferry bouldering! There is quite a lot of that here, more than you can shake a
'biner at. I've been wanting to chart it out, but have not had any time to do so. A
friend of mine had taken the initiative and created a very comprehensive online guide,
covering not only the rocks in Maryland, but as well as those in Virginia and West
Virginia. In 2007 it was taken down off the web, but two years later it was resurrected
and is now back! Please visit it, and visit the boulders. Climb your little hearts out.
You can find all the info he has collected here:
Harpers Ferry Bouldering
Note, it is still a work in progress, but until it is finished, there should still enough
to keep you occupied for quite a while. A few of the problems noted in Conrad's guide are
also noted in the Balcony Rock section above.
There is a nice collection of boulders located up in the Highlands here:
GPS coords:
Lat: N 39°19.570'
Long: W 077°43.236'
Getting to them? Bushwhack up and left from Balcony Jr Rock!
Conrad's guide also includes information for several rope climbing areas not covered in
this webguide.
Parking is the same as for Balcony Rock.
GPS coords: (main overlook)
Lat: N 39°19.524'
Long: W 077°43.538'
GPS coords: (top of The Sign)
Lat: N 39°19.482'
Long: W 077°43.546'
GPS coords: (top of A Slab)
Lat: N 39°19.466'
Long: W 077°43.526'
GPS coords: (top of B Slab)
Lat: 39#176;19.458'
Long: 077#176;43.531'
Parking coords:
Lat: N 39°xx.xxx'
Long: W 077°xx.xxx'
This area isn't the best or prettiest rock to climb on, but for
having both multi-pitch and top-rope routes, it has some of the tallest stuff
within a 90-minute drive of Baltimore (note: there is some taller stuff at Chickies
Rock in Pennsylvania, but not as much). A lot of the routes are not very heavily travelled,
and there is probably good reason for this: the area has difficult access (many
of the climbs are just physically difficult to get to), a lot of it is chossy,
and the only known copies of the original guidebook put together by Rob Savoye
exist only online, on the web (much as this does). But even still the online
guide is sketchy and lacks helpful details in locating various routes. This
section is an attempt to clear up and clarify where the routes are for the
intrepid adventurer who wishes to pit themselves against this 'wilderness
next to civilization'.
Much of the information from this section has been taken from Rob Savoye's old
guide, but it will have more in-depth coverage as I can get out there to expand
on things. I added what little info I have for protection ratings of the
multi-pitch routes herein. Most of the rappels on the multi-pitch routes
require the use of 2 50-meter ropes (or make two raps using a single 60-meter
rope).
Warning about some of the belay stations: some stations have bolts
set in at the belays. While these bolts are less than 10 years old (as of
2000), they are small - 1/4-inchers! Please pay careful attention
when using them for belays or rappels. Some of the belay stations on the
main wall (around the sign) have rap-links in the hangers.
CLOSURE NOTICE! Effective April 10, 2016, due to peregrine
falcon nesting, the area between the Gully and the A/B Ramps (includes the Sign wall) is
closed until 5 weeks after the chicks fledge from their nest. This is the second year that
the peregrines have nested there, and it is likely they will be regulars in the spring and
summer in the years going forward. As of right now, the Union Walls, Confederate Walls,
and Train Tunnel Wall, remained open for climbing. Best to keep up to date on closures by
monitoring the
Mid-Atlantic
Climber's page.
Note: this section will be updated as personal knowledge of the routes is
gained. I had originally thought to merely parrot Rob Savoye's info, but
after speaking with him and after having done a few routes here over the
years, I'd far far rather use my own words to better describe the routes.
And Rob agrees, this section is in serious need of updating.
In the mid-late 2000s, and early 2010s, there has been a resurgence of interest and
activity at Maryland Heights, most notably at the Train Tunnel Wall. Two to three aid lines
in the A3/A3+ range have gone in, as well as some moderately hard to stiff trad, mixed, and
sport lines.
Warning: If you climb at Maryland Heights and leave rap anchors behind (such as at the top
of A Route or D Route, but elsewhere as well), be warned that over the years
people have been stealing these! (as if they have nothing better to do)
This includes rap slings that were set in places Joe Hiker Public would not easily get to (i.e.,
some of the scoundrels are fellow climbers). Be prepared to bring rap slings and rings if you
intend on rapping off of any of the routes, and be prepared to part with them permanantly when
some ill-mannered RAPscallions has made off with the one you left behind, unable to afford the
courtesy of leaving it for others to use at their need.
Warning!!: The mixed and sport lines on the Train Tunnel Wall have recently seen
a rash of perma-draws disappearing, most notably from the lowest bolts on the routes. If you
go there to do one of the bolted lines, consider packing a perma-draw of your own, or working
out some convoluted manner to retrieve it on the way down (or solo climb up to it, which is how
some guttersnipe has probably stealing these to begin with)
CONFEDERATE WALLS
To the right of the train tunnel are a handful of routes on the short walls here. Access
is non-trivial, and route information isn't available to me at this time.
TRAIN TUNNEL WALL
This entire wall overhangs just enough to stay dry in a light to modest rain. However, this is not
a beginner's area. You still need to check in at the ranger's station before climbing. It is
possible to gain the Grand Ledge ~20' below the top by traversing in from the right, but you need
to get through a VERY exposed section near the beginning before the ledge widens comfortably.
Routes listed are from left to right.
Black Tie Affair (5.12a* PG/R) - ~180'. One of the hardest trad lines in the state. PITCH 1:
(95 feet) This is the money pitch. Begin at the far left corner of the wall where the train
tunnel platform wall meets the rock. Follow the jagged, overhanging crack in black rock up to a
tricky mantle move onto some unprotected but easier slab climbing. From the end of the slab climb
another overhanging face (a #0 metolius or #6 C4 helpful here, a #0.5 C4 is good for higher up)
until you come to another slab. Follow this second slab to the final crux section at a blank wall
split by a narrowing crack (#1-3 C4 good here). Climb up this steep section of rock, getting a
tricky #1 C3 to the right of the crack just as it closes up, until you gain a roof (#1 C4). Make
another mantle move to attain the anchors. Either rap or continue up PITCH 2: (85 feet) Climb up
and right on VERY loose rock until you intersect with Spectacular Spectacle midway through
the last pitch. PITCH 3: (25') Finish up on easy rock of the last pitch of Spectacular
Spectacle.
Long And Hard (5.9, PG/G) - 180'. This is fully described in the Climb Maryland!
guide, but included here for landmark idenfication. This route begins 15' right of Black
Tie Affair, shares the start with Whirlwind.
Whirlwind (5.10-*, G) - ~75'. A mixed trad/sport route. Bolts along the crux section, but
you will either need some gear for the easier stuff, or be willing to run it out. Same start as for
Long and Hard, but once you've made the first move onto the rock, stay low and traverse
right on a ledge to an outside left-facing corner. Climb through the corner (crux) past several
bolts and small ledges until you reach easier ground and a ramp. Follow the ramp up right to bolted
anchors. Hint: being able to stem really high will help immensely with the initial crux moves.
On October 16, 2005, John Kelbel and Dominic Albanese established Maryland's first (and so
far only) grade 4 route: Spectacular Spectacle.
Spectacular Spectacle (5.8 A3+ IV) - ~200'. This 4-pitch aid line climbs up the 200'
overhanging wall of Maryland Heights over the train tunnel. The bolts that are on the route may
be difficult to see as they are painted the same color as the rock. PITCH 1: Climb Center
Stage And All Alone. PITCH 2: Step down to the lower ledge and walk left until it ends in
12'. Ascend the small left-facing corner until it runs into an overhang 8' up. Climb over the
overhang and continue to follow the obvious right-leaning line ending below a prominent 2' roof
and a 2-bolt anchor. Note: the belay anchor is a full-on hanging belay! One fish hook is needed
on this pitch. PITCH 3: Tension-traverse out right, plug in some gear and lower out on it. Move
up to a wide slot in the roof and place a #3 & #4 camalot. Move up and left on thin short knife
blades in a seam on the overhanging face (crux). Step left and follow the bolt, dowel pin, dowel
pin, bolt ladder. Move up and right under a small left-facing corner/overhang. Follow the
overhanging corner to its left end and make a l-o-n-g move up to a horizontal seam. Over a shelf
to the right are 2 fixed pitons. At the bottom of the most prominent overhang on the wall plug in
a #3 camalot, then climb the small right-facing corner and crack 6' to a spacious ledge. PITCH 4:
Free-climb (5.8) the 25' long crack and face straight up to The Grand Ledge. Finish by
climbing the final 25' up an excellent crack just left of a massive 6' square detached block.
Top out.
![[topo for Spectacula Spectacle]](ss-route-topo.jpg) Topo for John's Spectacular Spectacle
Topo for John's Spectacular Spectacle
Outrage (5.12b G) - 65'. Sport/mixed. Same start as for Tomentosa Torment. Climb the
left-facing corner with metal bars covered with spray-on cement to the first bolt (sometimes a
perma-draw is there, sometimes it is stolen). Continue straight up the crimpy face to the second
bolt, then drift right to a jug (thin gear) to make a big move to the 3rd bolt. Trend up and right
onto a very steep face to a jug just right of the 4th bolt. Continue straight up past a 4th bolt
and a fixed nut to the black-painted bolt anchors in a right-facing corner. Lowering from here will
give you an idea of just how steep this face and route are. A second pitch is being planned.
Tomentosa Torment (project) - so far unfreed. Just noted here for clarification. It uses
the same start as for Outrage but begins traversing right and up earlier than Outrage.
unknown sport route (5.? G) - x'? Toward the right third of the cliff is a steep, somewhat
overhanging left-facing broad corner. Follow the bolts up and left to the anchors.
TRANSEPT TOWER
This chunk of rock appears to be a free-standing pillar as seen from the road, but in reality
merges straight into the hillside behind it. It is located at the far far right end of the broken
rock band that makes up the Train Tunnel Wall.
Ishmael (5.10c) - 30'. This line ascends the road-facing face. Climb up to a roof near the
top. Pull through it and top out. Walk off.
Ishmael Escape (5.9R) - 30'. As much of an 'escape' as you can expect to have with no gear.
Climb Ishmael until you get to the roof near the top. Scoot around to the right then up to
the top.
Project (5.?) - ?'. Around the corner right of Ishmael, climb up the face to the
top.
SIGN WALL
John Kelbel worked out a challenging alternate start variation to Hard Up
The Hard Way Up (5.10c/d R/X) - ~45'. Beginning about 6' left of the start for Hard
Up, near the right end of the graffiti "Debbie", climb up and pull through the overhang,
moving left and up the face, to a ledge. Continue up to the slightly overhanging blank face
(2nd crux) directly below the rap anchors. Top-rope recommended, as there is almost no
protection on this route.
Daniel's Variation (5.10 R) - ~50' This variation adds some spice to the already exciting
Sign Route. Climb as you would for the Sign Route, but at the middle of the sign
(good rest) build a life nest of gear and take off up the unprotected face above past a large
bulge and a long reach. At the horizontals above, you can finish in nearly any direction
you want: climbing straight up will take you past some loose rock, and going left will bring
you to a sturdy tree (105' rap down D Route) and a comfy belay ledge at the top of the
D Route slab. Do your best to protect well for your second, for if they fall at the
beginning of the runout, it can be hard to get back on.
The Great Escape (5.12a/b PG) - ~140'. Start on D Route and climb the corner for
about 30' until you reach the bottom of an overhanging, left-leaning crack system above you.
Carefully protect the blocky stretch of rock that leads to the base of the crack. Climb the steep
crack up and around the corner (having two yellow C4s helpful for pro). At an undercling/sidepull
near the end of the crack, plant your feet well, make a big move up to an obscure pocket, and roll
over onto the slab on the left. Either stop here and build a gear anchor, or finish on Dee's
Rival. The crux of the route is only 25-30' in length.
BABY BURN WALL - Instead of turning off to the right in "The Gully"
to access Dee?s Rival, et al, continue up 15' and scramble through the ramp on
the left to reach another platform at the base of a short friction wall.
Metropolis (5.10) - 60'. This prominent face and point of rock is directly above the Baby
Burn Wall area.
YELLOWJACKET WALL - 45' to the left of BABY BURN WALL is a large ledge with a
few trees and boulders. Below this is a short and steep wall. The easiest way
to get to the climbs is to rappel down to the ledge with a cedar tree. Note:
the climb Yellowjacket was put up by Scott McClurg (who in the book was
mentioned as the belayer whom the yellowjackets were bothering).
Metropolis (5.10) - 60'. This prominent face and point of rock is directly above the Baby
Burn Wall area.
JEFFERSON ROCK:
Lat: N 39°19.355'
Long: W 077°43.996'
Sick Pursuit (5.11) - Climb the crack through the overhang and top out.
Ths route is actually on the Jefferson Rock on the other side of the town
of Harpers Ferry. From downtown, follow the Appalachian Trail south for a few
minutes until you come to an overlook. The route in question starts on the side
of the rock closest to you as you approach from town, but down below the brush.
You'll have to find a way (there are several) to get to the base of this rock.
Find the huge crack that cuts through the overhanging wall/roof. That will be
this.
GPS coords:
Lat: N 39°19.586'
Long: W 077°43.531'
Skink Rock is one of a number of outcrops located on Elk Ridge, and is a hidden gem not far from the
more well-known Maryland Heights. An excellent destination for doing top-ropes and short leads, as
the ground along the base is flat and level, affording many places to stand, sit, and relax. The only
drawback to this area is the dusty lichen that coats much of the rock. Of course, the more people
come to play here, the less the lichen will clog your pores...
Skinks are not geckos, and geckos are not skinks. They are two different species. One way to discern the two
species is to check out their feet. Geckos have suckers for toes; skinks have little claws. You can google more
differences; I'm not going to cover them here. That said, there are 600-800 different types of skinks in the
world. If you are quiet while visiting this crag, you may see a few of them around.
If you come at the right time of year (mid/late summer), there is a small patch of blueberry bushes
growing along the top of the cliffs. Take care not to crush them too much while setting up top rope
anchors, so others can enjoy.
Parking coords:
Lat: N 39°19.498'
Long: W 077°42.954'
The parking is the same as for Balcony Rock above. See also the associated note about parking there.
Alternative parking is at one of the pulloffs near the trailhead.
Lat: N 39°19.xxx'
Long: W 077°42.xxx'
Another option is to park in town somewhere and hike over (can add 1-2 miles to your
hike, one way).
To get to Skink Rock, walk down the road away from town, towards Harpers Ferry, until the road does a
hard S-curve to the left and crosses over the RR tracks. Step over the guardrail and find the well-worn
footpath that goes uphill from behind the concrete barrier retention wall. Follow the path upwards and
left until you come to the main Maryland Heights overlook. From there locate the main MH path that would
take you to the parking area for the Maryland Heights hike. As you go up, find the fainter footpath that
veers off to the left 20-30' up the main MH trail. Follow this fainter path (that gets more obvious higher
up) for about 300' or so, then peel off steeply downhill towards the rocks.
For anchors you will need either fairly long lengths of webbing/static line (20-30' in most cases) and
you can also use gear in some places. If you have no gear, you may need to have some webbing/static line
that will reach 50-60' for some routes. Most of the anchors are trees, but there are a number of exposed
sections of rock that will take some gear. Most of the horizontal cracks are flaring, so you need to be
well-versed in your gear placements here for TR anchors.
The routes are described right to left as you would see them approaching the cliff. The routes to the right
of Unyielding Finale are pretty clean and lichen-free. Everything left of Unyielding Finale is
coated with a dusty lichen. You might want to bring a wire brush.
Skink Rock Chimney (5.6) - 17'. This is the first 'real' climb on this rock. Climb
the short, blocky chimney to the top.
project (5.12?) - X'. Climb the face immediately left of Skink Rock Chimney and right
of the Carpet Crack corner, without using either.
Carpet Crack (5.8* G) - 27'. A classic corner crack climb. If it were taller it'd get two stars. Jam,
layback, or stem your way up the corner to a ledge, but continue up a few more moves following the corner and
face moves on the left to the top. If you want to lead this, you'll need gear from 3-5 inches. You bought that
#5 Cam for a reason...didn't you?
Skink Magic (5.9+) - 27'. Staying out of the corner of Carpet Crack, climb straight up the face
on small but decent finger ledges to the top. The arete is off route as well.
Bluepill (5.10a) - 27'. Constrain yourself to the arete immediately left of Skink Magic to the
roof. Finish by continuing up the face, using the arching left arete as needed. For more fun, pull the roof
when you get to it, finishing on easier moves.
Air Show (5.11) - 33'. Begin in the middle of the broad, lichen-free face below the wide roof 10' left
of Bluepill. Climb up the face on small holds that just get more and more technical. At the roof (V1),
climb up through the weakness that forms a small right-facing corner to the top. If you fall below the roof,
you will understand the name of this route.
V1: Air Show Right Exit - When you reach the roof, exit out on jugs and slopers, slightly to the
right of the line you followed up to the roof.
Rags To Riches (5.9** G) - 33'. Stellar route, possibly one of the best in Maryland. Begin 10' left of Air
Show, climb this fantastic corner crack system up to the roof. At the roof, follow the crack out and step
left, reaching up to either a ledge or a jug, depending on your ape index. Power up to the top. Pumpy route,
a solid lead that takes mostly medium to big gear. A rack of #0.5 to #5 camalots with some long slings is about
perfect.
Unyielding Finale (5.10a/b) - 37'. A bit sustained, and requires some brains.
Climb up the blocky inside arete/corner just left of Rags To Riches until you meet
the roof of Rags To Riches. Finish on the last moves of Rags To Riches.
Alternatively, about halfway up step left around the main arete onto the main face and
continue to the top there. Little less of a puzzle, but no less trivial as you get higher.
Driving With The Top Down (5.8* ) - 37'. Start on the small boulder at the base of the cliff 5' left of
Unyielding Finale arete. Follow the line of weakness up, trending somewhat right, to a small overhang.
Continue up gently right (crux) and then straight up to some horizontals near the top. The nice holds around
the crux lean the wrong way. Enjoy!
Dancing With Trees (5.6) - 35'. Really, though, there is only one tree to dance with. Begin at the series of
short, blocky right-facing corners 8' left of Driving With The Top Down. Climb up these short corners
to a stance. Then either step right and continue up the main corner (awkward, with the tree) until it ends, or
aim slightly left and ascend the outside face just left of the main corner on a series of welcome but not
obvious holds (avoids dancing with the tree). Where the two lines meet again, follow the thin crack in the
face left of the shallow left-leaning corner to the top. There are other finish variations to this route on
the right.
Conquest (5.10d) - 32'. This is likely a variation to Conrad Vs The Skink
Monster. One move wonder crux, otherwise this would be probably 5.9. Start on the
face between Conrad Vs... and Dancing With Trees, without using either the
crack or block right facing corner. Climb up to a stance then ascend the more or less
smooth face, aiming for the small block roof just left of the end of Dancing With
Trees. Finish through the roofs high overhead as for Conrad Vs The Skink Monster.
Conrad Vs. The Skink Monster (5.11-) - 31'. Who will win? Begin at the crack system 6' left of Dancing
With Trees, just right of a medium-sized oak tree growing next to the base of the cliff. Climb up to a ledge,
then delicately work straight up the face to the small roof near the top of the wall. The crux here is finding
feet while on tiny crimps for the hands. Pull past the roof by following the crack and corner on the right.
The White Man Headbob (5.10a) - 31'. Begin as for Conrad Vs The Skink Monster. Once on the ledge,
drift left as the holds lead you, then angle back right when you are immediately below a long, few inch wide
roof. Reach over to the longish right-facing corner and work extremely tiny footholds which verge on imaginary
until you can reach the slightly flaring hand crackabove (crux). Once you've got the crack, you'll still have
feet issues, but should be able to work it out to gain the top in a few short moves.
Oh My Eyes! (5.7) - 29'. So-named for the amount of lichen that showered down on the climber when he was
looking up, searching for another hold. Start at a broken finger crack 8' left of White Man Headbob.
Face-climb, layback or jam up this short crack to a ledge 8' up. At this point aim left for the left-leaning
right-facing flake system in the middle of the face (V1). Follow that until it ends, then work your way up the
face (crux) to some good horizontals then the top. Note: in the early 2010s four bolts and a two-bolt anchor
were added to this line. The bolts basically follow the crack system up. The two-bolt
anchor at the top is helpful for dropping a top-rope on the route as setting it up
otherwise requires a bit of ingenuity and long, long anchors.
V1: Oh My Eyes Right Finish (5.7-) - Instead of heading up left, climb directly up to a fissure notch at
the top of the wall. Climb up that until you run out of rock.
Eyes Of A Stranger (5.9+) - 29'. Start on the broken hand crack 8' left of Oh My Eyes!. Once standing
on the ledge, make a very commiting move (crux) to head straight up and right to grab a deep ledge. Without
losing momentum, keep angling up and right to gain the right-facing flakes of Oh My Eyes!. Finish on
Oh My Eyes!. You might consider this a variant start for ...Eyes! or a worthy standalone route.
Kuutamo (5.8-) - 28'. Finnish for "moonlight". Begin either on Eyes Of A Stranger or at a
blocky corner 5' further left of that. Climb up 8' to a stance and high-step into the widely flared crack and
gently following it for a few moves until it peters out. If you are height-challenged, you will need to make a
couple of creative and delicate moves (crux), possibly employing a mono-doigt pocket in the face, in order to
gain a hand ledge up right (but thin feet). Reach up, crank down, and hit the top.
Skink Rock tapers off to blocks after this point.
GPS coords:
Lat: N 39°19.617'
Long: W 077°43.548'
Approximately 200 feet to the left of Skink Rock is another expansive, ~300' wide, wall of rock.
Unlike Skink, however, it is more a jumble of bouldery/blocky gullies and sheer corners capped
by overhangs. This not-oft visited band of rock is sometimes the home to peregrine falcon
nesting boxes put in place by the NPS, so if you go here and you see said boxes at the top
of the cliff, please resist continuing on and climbing there for the season. Return again
in the fall after the chicks have safely fledged.
Anchors. You will need LONG webbing or static line 30'+, depending on what route(s) you
opt to set up), and you can back that all up with a light rack of medium gear in some
places.
Access is by rappel, or scramble down the steep gully between here and Skink Rock, or
scramble down the hillside on the far north end of the crag where the wall tapers down.
Lower Buttress
This is the first vertical bit of rock you would encounter coming over from Skink Rock.
It offers a handful of route options on its western and northwestern sides.
The Corners.
Uphill to the left of the Lower Buttress is a series of right-facing ccorners, some of
them capped by roofs.
unknown 5.? - X'. This route climbs the first corner to the left of the steep
ravine. The start is a bit stout.
Stone Fort Corner (5.7) - 37'. Work up the middle corner up to the overhang
utilizing. some awkward holds and moves. At the 'hang, pull over right onto some broken
blocks to skirt past the roof, then turn left again and climb the face and corner above
the overhang to the top.
unknown 5.? - X'. Start at the same spot as for Stone Fort Corner, but
head left up the ramp to a three-trunked tree and a ledge. Turn right and climb the corner
until it ends. Finish on the lichen-covered face above.
The next set of climbs are located ~120' left of Stone Fort Corner, just past the
wide stretch of blocky stuff.
Dirty Lichen Party (5.9) - X'. Climb up the center of the main face just right of
the large right-facing corner (optional: start in the corner for a few moves, then step
right onto the face). Pretty much go straight up to the top. Var: about 2/3 of the way up,
when the dusty, sandy lichen gets thicker and your traction options for hands or feet get
worse, step right to a small break in the wall and desperately clamber up to the top.
Guns of the South (5.7+) - X'. Climb the large right-facing corner to the rhododendron bush. If it
is still there, step right onto the face, make some desperate 5.7-ish moves until on a foot
ledge above the rhodo, then step back to the corner and finish up with a few layback moves
until it is possible to follow the crack up a ramp to the left. Less dirty than Dirty
Lichen Party by a lot.
The next set of climbs are located ~60' left of Dirty Lichen Party, near the large,
flat-ish movie screen wall.
Peppermint (5.9*) - 38'. Begin at the broken blocks with the jagged vertical
hand/finger crack at the uphill most point of ground, below and right of the large
flat-ish movie screen wall. Climb up to a ledge, then work your way up along the narrow
left-facing corner/arete to the top. Slightly overhanging, a bit punpy, the holds are
much better than they first look.
I Think I Can Do It - (5.10a*) - 38'. Start at the same point as Peppermint.
Once on the ledge 15' up, step left and climb up the mottled colored face 5' left of
Peppermint, tackling one sequence of boulder problems after another, broken by a
good hold every 6-7 feet. Finish below the large right-facing corner left of
Peppermint.
Northwest Branch Creek has a rather nice collection of boulders and boulder problems that are 1) fairly easy to
access, 2) fairly close together, and 3) host a nice range of problems from V0 upwards to V11 - something for
everyone!
Cory Hanson has put together a very nice pdf guide to the area, so this site does not presume to supercede
or replace the work he has done. You can access a copy of his
bouldering guide here.
Great Falls/Angler Inn Parking coords:
Lat: N 38°58.917'
Long: W 077°13.608'
From here follow the path down to the C&O canal, turn left, go a short distance, turn right, and head down
the steepish hill to the boat put-in.
Carderock Take-Out coords:
Lat: N 38°58.192'
Long: W 077°11.941'
Carderock Take-Out Parking coords:
Lat: N 38°58.255'
Long: W 077°11.904'
This is the easiest place to take out boats downstream from Vaso Island. Otherwise you can try fighting the
current and go back upstream to where you put in...
Offut Island
GPS coords:
Lat: N 38°58.469'
Long: W 077°13.460'
Hermit Island
GPS coords:
Lat: N 38°xx.xxx'
Long: W 077°xx.xxx'
Turkey Island
GPS coords:
Lat: N 38°xx.xxx'
Long: W 077°xx.xxx'
Vaso Island
GPS coords:
Lat: N 38°58.486'
Long: W 077°12.681'
This is the large island directly across from the main Carderock
climbing area. The far southern side of it holds most of the climbing on the
island.
GPS coords:(Bonsai Wall area)
Lat: N 38°58.486'
Long: W077°12.681'
Note: desired gear anchors here include blue tricams, #0.5-1 Camalot (for a couple routes
the #2 or 3 could be helpful)
GPS coords:(Salad Bar Wall area)
Lat: N 38°58.404'
Long: W077°12.509'
GPS coords:(3rd wall area)
Lat: N 38°58.396'
Long: W077°12.502'
GPS coords:(base of Crack With No Name area)
Lat: N 38°58.369'
Long: W077°12.476'
GPS coords:(Ventura Highway area)
Lat: N 38°58.366'
Long: W077°12.459'
GPS coords:(Kayaker area)
Lat: N 38°58.341'
Long: W077°12.427'
GPS coords:(Next Wall area)
Lat: N 38°58.330'
Long: W077°12.424'
For Carderock itself:
Parking:
Lat: N 38°58.567'
Long: W 077°12.323'
GPS coords: (Hades Heights)
Lat: N 38°58.509'
Long: W 077°12.393'
GPS coords: (Jungle Cliffs)
Lat: N 38°58.554'
Long: W 077°12.412'
There are already guides to the climbing in and around the Great Falls
region, but there are a couple of easy-access walls that have been
overlooked for one reason or another. These are covered here...
AMPHITHEATER WALL
GPS coords:
Lat:
Long:
Located off the Carriage Road trail to Matildaville is a grassy meadow partially surrounded by
a short wall. There are not many routes here, and most all are short (less than 20-25'), but
the area does offer alternative climbing when the river-side routes are all taken! Or when the
Potomac is flooded so much that many of the river-side routes are underwater. The routes range
in difficulty from 5.2 to 5.9 or so (maybe a 5.10 or two around). The 'main' area has a tree
right at the edge of cliffs to rig a short toprope anchor to (to set up one can either climb
the 5.4 route to the right, diagonaling to the tree, or bushwack around the far right up to the
top). Bring a frisbee to play in the meadow. Bring a blanket to lay in the sun. Bring a picnic
to munch on while watching everyone else climb...
AID BOX
Add the following to this section:
b>Wake Up Call (5.9/5.10 - 5.10/5.11) - Climb the face between Dark Corner and
Skid Row. Following the hairline seam only w/out using the left-facing corner to the
right makes it a *much* harder route! Can climb off of either setup (Dark Corner or
Skid Row).
As the largest concentration of climbers in the central Maryland region are
located in....well, central Maryland, the rock in western Maryland often goes
overlooked by the central Maryland climber. If the central Maryland climber
decides on a road trip, it's usually a "destination" spot such as Seneca, the
New, or the Gunks. Whoever heard of climbing in the hilly, mountainous region
of western Maryland, anyway? That's just crazy talk!
It's a shame that not more know of the resources that western Maryland offers. What
follows in this section are a few areas that you might choose to explore if you are
either 1) not up for a full weekend commiting road trip or 2) are "in the area". So
pack your rope, harness, shoes, and other climbing paraphenalia, and get yer butt
out on the road to explore some new stuff!
Rocky Gap State Park is located 30 miles west of I-70 off of I-68 (but before
you get to Cumberland). It is fairly easy to get to, and the setting and area
is quite nice (the state park is mainly the lands around a lake with a resort
attached). The climbing is hidden off in the woods past the far western end of
the lake. And there is quite a bit of climbing to be done here! There are
essentially two main cliff bands (with a third waiting investigation) to
explore: the Spillway Cliff (until a better name is learned) and the Canyon
Overlook Cliffs.
The rock here is very reminiscent of Sugarloaf Mountain and Annapolis Rocks.
Have fun.
Warning: during hunting season you might find it prudent to wear bright colors,
as the rock outcrops tend to be in managed hunting zones. Or just skip climbing
there when there are gunshots going off in the hills nearby.
Directions: From Hagerstown and points east, take I-70 to Exit 1A, which puts
you onto I-68 West. Take I-62 for 30 or so miles to Exit 50. At this exit bear
right at the offramp and in about 1/3 mile you'll approach a guardhouse. Just
before that you want to turn left towards the resort. Follow that winding road
back for 0.8 miles to the parking area near the North Canyon Overlook trail. As
of 2009 the road beyond is closed to public vehicles, open only to bicyclists,
pedestrians, or park vehicles.
Parking coords:
Lat: N 39°41.757'
Long: W078°39.843'
To get to the Spillway Cliff, stroll down the pedestrian/bicycle-only access road
for 0.3 miles until you reach the guardrail on the left just after a green
electrical box, over the earthen dam (just past the water treatment plant buildings).
From here follow the path/trough down alongside the woods and steep hillside until
you reach a small bouldering wall on the left. You can play here, or continue down
another 40' or so and you'll be at the start of the main cliff band. As there is no
established trail system here (it is visited, but not heavily), you'll find yourself
bushwhacking a bit now and again as you make your way along the base of the cliff.
Pick a line and find a way to the top (there are a few break points in the rock that
will allow you to get up top), set up your rope(s), and play! The tallest stuff will
be at the far right end of the cliff (note the huge roof problem at the far right end
of this rock band).
If you wish to proceed straight to The Great Roof, from the electrical box mentioned
above, turn left off the road and head straight up the hillside following a small
footpath into the woods. If you keep the cliff band on your right as you go up, you
will come to a small overlook after a few hundred feet. You're there!
![[Rocky Gap Spillway Cliff - the great
roof]](rocky-gap-greatroof.jpg) The great roof of Rocky Gap's Spillway
Cliff area
The great roof of Rocky Gap's Spillway
Cliff area
To get to the Canyon Overlook Cliffs, take the North Canyon Overlook trail
(located just north of the wide parking area, on the left) back to the overlook.
Enjoy the view, then backtrack a dozen feet or so and head off into the woods as
the loop trail will take you. As you pass the small #7 marker post you'll see rocks
downhill to your right; aim for them. You'll end up scrambling a little to get to
the base of the rocks. Once you do, turn left and start walking! You'll find a
number of small roof problems here to play on. Some of the rock is difficult to
get to, being overgrown and all. But other sections are tree-free (all you need to
do is find your way to the top and set up your ropes; if you walk the entire
length of the cliff you will get to a ramp that will lead you up, and from there
you go left; you'll be walking next to the short upper tier of rock at
that point).
Route information has been difficult to come by so unless a route name is truly
known, a note will be placed in the route description indicating this is a
placeholder name (until either the true name is revealed or it is discovered
that no one's climbed it before, then the placeholder will become the name of
the route).
SPILLWAY CLIFF
GPS coords:
Lat: N 39°42.047'
Long: W078°39.845'
This band of rock faces northeast.
The Great Roof (5.6/5.7*) - X'. At the far end of the Spillway Cliff is a
massive roof 45' above you. Climb up through the blocky 'hangs, staying right
of the squarish block roof split by a hand crack, and finish on the left side
of the roof. If you climb up through the handcrack (not all it's cracked up to
be, either), it's more like 5.7/5.8.
There are more routes to the left of this one. The rock band essentially ends
[for climbable rock] to the right of the great roof.
CANYON OVERLOOK CLIFF
GPS coords:
Lat: N 39°41.880'
Long: W078°39.976'
Hidden below and off to the overlook left is a wide swath of rock that offers a fair
bit of climbing. Anchors include trees, boulders, and gear placements.
Overlook Routes
Though the routes are short, this is probably one of the easiest places around to set
anchors, what with the trees being readily available right at the overlook. However,
when setting anchors, if you use the trees on the hiker side of the fence, be sure to
keep them low so visitors to the overlook are not inconvenienced! (and your anchors
aren't compromised by someone tripping over them and undoing your equalizing efforts
- and so as to not earn the ire of the non-climbing public). There are also options for
setting gear anchors just below the fence barrier as well or in addition to using tree
anchors.
To access the base of the rock below the overlook either head right from the right end
of the overlook fence for 70' until you get to a large, flat boulder. Then cut down and
left and follow a shallow bench along the hillside (almost looks like a trail) until you
get back to the rock, or push through the woods off the left end of the overlook fence
and scramble down the steep slope and ledges, turning right once you are at the main
ledge.
See Nick Climb (5.5) - 22'. Begin a few feet to the right from the big horizontal
pancake flake that sticks out from the left end of wall. From the ground, make a quick
bouldery move up (or just walk around and step up) onto a broad ledge. Climb up the wall,
on the right side of the vertically projecting block (going left into the crack makes
these moves a wee bit easier. Keep going up aiming for the broad notch and right-facing
corner at the top.
See Nick Pulloff (5.8) - 23'. Begin 15' from the left end of the wall, a couple
feet left of the end of the ledge before the step down by a bare-branched pine tree.
Climb up the white rock to a broad roof and work out holds to pull through to the top.
See Nick Overlook (5.5) - 29'. Begin 5' right of See Nick Pulloff, just
right of the bare-branched pine tree, directly below the broad roof with a prominent
right-facing corner. Climb up the wall to the right-facing corner below the roof, then
utilize the corner to pull around the roof.
See Nick View (5.7) - 28'. Begin 10' right of See Nick Overlook, below the
diagonal notch toward the right end of the broad roof below a short right-facing corner.
Climb up or around the larger right-facing corner in the main wall to a stance below the
notch. Stretch to gain some holds in the notch and out left to do a hero move through the
roof. More challenging for shorter folk.
West Wall Routes
This stretch of rock starts from the break in the rock band to the left of the overlook
and continues in a southerly direction for several hundred feet. Lots of climbing
opportunities about, but a lot of it is overgrown with lichen and rhododendron bushes due
to lack of visitation.
Dramatic Exit (5.8-5.9) - 33'(?). Begin 5' left of Quietly Confident. Climb up
to and pull through the broad roof ~1/3 of the way up (5.8). Continue up to the blocks
below the high roof and pull through on the right or left of the 'block line' (5.9).
Var (5.8): instead of pulling through the high roof, step left and climb up through
the notch.
Quietly Confident (5.9+/5.10a*) - 43'(?). Start between two blocks by the wall
to the left of the large tree, directly below three wide roofs, 30 feet right of
the left end of this cliff band. Climb up the blocks and through the first roof
on small holds (5.6/5.7) to a stance. Stay solid pulling slightly right through
the second roof on decent, flat holds (5.9/5.10a). Once you've cranked this,
work up left to the shelves below the final roof, climbing through the imposing
roof on great holds. Pull through and claw the last few feet to the top.
You Look Like A Nail (5.8) - 47'(?). Begin 16' right of Quietly
Confident, directly below a roof midway up split with a jagged crack. Climb
up to the roof and crack then crank through the roof, reaching high up to a
sharp jug (if you can; height-related problem, so find other half-decent holds
if you can't reach the jug) and stepping high right onto the small arete point.
Crank through this, reaching high again to a small horizontal finger crack
below the next overhang. Get yourself back into position, then bang through
this next wall, aiming for the small tree just above - and being very
delicate as you approach the ledge covered with dirt, rocks, and tree debris -
it is all loose!! Stop at the small tree, or very delicately work up the
decent holds out the right end of the roof (take care your feet do not dislodge
any of the loose stuff below the roof - you might want your belayer (and rope!)
to be off to the side somewhere while you climb this!).
Gray Area (5.3-5.5) - X'. Begin 26' right of You Look Like A Nail, 10'
right of a big tree growing on a ledge a couple feet off of the ground. Climb
pretty much anywhere through the small blocky overhangs to the top.
Ode To Lichen (5.9) - X'. Start 25' right of Grey Area, immediately
left of a smallish tree next to the wall. Climb up easy shelves through a bulgy,
ledgy wall to the triangle shelf/flake immediately on the underside of the broad
roof high up. Work up and through the roof at this point, then finish on the lichen
slab above to the top.
TANSTAAFL (5.9/5.10) - X'. There Ain't No Such Thing As A Free Lunch. Begin
just right of Ode To Lichen, on the other side of the smallish tree. Climb up
the wall and aim for a point below the high roof a few feet right of the triangle
shelf/flake of Ode To Lichen. Get a stance and find the hidden holds, then
pull through the roof directly. Finish on the ledgy lichen slab to the top.
Var (5.4) : Instead of pulling the roof directly, once below the high roof, work your
way right on a ledge to the right end of the roof and climb up the right-facing corner
to gain the slab above. Trend left and up to finish.
At just under three-quarters of a mile long, The Narrows is perhaps the largest crag in
the state. For years climbers have driven under it, and gazed up, wondering how to
get there, and what the rock was like. During those years, a very few hearty
souls actually managed to brave the trek to the rocks and do a few routes. PATC
has been there a few times some decade or three ago, and a handful of other
climbers (such as local guide Darrel Spence) have visited the wall, but left
about as quietly as they came. For whatever reason, word of their feats never
really reached the climbing community. And so the crag slumbered for years,
with the only visitors being locals who would sit up on top to make out, or
drink and toss their beer bottles in the void below, or both. Even the
geocaching community attempted to foster interest in this area by putting a
geocache atop of the cliffs, but so few geocachers bothered to visit it, the
cache was eventually removed. The place was too remote, too far off the normal
beaten track - even if it was just a couple miles outside of downtown
Cumberland.

The main wall of The Narrows. "1" is the top of Cumber
Honey, "2" is the top of the Jim Pick Wall
Then in mid-2002 Mike Varlotta of Pittsburgh hooked up with Darrel Spence, and
through conversation Darrel led Mike and a small group of other Pittsburghians
to The Narrows. With dropped jaws, Mike and crew were understandably awed and
impressed. Here was a goldmine of untouched, BIG rock, about 2 hours distant
from Pittsburgh! And while, yes, they knew some routes had already been done,
it was very clear that a lot of the area had never been climbed. So began a
campaign over the next few years to begin developing the area, putting up new
routes and making them safe by trundling literally tons of loose rock
from the walls above. It was adventure climbing at its finest. By the spring of
2004 there were 70 established routes, and by the end of that summer, over 100.
90% of these are noted in this webguide (that should be enough for you for now
until the guide itself comes out, no? :-) The routes went from 5.2 to 5.10+,
with the bulk of them in the 5.7 to 5.9 range. So not only was this a superb
find, the bulk of the routes appear to be in the realm of your average climber.
This was not to be an area where elite-only climbers could play.
To describe The Narrows, it is easiest to say that it is like Seneca Rocks,
except laid horizontal like the Gunks. If you can imagine that, you have this
place pretty much nailed down. Lots of ledges, numerous horizontals for gear
placements, some quite imposing roofs, walls upwards of 200' tall allowing for
multi-pitch climbing opportunities - everything a growing climber needs without
travelling to Seneca or the Gunks.
Mike and his Pittsburghians, as well as more recently Indy and a handful of
Marylanders, have been working steadily to develop the area: install and
maintain trails, clear out loose rock, set up rappel stations, etc.
While first-ascent fever does rage among climbers, it is asked of those
climbers who come to visit this crag that they take a hand in helping maintain
what is there, and not come out, do a few first ascents, then go away again.
This is a resource for everyone, all climbers, and all should share in its
growth and development, as unpleasant as some of those tasks are.
When you first come to this area it is encouraged and suggested that you stroll
along the bottom and attempt(!) to identify various landmarks before you climb
(difficult as that might be, esp when the foliage overgrows down low), in
order to keep your bearings and learn where your access and decent areas are on
the cliff. There are over a half dozen rap stations already established here,
most of them easily reached by walking along the cliff. There should not be a
need for too many more.
While a couple pitons do exist, there are no bolts at this crag (except at
a few rap anchors), nor is there a need for any. For multi-pitch climbing, there
are plenty of ledges to anchor off on. For single-pitch climbing, there are plenty
of trees up high to use as anchors and rap stations. Some places can be set up on
top-rope, but these are primarily over at the Far Wall area. Some of the shorter
leads along the main section of cliff can be set as top-ropes, but someone will
have to do a lead climb up them first. In any event, with so many other places in
Maryland and the surrounding states already having a large number of top-rope crags,
the top-rope routes here will not likely see much visitation for the time being.
Climbing at The Narrows
Given that the cruxes tend not to be sustained in the Seneca fashion, it has
been found that sending the routes in one long pitch has given the most bang
for the leader buck - almost all routes have been put up in a single pitch.
However, since some of the routes are 180'+, and sometimes wander, it has been
found to be extremely useful to climb using two 60-meter ropes and doubling up
on cams. Otherwise, if you want to do routes in multi-pitch fashion (generally
two pitches), a standard rack and single 50 to 60-meter rope will do the job
(note, however, that a few rap stations require two 50-meter ropes!).
Given the abundance of ledges, comfortable, well-protected stances should not
be difficult to find.
Rock Quality
While most of the established routes here are pretty clean of loose rock, do
not assume that every hold is solid - ALWAYS
TEST SUSPECT HOLDS AND BLOCKS! You don't want to accidently pull
on an abdomen-sized (or larger) block that everyone else has managed to miss and drop it on
your belayer, now, do you? There is still loose rock on a number of the climbs
here, even those which have been done a few times over. Holds also might snap
off over time. This isn't Seneca (which has loose rock still, even after decades of
people climbing there, and has large sections periodically fall every couple/few
decades) or the mostly pristine Gunks. This is a new, pioneering area. Treat it
with respect. And if you do find a large loose block but it is unsafe to trundle
(due to the presence of others below you), please mark it with a chalk 'X' to let
others know that it is a danger. Hopefully someone will be there to trundle it
later when no others are below.
![[Rockfall below Dancing Spanish]](narrows-2009-rockfall.jpg) Rockfall on the trail below Dancing Spanish...
Rockfall on the trail below Dancing Spanish...
NOTE: in the winter/spring of 2009, the enormous hanging arete
of Dancing Spanish... fell from up high, obliterating the mini-gendarme noted in
A Winter's Tale below, leaving piles of rubble on the ledges above the trail, half
destroying the trail itself, and leaving a swath of debris and destruction into the woods
below, obliterating trees and foliage for nearly 50-70'. Take great care while in this area!
NOTE: on June 26, 2011, a large block forming the crux section of the
route Unexpected Party broke free and fell to the ground while someone was on it.
The rock itself is Tuscarora Sandstone, identical to that of Seneca. Except
the strata is horizontal, not vertical (i.e., Gunks-like). For those of you who
have frequented Seneca, this will be familiar yet "new" rock. Enjoy it!
Getting Off
There are a half dozen already-established rap stations for the main
section of cliff, but if that isn't an option, you can still always walk off!
It is suggested that on your first visit(s) you climb some of the routes near
established rap stations in order to familiarize yourself with them as you
venture further and further afield (acliff?) on other routes.
Remember that much of the main cliff band exceeds 150' in height, so it would
be prudent for you to do double-rope raps (or do two raps if you have an
intermediate rap station on hand; more common for people to do double-rope
raps).
At present time the following rap stations are established with approximate
associated heights:
- Free But Worth It - 70'. Bolts and rings.
- Kiddie Land - 50'. Slings on tree.
- Tunnel of Love (also known as Fun House rappel), two separate
rap stations: one of webbing at the top of the rocks, and a pair of rap rings and
bolts 10' below the webbing - 70-80'
- Unexpected Party - 90'. Slings in pine tree set back 10-15' from cliff edge.
- The Howling - 80' [there is also a shorter rap set on top of the
cliff directly above (and down to) The Howling rap that allows
convenient raps from any of the pitches that continue from The Howling
ledge. In all here cases the raps stations are slings with rings around trees.
- Jim Pick - 120'. This bolted rap station is set discreetly near a tree
~15' below cliff top; can be reached via easy 3rd class ledge scrambling. A single
60-meter rope will get you close to the ground with rope stretch (you'll have to
scramble the last 15' or so).
- When the Buffalo Roam - 190'; a black piece of webbing tied to a tree at
the top of this climb, set back from the edge a few feet (as of 2005; may need to be
replaced). It is recommended that you do this in two raps, as the friction of trying
to pull the ropes down from here is...formidable. NOTE: as of 2011 this rap station
has disappeared.
- Shardly Worth It - 170'
- Sisters Rappel - 85'; this is set ~40' below the cliff top and can
be reached via a series of ledges and easy 4th class scrambling (there was a short
handline/rope to assist with the 4th class downscramble as of 2004, but it may need
to be replaced). A short distance (about 200 feet) north of the rappel (at the top
of the Ballad Wall) is a building and an antenna. Follow the jeep trail south along
the ridge until it ends. Off a nice rock outlook stands a small "island" of rock,
separated from the main ridge by a tiny gorge 10 feet deep and 5 or 6 feet across.
(You can jump to the "island.") Climb down into the tiny gorge. The rappel is off a
tree at the south end of the gorge. Be careful getting out to it!
There are a few other rap stations also established, but these may or may
not be permenant at this time. One is to the right of the top off for King
Tut, approximately 30 or so feet away.
Due to the potentially unknown nature of the rap stations, especially those built
out of webbing, it is generally a good idea to carry 1-2 pieces of 10-15' 1-inch
webbing with you on a climb, to either add to an existing rap station (and thus
bolster its strength; some of the webbing rap stations are quite old and are in
need of replacing) or to re-establish one that's missing.
If you are coming from the far end of the cliff and want to hike out, it's
almost easier to just hike down the hill than deal with rapping off. But if it
is just a couple of you and you don't want to deal with the steep road hike
out, you can easily access the Jim Pick rap station via trails that run
along the top of the cliff. For you climber-geeks out there, GPS coordinates
for the rap stations have been included in the descriptions below.
Flora & Fauna
Be aware that this is a not-heavily human-trafficked crag. You will encounter biting
ants, poison ivy, and greenbriar. The possibilities of snakes is real (though they
seem to prefer the more heavily angled cliff band across the valley; I've been advised
there is a host of timber rattlers over there), and wasps/hornets are also a very
real possibility. In the summer of 2011 I got a report of an enormous nest of highly
aggressive hornets on Tunnel of Love - aggressive and so many that the report said
"wall of hornets...stinging the rope". Late summer of 2014 another enormous nest of
voracious hornets was discovered at the start of The Howling, with the hornets
preventing climbers from getting to How Yick Yang
Directions:
From Baltimore/D.C.
Take Exit 44 for Alt 40. Once off the highway, bear to the right and continue
0.7 miles until you are forced to turn hard to the right (the road before you
will be one-way towards you, and there is a concrete median that will divert
you to the right). A couple hundred feet later you will come to an angled
intersection; head right. The road (Alt 40) is now once again two-way. After
another 0.9 miles you'll have come to the third in a series of traffic lights.
Turn right here onto Pear Street. At the first/next intersection turn left onto
Columbia. Follow Columbia (~0.25 miles) until it ends with a yield sign at an
angled Y-intersection with Piedmont Ave.
From I-68 west of Cumberland:
Take Exit 43D, follow the road until it turns left and comes to a stop sign.
Turn right onto Park Street. Within 0.1 mile or so you will come to a
multi-directional intersection and a sign indicating "JCT 40".
Continue straight (very slightly left) through this intersection and then
quickly turn right, getting into the left hand lane immediately. Within
less than a rope length the left lane turns left. A couple hundred feet later
you will reach the main run of Alt 40. Follow this to the third light (~0.75
miles) and turn right onto Pear Street. Follow the directions from this point
as per above.
If you are going to the main area (the tall, lead stuff), note
that as of June 1, 2007, the parking situation has changed! In the past we
had informal permission to park in the church's overflow parking lot. But recently they
have been forced to deal with people abandoning cars in the lot, and have had to pony up
for having these cars towed away. Very uncool of the people abandoning the cars there,
and the fallout from this is if there are any cars that the church does NOT
directly know about, nor have they given direct permission to, the cars will be
ticketed and towed! This is the only solution they have right now for the problem.
And alas, given the lack of parking for climbers, it can be problemmatic. So, if you are
planning on climbing anywhere on the main wall, it is suggested (until such a time that
the situation changes) that you park on the street somewhere and go in from there.
Parking Coords, Main Wall:
GPS coords:
Lat: N 39°39.698'
Long: W078°46.584'
If you are going to the Far Wall area, turn right onto Piedmont and go up for about
0.2 miles to the base of WIlls Mountain Road. Park off to the side of the road opposite
the houses.
Parking Coords, Far Wall:
GPS coords:
Lat: N 39°39.909'
Long: W078°46.424'
To The Rocks:
From the car - approach time is ~15 minutes to the main cliff! Walk west down Piedmont
until the street ends. Take the right onto Zihlman Way and follow that final street
back until it ends several hundred feet later (note: the cliffs you see across the
valley to your forward left are not the cliffs you are actually heading towards). Push
on through the woods on a footpath and follow that, trending upwards (steep in places)
until you reach a large, overhanging rock 'cave' called the Front Porch
(N 39#176;39.809' W078#176;46.741'). There are faint�pink blazes on some of the trees to
keep you on the trail.
As noted in the directions above, if you plan to hit the Far Wall area, it is actually
easier to hike up the PlastiCorps road to gain access to the state park fire road that
will bring you over to that area. Follow this up until it turns sharply to the left
towards the main PlastiCorps complex itself and a fire road (Wills Mountain Road;
unmarked as such) leads uphill from the curve. Do not take the gated road straight
ahead, but rather the gravel/rock dirt road left of that. Follow that to a large
clearing atop of the cliffs (the Sunshine Buttress area will be off to your
left). Off to the right is a trail in the woods. Follow that until it splits,
and take the left fork. After about 5-10 minutes there will be a large,
TV-sized arrowhead-shaped rock in the middle of the trail pointing off to the
left, and a stack of rocks against a tree on the left. This is your turnoff
marker for the Far Wall. The whole hike will take 40-60 minutes, depending on
your individual hiking speed (it is essentially uphill pretty much the entire
way; steepest section is the paved road, after which the grade eases back
somewhat). Until the trail system is established at the base of the cliff all
the way, this is the easiest manner in which to reach the Far Wall area.
Misc Info
The weekend of June 11, 2005, saw the first organized trail clean-up/maintenance
weekend, in which no less than 5 tvs, a 5-CD player, a cassette radio, a sheet
metal door, and the remains of a shopping cart were dragged from the base of the
cliff to the trailhead, all filling up the volunteer pick-up truck. New stairs were
put in place on the initial steep section of the approach trail, and belay platforms
and steps were put in at the base of the Jim Pick Wall. Please help take care of
these improvements to the area whenever you can, and please help take out any trash
that the few not-so-caring locals feel they need to deposit over the top. Thanks!
Update for 2007: alas, two years after the above clean-up, the Narrows is in dire need
of it once again. Currently, as of June 2007, there is now a computer and monitor, tent
parts, driveway sports toys, beer cans galore, some steel rod structure thing, and an
oven, most of this at the base near I Wanna Live/Shardly Worth It. Some
stuff was taken out on the visit where this was all discovered, but there was enough that
a more organized effort will need to be made.
Note: Hawks and eagles use this area (well, the ridgelines just north of the Narrows) as
a migratory path. You can see them readily if you know what and when to look for. Also,
sometime in 2011 the
Cumberland Gap Hawk
Watch started to set up a hawk and eagle observation post at the top of Sunshine
Buttress. (although the blog has not been updated since fall 2013, they are still up
there observing). Very friendly folk if you are up here and see them. Stop over and say
hi, they will readily be willing to help you spy the hawks (and any eagles) that are
flying over. Since they don't often get visitors, and hawk/eagle watching can be a very
isolated activity, they may talk to you non-stop. :-) But you'll learn more than you
might have ever thought to ask. You can track their daily and monthly count progress
here
Additionally, peregrine falcon are known to visit these cliffs. Whether or not they are
nesting here is yet TBD.
.
Routes
Being so long, The Narrows is segregated into sections or segments, delineated
by description and approximate GPS coordinates (for you high-tech geek climbers
out there ;-).
If you feel you have done a new route, please contact me with the details so I can keep things recorded
properly. As you can see from the FA attributes, there are new routes going up
almost every year.
Some alternate route descriptions and topos are available at
Mountain Project.com.
Unless otherwise noted, all routes are listed from right to left.
FUNLAND GPS coords:
Lat: N 39°39.798'
Long: W078°46.748'
This area is the most beginner-climb friendly of the entire cliff for several
reasons:
- It is the first area you come to after following the trail to the base of
the cliff,
- It is 40' from the Front Porch described in the Directions above, offering
a convenient place to stash packs while climbing or to escape sudden storms,
- The climbs are all on the short side - ranging from 45' to 80' which
allows for leading that is far less committing than the 150+' routes that are
the norm on the remainder of the cliff,
- You can reach the top of the clibms in this area via a hiking trail that
diverges from the approach trail about 3/4 of the way to the base (thus you can
top-rope without having to lead anything and/or walk off your climbs to return
to their base),
- The rock quality and gear placements are as good as anywhere on the cliff,
and,
- Most significantly, there is a high concentration of very easy and
easy-moderate leads that stay at the grade for their entire vertical
length.
Follow the trail out and around the right side of the initial rock shelter
(Front Porch) for 15' to a Y in the path (stay slightly higher than the trail
on which you approached). Both forks are roughly 20' from the wall. The left
fork will put you underneath Tunnel of Love, and the right fork will put
you under Monk. The most obvious of all the climbs in this area is
Kiddie Land which is used as the point of reference for many of the
others.
Hunter's Roof (5.7 G) - ~70'. This route starts 15' to the right of Free,
But Worth It, behind a large pine tree. Pull the small roof and follow the short
crack to a ledge. Follow a slab to a larger roof then pull the roof at its widest
spot, directly below a small pine tree. Once up on the main ledge work over to the
anchors at the top of Free, But Worth It and rap back down.
FFA: Andy
Hershey, Leroy Hunter, June 2015
Free, But Worth It (5.3* G) - 70'. Easy for a 5.3. Start 10' to the right of
Monk on the short section of wall that meets the path. By taking the path of
least resistance up this breadth of wall, you can keep the climbing at or below 5.3;
by working alternate lines you can add couple grades of difficulty.
FFA: Annie Jones,
Chuck Jones & Mike Varlotta, April 2004.
Monk (5.6*) - 60'. Climb the left-facing corner on the short section of
wall that is below and just to the right of the striking (but short) arete that
is about 15' to the right of the Kiddie Land corner. Reach the ledges
directly below the arete and then climb the arete and the crack just to its
right. Take a step to the right where the arete is at its steepest in order to
reach the big ledge while keeping the climb at 5.6 difficulty.
FFA: Mike
Varlotta, Jim & Lori Johnson, April 2004.
Carousel (5.4*) - 42'. 5' to the right of Kiddie Land is a 15'
crack that starts about 4' off the ground. Climb up the crack and then move
slightly right ot the featured section of vertical wall that leads up to a big
ledge. Like the two climbs to the immediate left, this is a great beginner
lead. Nice easy moves on good vertical rock with good gear.
Top-rope variation (5.9) - Start about 5' to the right and climb
directly up the face avoiding the crack on the left and the corner on the
right.
FFA: Mike Varlotta & Bill Forrester, March 2004.
Kiddie Land (5.4+* G) - 42'. Hard for a 5.4. In between where the two branches
of the
trail meet the rock is an obvious inside corner that leads to a rap station at
a pine. Climb the wide crack, blocky corner, and flakes to the tree.
FFA: Mike Varlotta, November 2002.
Preschool Dropout (5.5*) - 42'. The days prior to putting up this climb,
Gigi, Mike Varlotta's 4 year old, told him that she was "never, ever going
back to preschool..." that there'd be "no more school until
kindergarden.". Begin between the starts of Kiddie Land and Rain
Check and climb up to the short right-facing hand crack/flake partway up
the bottom third of the wall. Move up the crack through good stances and holds
and then straight up to the top of the wall.
FFA: Mike Varlotta & Jim Johnson,
March 2004.
Rain Check (5.9) - 80'. Begin 10' to the left of Kiddie Land
and 15' to the right of Tunnel of Love. Climb straight up the wall
aiming for the bulges/small roofs. The crux over the final bulge of this route
is very brief, but it is probably two grades harder than the rest of the
climb.
FFA: Will Dameron & Mike Varlotta, May 2003.
Tunnel of Love (5.6*) - 80'. Climb the leftmost part of the wall 25'
to the left of Kiddie Land, aiming for the 'tunnel' 35' high. Step left
of or climb over the tunnel then continue straight up to the ledge. Finish on
fun 15' vertical section of wall to the rap station at the top. Nice, easy
moderate lead. Good gear on good rock. There is a bolted rap station near the
top of this route, as well as a webbing anchor rap station 10' higher.
FFA: Mike Varlotta & Jim Cirilano, November 2002.
To Great Lengths (5.8) - 80'. Start directly in front of the tree that
marks the arete between Fun House and Tunnel of Love. By running
this line directly up the arete you can avoid sharing holds with the climbs on
either sid. The roof at the bottom can be ascended in three distinct places:
it's 5.7 on the left, 5.8 in the middle, and 5.9 on the right.
Variation: Upon nearing the top of the arete, situate yourself on the
headwall slightly behind and to the left of the ledges that cap the arete. Send
the roof without the advantage of starting from the ledges (5.10).
FFA: Mike
Varlotta & Will Dameron, May 2003.
Fun House (5.8*) - 80'. Climb the blocks and wide cracks 15' left and
around the corner of Tunnel of Love. Continue straight through a series
of three roofs, taking each at its widest point. Gain the ledge and finish as
on the final vertical section of Tunnel of Love. Much like Rain
Check, the crux is blind but brief.
FFA: Mike Varlotta & Jim Cirilano,
November 2002.
Mystery House (5.4*) - 120'. Climb the first part of Fun House to the
roofs, then traverse up and left on easy ground, finishing on the upper tiers of
Mystery Scat. A variation of the two routes, really.
FFA: Johannes
Reisert, Angela Roberts, Summer 2004
Mystery Scat (5.4*) - 110'. Quite a nice climb, the crux is early in the route.
Climb up the face 15' to the left of Fun House to the very top of the rock.
Lots of variations you can do to make things harder. You could also cut off the last
20-30' and bushwhack over to the webbing rap station atop of Tunnel of Love,
but you deny yourself that much more rock to play on.
FFA: Chuck & Annie Jones,
April 2004.
ONE PITCH WONDER WALL GPS coords:
Lat: N 39°39.776'
Long: W078°46.741'
The One Pitch Wonder section starts about 40-60' right of Free But
Worth It in Funland. A handful of routes wind their way up through and/or
around overhangs and roofs. The rappel station is located at the GPS
coordinates.
The routes in this section are listed left to right. It will help to be
familiar with Funland first!
King Tut (5.5/5.6) - 65'. Begin next to a 6-inch diameter pine tree at
the edge of a steep drop about 60' right of Free, But Worth It. Climb up
the white block to a platform below a roof that forms the bottom of a blunt
arete. Move right on the ledge and climb up the corner below a tree, passing
the tree on the left (crux) to another ledge. Work up and trend right, passing
several roofs, climbing short, steep sections to ledges, aiming for the pine
tree at the top. The climb ends at a jumble of boulders just before the pine
tree.
FFA: Mark 'Indy' Kochte and Johannes Reisert, May 2004.
TBD (5.5) - 60-65'. A nicer variation to King Tut. Start as per King
Tut, but instead of moving right below the roof, weave left then right through the
overhangs in the blunt arete until you reach a spacious ledge 10' or so from the top.
From there either bear hard left and climb easy rock out, or to keep a little spice of
fun, clamber up to the right and top out.
FFA: Brendan Cathcart, Mark 'Indy' Kochte,
August 2014.
King Butt (5.2) - 60'. Another variation to King Tut. Start as King
Tut, climb over a solid detached block, then break left-ish and work you way through
some groaning loose stuff, then up the left side of a series of ledges with a few easy
moves.
FFA: John Harman, Adam Byrd, August 2014
I'm Too Sexy (5.7+/5.8-) - 55'. Begin 40' right of King Tut, at
the right side of an open stretch of rock, at the low pointed arete. Climb up
to the left side of a large, pointed block jutting out from beneath a roof
about 30' up. Pull onto the block (crux) and ascend the 10' section of
blank-looking slab to a huge ledge. Continue up easy rock immediately right of
the massive roof to the pine tree (rappel). Alternate variations exist both at
the first roof and for pulling through the larger, upper roof. A unique line
could be put in starting about 10' left of this one and going straight up
through the first roof and then somewhere through the second roof. If this
were longer, cleaner, and not broken up by the large ledge, this could be a
starred route.
FFA: Mark 'Indy' Kochte and Lisa V. Smith, August 2004
Jungle Love (5.3) - Begin around the corner 10' right of I'm Too
Sexy, starting just right of a pine tree on a ledge about chest/head high
(depending on your height). Climb up past the pine tree to a small, blocky roof
on a steep section of rock. Step right around this, weaving through trees and
bushes as you go (there are enough holds around that you do not need to bother
with the trees or bushes). Once at the large ledge step forward and continue up
to and through a square notch at the top of the wall (just avoid the 4th class
escape gully to the right; it's not worth it).
FFA: Mark 'Indy' Kochte and
Lisa V. Smith, August 2004
CHUCK WALL GPS coords:
Lat: N 39°39.815'
Long: W078°46.729'
The following climbs can be reached by continuing along the path for 30' beyond
the Front Porch mentioned in the preface to the first set of climbs
(in the Funland area). There is a 30' breadth of wall that is about 40' high
and marked by a small roof at waist height off the ground in the middle of its
breadth. The upper rap station for this area is located at the GPS
coordinates.
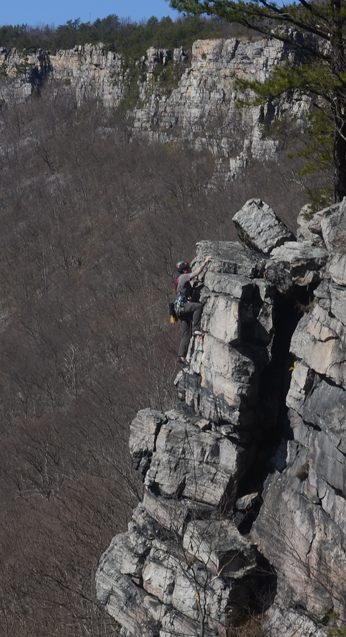 Jay Levy ready to top off on Unexpected Party
Unexpected Party (5.7** G/R) - 85'. NOTE: On June 26, 2011, there was a very
significant rock fall event from the opening moves of this climb! A very popular
route, and used to be an excellent 5.5 climb for budding leaders, as the crux is at the bottom
(still is, though now it needs a bolt and is trickier to pull through; until a bolt is installed,
the 'R' rating has been added.). Start the climb where the large boulder is laying on the trail.
Work up some initial foot ledges near the center of the wall, then climb directly
up the blankish lower section to reach the vegetated ledge (when in season - blueberries!!!).
Romp directly up the blocks and ledges to a belay at the pine tree. Either finish on After
Hours or rap from the pine tree. Except for the early crux moves, an easy and fun route for
its grade.
FFA: Chuck Jones, Annie Jones & Mike Varlotta, April 2004.
After Hours (5.6R*) - 65'. (this could be thought of as the second pitch
of Unexpected Party and the two climbs could be done in one long pitch)
Continue directly up from the pine tree rap of the previous climb over 45' of
very good rock to gain a ledge that is 20' from the top of the climb. Beware
that the final 20' (off the ledge) surmounts rock of much lesser quality than
what was below. To avoid that (R) section you could set a belay on the ledge
from which you could walk to the right in order to reach the Tunnel Of
Love rappel.
FFA: Mike Varlotta, Chuck & Annie Jones, April 2004.
The E Street Shuffle (5.2*) - 45'. This begins 50' above the ground, on the
broad ledge above the Chuck Middle roof, about 10' left of where Unexpected
Party continues off the ledge. Climb the path of least resistance to the top.
FFA: Mike Varlotta, Chuck & Annie Jones, May 2004.
Chuck Left (5.?) - 40'. No route description available.
Chuck Middle (5.9TR) - 85'. Start 20' to the left of Unexpected Party
about about 10' right of the left side of the wall. Climb directly up the wall
and take the roof at its widest point. The crux is short, bouldery, and very
pumpy. Once at the ledge above (~40'), continue up following Unexpected Party
or The E Street Shuffle.
House of Sticks (5.5*) - 85'. This often overlooked and obscure line starts between a
small but tall pine tree and an oak tree, a few feet to the left of Chuck Middle and 5' from
the left side of the wall. Climb up and left so that the roof can be passed on the left (crux).
Continue up the left side of the wall to the top. A very nice route, both below and above.
FFA: Chuck Jones, Annie Jones & Mike Varlotta, May 2004.
HOWLING WALL
Lat: N 39°39.835'
Long: W078°46.729'
Continue 150 feet along the trail to a large TV-sized boulder embedded in the
middle of the path. From this boulder scramble to the base of the cliff up
right for the next two routes.
Robinson Crusoe (5.7* G/PG) - 140'. One or two pitches, as you feel. Start a bit
left of the center of the 20' concavity, aiming for upward to some sizeable right-facing
flakes. Go around the flakes on the left (easier) or inside them to the right (harder)
and continue up to a small tree ledge at 90'. Belay here or keep going. Make some awkward
moves through the overhangs (with questionable rock quality) immediately above the ledge
and saunter up the final 35-40' to the top. Take care not to kick off any of the loose
rock on the ledges above onto your belayer below. Use either the Fun House/Tunnel Of
Love rap station (over to the right) or the School House Rock rap station (just
to the left along the gully).
FFA: Mike Varlotta & Will Dameron, November 2002.
Buddy (5.8**) - 120'. Begin slightly to the left of Robinson
Crusoe climbing up and left on a diagonal through easy initial moves and
then straight up to the top.
FFA: Mike Varlotta & Will Dameron, June 2003
From the TV boulder continue another 120' on the main path to a slight upgrade
where the trail meets the cliff.
How Yick Ying (5.5) - 160'. Start in the dihedral just around the right
side of the lower crack that leads directly to the arete on the right side of
The Howling face. PITCH 1: Climb the dihedral to the first sloping earthen
ledge. From there climb the wall on the left until it is possible to begin stemming up
both right and left sides of the inside corner. Either end the first pitch on
The Howling ledge, or move right of the ledge to gain the top section of
the wall on the right side. Periodically this pitch will need pruning/gardening. PITCH2: A very
nice finish pitch, no harder than 5.3. From The Howling ledge proceed to the stacked blocks.
Either climb up right or left around them (going under is also an option) until on top of the
blocks. Continue up the pocketed and featured left wall to the top.
Variation 1 (5.10) - Rather than finishing on the left-facing corner of the right wall,
move out and right onto the face and up a series of short roofs to the top.
FFA: Mike
Varlotta & Nate Ghubril, November 2003
The Howling Arete (5.8**) - 90'. Climb the crack (just to the left of
the start of How Yick Ying) to the arete. Climb the arete proper to the
ledge.
FFA: Mike Varlotta & Nate Ghubril, November 2003
The Howling Direct (5.9-***) - 100'. Use the boulder start 8' to the
right of The Howling start (5.8) and then climb the center of the wall
through the overlaps to the roof mentioned above. Here, climb directly over the
last roof to establish on the slab and then straight up the slab (5.9-) before
moving back left to gain the exit notch. The crux section here is brief with a
single, very small, but decent wire placement. The remainder of the climb (both
before and after) offers very nice moves with good pro on good rock and the
notch is reminiscent of the classic moderate "roofs" at the Gunks.
FFA: Will Dameron & Mike Varlotta, September 2002.
The Howling (5.7***) - 90'. Start directly above the point where the
trail meets the cliff at the left-facing flakes/corner. Soon after start, move
slightly right in order to continue up a series of overlaps that lead to a
small roof below a clean 20' slab. Climb the corner to the left to the slabby
wall and finish through the notch to the rap station at the pine tree on the
ledge. Beware ants at the belay/rap station (but enjoy the blueberries when in season!).
FFA: Will Dameron & Mike Varlotta, September 2002.
Varlotta's Daughters Would Totally Flash This (5.3*) - 50'. This climb
starts from the far right side of The Howling ledge. Climb the highly
featured section of headwall on the far right side of this section of wall.
An enjoyable, easy lead.
FFA: Nate Ghubril & Mike Varlotta, November 2003
School House Rock (5.7***) - 80'. Climb up and left from The
Howling pine tree ledge to directly beneath the large roof. Traverse back
right underneath the roof until you can turn the corner. Finish going straight
up. There is a rap station here that will get you back to The Howling
rap ledge.
FFA: Mike Varlotta & Will Dameron, September 2002.
The Christening (5.9*) - 180'. Uses the same start as Who Do You
Believe for 50' up a series of easy big ledges. Aim for the double cracks
that lead to the first roof that is an additional 25' above the ledges. After
that roof continue up the headwall for another 25' and through a series of
three roofs. At this point you can either finish on School House Rock or
try to send the climb through the the two angled cracks out the left side of
the roof.
FFA: Will Dameron & Mike Varlotta, June 2003.
Misty Splitter (5.9+*) - 180'. Use the same start as Who Do You
Believe, 20' to the left of The Howling. Climb to the left of the
pines on the ledge that is 50' high, and straight up to the roof. Jam out
through prominent left-diagonalling hand crack that splits the roof at its
widest point. Grab the lip and cut loose! A very easy first half of the climb
leads to an awesome finish. By doing the first pitch of Deconstruction,
you could reach the spectacular finish and turn this into a three-star outing.
FFA: Will Dameron & Mike Varlotta, October 2002.
Who Do You Believe (5.8*) - 180'. This was the first climb established
during the 2002 development. Same start as Misty Splitter, but from the
pines mentioned above, this climb moves up and to the left to gain the dihedral
that leads to the roof. Traverse left under the roof until an exit can be found.
Like Misty Splitter, the first half of WDYB is very easy. Whereas
Misty makes up for it with a spectacular (but shorter) finale, the top of
WDYB gives back 40' of quality climbing.
FFA: Mike Varlotta & Anne Jones,
Summer 2002.
JIM PICK WALL GPS coords:
Lat: N 39°39.847'
Long: W078°46.723'
Further around the corner from Who Do You Believe is this area.
You'll need to boulder up a 10' headwall right next to the trail to access the routes
here, then scramble up the 20' vegetated slope to get to the cliff proper. The
rap station (two ropes, 50-meters minimum) is located at the GPS
coordinates.
Jim Pick (5.8***) - 160'. There are several starts that can be done to
begin this route. All are 5.5-5.6 in difficulty.
- The face to the left of the 15' tall
left-facing corner
- The corner itself
- The arete and far left side of the face around the
right of the left-facing corner
- The face 10' right of #3
Gain the first ledge and then
move slightly right to the first series of
left-facing flakes. Climb the flakes and overlaps until you reach the middle
roof of a staggered row of three roofs that bisect the cliff. Climb out the
crack on the right side of the middle roof. After establishing above the roof,
aim directly up to the shallow left-facing corner system. Climb that and then
move slightly back to the right aiming for the obvious exit notch. Sustained
for it's grade once you get above the first roof. Classic; not to be missed.
FFA: Mike Varlotta & Will Dameron, September 2002.
There is a 5.9 variation put up by Will and Mike in June 2003. It basically climbs
the middle roof on the left side before rejoining the main route.
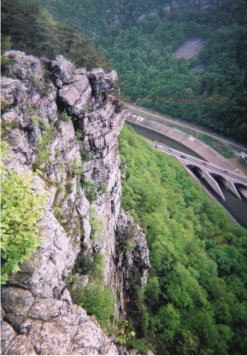 Jim Pick Wall
as seen from the top of Cumber Honey
Jim Pick Wall
as seen from the top of Cumber Honey
Deconstruction (5.7***) - 180'. This route uses one of the start
variations (#3 or #4 best) as Jim Pick, but climbs up to the right.
PITCH 1: After gaining the first ledge continue up the face and to the right
until gaining the third series (from left to right) of left-facing flakes.
Climb the flakes until it is possible to traverse even further right aiming for
a spot more near the somewhat blunt arete. Climb the arete an additional 50-60'
until gaining the very large ledge that is approximately 35' below Who Do
You Believe. (5.7, 130'). PITCH 2: Climb up and to the right off the belay
ledge, gaining the left side of the large rectangular block that is wedged
precariously in the headwall. Traverse right along the block until reaching the
crack system above it on its right side. Once on the block, climb up and
to the right until you can exit at the first notch on the right of the Misty
Splitter finish (5.7, 50').
FFA: Mike Varlotta & Will Cross, August 2003.
Smoke 'em If You Got 'em (5.10*) - 160'. Use either variation #3 or 4
from the Jim Pick starts. After gaining the first ledge, continue up
the face and to the right until gaining the second series of left-facing
flakes. Climb the flakes straight up, passing the tree on the left, and then up
to and over the next roof at its widest point (crux). Maintain a direct line up
to the exit notch of Jim Pick, staying to the right of the shallow
left-facing corner on the top third of Jim Pick. Finish through the exit
notch of Jim Pick. Note: the gear under the roof is good, but the next
15' (crux) over the roof is rather difficult to protect.
FA: Mike Varlotta
& Jim Johnson, August 2003
You can skirt the roof crux with this variation:
Smoke 'em Variation (5.7***) - 170'. Climb Smoke 'em If You Got 'em up
to the roof. Skirt around the left side of the roofand rejoin the climb above.
FFA: Mike Varlotta & Jim Johnson, August 2003
Second Pick (5.7+*) - 185'. Climb the left side of the Jim Pick Wall to
the roof on the left then traverse right across the wall to gain the shallow
left-facing corners of Smoke 'em.... Finish on Jim Pick.
FFA: Mike Varlotta & Dave Gibson, October 2002.
Slim Pickins (5.10***) - 180'. Climb the start of Jim Pick until reaching
the middle roof. Pull the roof and then continue straight up the center of the
wall. The top section is "almost R/possibly R" --sustained 5.9/5.10 climbing at
times over gear that is not as good nor as close as you'd like. This climb was
attempted on two different occasions (whereby the leaders of both teams downclimbed
after entering the unknown runout near the top third of the top section). It is
the only climb thus far to have been top-roped before being led; although Chris &
Bob did send it on their first attempt, with beta only.
FFA: Chris Thomas & Bob
Georgantas, June 2004
Left Pick (5.9**) - 160'. Climb the left side of the wall to the roof on
the left. Climb out the right side of the roof and then straight to the top.
FFA: Will Dameron & Mike Varlotta, October 2002.
Easy Pickin's (5.7-***) - 175'. Climb Left Pick to the roof and
then move left around the roof, up past a ledge to a left-facing inside corner
that offers some cool backstepping and stemming moves. Be sure to climb the
final 15' section of headwall off the left side of the Jim Pick Rappel ledge.
FFA: Mike Varlotta & Will Dameron, June 2003.
Dirty and Cheap... (5.3) - 175'. Start in front of the small trees about
20' to the left of the left-facing corner that bisects the bottom part of the
Jim Pick Wall. Climb up and to the left along the path of least foliage until a
line can be taken straight up to the top of the cliff.
FFA: Mark Perry and
Mike Super, August 2003
CUMBER HONEY WALL GPS coords:
< href="https://maps.google.com/maps?q=N+39+39.871%27+W078+46.717%27&bav=on.2,or.r_cp.r_qf.&bvm=bv.74649129,d.aWw,pv.xjs.s.en_US.mrQEfghoF0I.O&biw=1184&bih=657&dpr=1&um=1&ie=UTF-8&sa=X&ei=3UgQVOCaLoSvyAScyoDgAw&ved=0CAYQ_AUoAQ">
Lat: N 39°39.871'
Long: W078°46.717'
This next striking wall is one hundred fifty feet further along the trail. It
is capped by a prominent pie-shaped roof to the left of the Jim Pick Wall and
marked on the lower half by a wide fractured crack system up the middle of the
left page of the open book.
Tips (5.6) - 180'. Climb the right wall of the open book. Not as much good
gear as you would think or like.
FFA: Mike Varlotta & Will Dameron, October 2002.
Mini-skirt (5.9**) - 180'. Climb the crack in the back of the open book
up to the roof that is halfway up the wall. Traverse left under the roof to
join up with Yellow for 10' in order to get above the roof. Traverse
back right to reconnect with what would be the continuation of the straight
line above the open book crack. Continue up this line to the big ledge 20'
below the final roof, and then straight up through overhanging ledges to the
top.
FFA: Will Dameron & Mike Varlotta, June 2003.
Yellow (5.7**) - 180'. Climb the left side of the open book up the
fractured crack that splits the wall. Pass just to the left of the midway roof
then follow the crack to the ledge. Finish by moving bcak to the right up the
path of least resistance.
FFA: Darrell Spence, 1990s
Richard's Roof (5.7/5.8**) - ~180' Climb Cumber Honey (below) to
the large roof at the top. From here traverse right under the roof and exit trending
upwards to the right. Named after one of the first ascent party members who passed
away shortly after the route was done.
FFA: Scott Richards and Tim Anderson,
November 1998
Cumber Honey (5.8+***) - 180'. Do not miss this route! Climb the start
of Yellow up toward the ledge. When approaching the ledge, rather than
moving right, continue straight up and slightly left in order to gain the
finger crack that diagonals up and right. This crack leads to the right side of
the 30' bulging/overlapping black rock that leads to the final roof over a
right-facing corner. Climb the right-facing corner to the center of the roof,
then traverse left (good hands, no feet; crux) until you can turn it and pull over
on the last moves to the top.
FFA: Mike Varlotta & Will Dameron, September
2002.
The Verve (5.9+*) - 180'. Start on the left side of the ledge from which
the previous four climbs begin. Climb the first 20' of face that leads up and
just left of a small treee on a ledge. From the tree climb either to the left
of the large face/corner to the right (easy) or straight up it (5.8). From atop
that ledge, continue up through the middle section of easy climbing until you
reach the roof on the left side of the wall that is about 30' from the top. The
entire final section is high quality and makes the pitch worth the effort.
FFA: Will Dameron and Mike Varlotta, September 2003
Charged Emotion (5.7*) - 180'. This climb can be accessed either from
the start of The Verve (and somewhere to the left), or to the right of
Cumber Bunny. The climb goes up the section of wall between the two.
Start in the right-facing corner. Climb up to a stance beneath an overhang for
gear. Continue up the wall straight until you gain a large ledge. From the
right side of this ledge pull the rooflet to gain the crack which starts
several feet above. Climb this crack then move slightly left for the splitter
crack at the top of the headwall. Climb this crack until it ends then head up
and left to finish to the right of the loose overhang at the top of the wall.
FFA: Will Dameron and Josh, September 2003.
This next section of routes starts about 45' further down the cliff from
Cumber Honey. Scramble up the broken section of wall that meets the path
at the three-trunked tree.
Cumber Bunny (5.6) - 180'. Climb the path of least resistance up the
first section of wall to the left of the jagged "ship's prow" that
marks the leftmost edge of the top of the Cumber Honey Wall. FFA: Mike Varlotta
& Will Dameron, September 2002.
The Boulder Wall (unrated) - 15-20'. A short way further along the trail
(before reaching the start of When the Buffalo Roam) there is a 15-20
foot tall, clean wall that is some 25' wide. Although the landing leaves much
to be desired, there are plenty of big holds and traverse possibilities to make
this a good area for warming up without having to top off. The wall also appears
to offer some harder and very cool problems for those willing to top
off.
When the Buffalo Roam (5.6** G) - 190'. Start at the low point of the
trail, 45-60' before the upturned tree that marks the base of A
Winter'sTale.Start in front of the thin twisted tree and climb directly up
the initial 50' face. Continue up and slightly to the right in order to pass on
the right the roof 2/3 of the way up the cliff. Continue still further up and
more to the right in order to climb behind the final large left-facing
flake/corner that leads to the top. The first ascent was done in three pitches
while exploring other route possibilities on this section of wall. There are
two very large, comfortable ledges if a multi-pitch outing is what you're
looking for. On the other hand, double 60-meter ropes would get you to the top
in one, long, high-quality pitch.
FFA: Ranjeet Tate, Pat Broderick & Mike Varlotta,
September 2003.
Rendezvous With Rama (5.8*** PG) - ~190'. This is best done in three pitches.
Relax and enjoy the views from comfortable belay ledges! PITCH 1 (~90'): Start on the
mostly buried boulder, A few feet uphill from a cluster of three small trees, approximately
25' left of the start for When The Buffalo Roam. Boulder up to a stance to get
gear in, then boulder up to a ledge with a tree to the right (and other foliage). You
can keep the climbing to 5.6 through this initial section by using the hidden flake off to the
left. Step over to the tree where a block sticks out from the roof at waist level. Step up onto
the block and head up, trending slightly right as you go. Climb up just left of the tree to
cleaner rock. The last section (5.7) goes through a shallow corner with a block or two sticking
out of it. Look for the key hidden hand hold to get up to the belay alcove. PITCH 2 (~60'): Climb
up and right, aiming for a horizontal break about 10' below the roof above, and make an airy traverse
around the corner. Step up to a ledge below a small roof. Balance up (5.8-; no gear after the ledge)
12-15' to the spacious belay platform with a moderate sized pine tree. Alternatively, to avoid
the 5.8 no-gear crux, traverse right about 5' to a small right to a fractured right-facing
corner and climb up that (still no gear, but it's also no harder than 5.7, and is about 5'
shorter) to the belay ledge. PITCH 3 (~40'): Climb the short, featured and fractured wall above,
pulling through the low roof (5.6) 15' above the belay and drifting up right to any exit you desire
(through the notch, through the high roof, step left). The climbing is no harder than 5.6, depending
on your exit. The first pitch was established over three different visits while avoiding vultures on
the first pitch of Where The Buffalo Roam; pitches 2 & 3 of this route went in on the third
visit.
FFA: Mark 'Indy' Kochte, Carlos Carro-Dupla, Mike Hopkins, Johannes Reisert, Robert 'Bud'
Roper, June, 2005
Rama II (5.9*** PG) - 180'. This is almost a variant of Rendezvous With Rama,
except that it climbs an almost completely different line, save the start and the end. PITCH 1 (~85'):
Begin on Rendezvous With Rama, but do not step right to the tree when you reach the first
vegetated ledge. Instead, continue straight on up the wall for another 75 or so feet until you come to a
broken ledge above most of the foliage. PITCH 2 (~55'): climb up the wall above, aiming for the narrowest
part of the wide, imposing roof above. Be sure to get gear in at the last horizontal, as the crack
immediately below the roof is too wide for anything but a #72 Camalot. Find the GOOD handhold at
the lip, and reach up to the right-leaning corner crack above (you can get gear in at this point; a
red #1 camalot will work) and yard on up. Regain your balance and finish the last moves to the
belay ledge above. PITCH 3: Finish on Rendezvous With Rama. The route has plenty of gear-placing
opportunities, except for the 10' or so section below the crux roof on pitch 2. Enjoy this climb.
FFA: Christian Kammerer, Mark 'Indy' Kochte, June 2005
A Winter's Tale (5.9-** R) - 180'. From the trail, continue 45-60' past
When the Buffalo Roam to the upturned tree at the path's fairly subtle
crest. Locate the mini-gendarme on a ledge ~25' above the crest. Climb the
lower section of wall beneath and slightly left of the mini-gendarme. Continue
up west-facing sections of headwall that meets the clean white roof at the
cliff's midway point. Climb the vertical wall until the roof can be passed on
the left (note: this is where the climb might deserve an "R" - the
crux is over a margine thin wire and a piece of brass). Continue up to the big
roof. Traverse some 20' right until you can locate the moderate (5.7) exit
through the roof. FFA: Mike Varlotta & Will Dameron, February 2003
Note: in the winter/spring of 2009, a huge chunk of rock fell
from up high, obliterating the mini-gendarme noted in A Winter's Tale, leaving
piles of rubble on the ledges above the trail, half destroying the trail itself, and
leaving a swath of debris and destruction into the woods below, obliterating trees and
foliage for nearly 50-70'. Take great care while in this area!
A Winter's Tale (The Uncut Version) (5.10** R) - 180'. Climb the
original route to the roof. Rather than traversing right to the moderate exit,
climb directly up through the broken notch. A pumpy crux that keeps on coming!
FFA: Will Dameron, April 2003.
Dancing Spanish Through the Chimney (5.8**) - 180'. A two-pitch route.
PITCH 1: Use the same start as A Winter's Tale until you reach the 30'
vertical section of headwall directly below the clean, white roof. At this
point, rather than moving up and left on a diagonal to bypass the roof on the left,
move up and right on a diagonal to enter the chimney/flake system up to the
right. Creative movement and problem solving in the chimney (5.8) are required to
continue. Traverse right after this, out to and up and around the TV-sized chockstone
that can be seen from the ground. Belay from the ledge just above and right of the
chockstone to minimize rope drag. (5.8, 130') PITCH 2: A great second pitch for its
grade. Climb directly up from the belay for 15' until it is possible to make a short
traverse to the right. After the traverse, finish by climbing a direct line to the
top of the cliff. (5.6, 50')
FFA: Mike Varlotta and Patrick Broderick, April 2004
Buffalo Soldier (5.9**) - 180'. Could be a three-* route. PITCH 1: Start about
30' to the left of the start for A Winter's Tale at a small, chest-high roof
in front of several trees that mark an (uncommonly) shady belay. Climb up the lower
section to the first vine-coverd ledge and then up the next section to the next
ledge aiming for the obvious finger crack that splits the roof at about half of the
cliff's height. Use the crack to pull the roof and then climb the face above to a
spacious ledge (5.6, 100'). PITCH 2: Continue up and left to the notch that passes
through the roof and then continue straight to the top. (5.9, 80').
FFA: Mike
Varlotta & Ranjeet Tate, September 2003
Shardly Worth It (5.5) - 190'. Start about 15' to the right of the
left-facing corner that is just to the right of I Wanna Live. Climb up a
series of short headwalls that each lead to various large ledges and eventually
to the top.
FFA: Chuck & Annie Jones, August 2003.
I Wanna Live (5.10+***) - 180'. Without a doubt the area's wildest and
most spectacular finish. Climb the wall beneath the impressive-looking
square-cut roof approximately 600' from A Winter's Tale. PITCH 1: Climb
the broken crack in the middle of the wall to the highest pine tree that is in
line with the left side of the roof (5.4, 80'). PITCH 2: Climb up and right
from the pine belay back to the middle of the wall and a series of small roofs
and overlaps (5.9) to the granddaddy finish (5.10+, 100'). The crux goes out a
7-8' horizontal roof, following a jagged "S" finger crack into a hand
traverse/heel hook section and then through the overhanging notch finale.
Perhaps 25' of crux in all. Pump Factor High. Gear placements abound - if you
can let go long enough to get it in!
FFA: Will Dameron & Mike Varlotta,
November 2002.
I Wanna Give (5.6*) - ~180'. This route is actually to the right of
I Wanna Live, but to keep with poetic licensing, listed after. Climb the
face just to the left of the bottom left-facing corner that is in line with the
right side of the I Wanna Live roof. Climb superb rock up a direct line
that skirts first the bottom roof band and then the top one on their right.
FFA: Mike Varlotta & Bob Dodson, August 2003
The Chase (5.7** G) - Start by climbing the 5', diamond shaped roof, 6
feet off the ground, 130' feet left of the I Wanna Live overhang. Pass
the prominent nose on the left side. Continue past a ledge and up the broken
column to the large roof above. Breach the roof directly above the column (5.7)
or step right to avoid crux number one. Continue to a spacious belay ledge
beneath a broken corner. Pitch two, climb the broken corner and flakes,
trending up and left to meet the largest roof at a deciduous tree. Mount the
roof directly above the tree and climb the easy ground beyond to the final
roof. Traversing either left or right will avoid the final crux but it is
highly recommended to climb straight through the final roof for a perfect
finish to this esthetic line (and the easiest roof on the climb).
FFA: Scott Haines and Curt Taras, May 2004
Ghetto Booty (5.6** PG) - ~140'. Start 30' right of The Chase, next to
the roots of a tree crossing the path at eye level. Climb up to a large block behind a
pine tree. Follow straight up to a system of grassy ledges. The belay is to the right
at a small pine tree (5.5, 60'). From there climb left of the belay straight up to a
shallow right-facing corner with flakes and a vertical crack system. Exit through the
notch (5.6, 80').
FFA: Annie Wislowski, Johannes Reisert, May 2006
Gin and Tonic (5.6* PG) - ~140'. Start just to the left of the fallen tree in the
shallow corner to the left of Ghetto Booty. Climb until you reach a belay ledge
to the right of a triangular roof (5.6, !70'). Continue straight up and move left over
the roof. Climb straight up the face above through a series of ledges, over a small
roof, and to the top (5.6, ~70').
FFA: Johannes Reisert, Annie Wislowski, May 2006
Cave of Silence (5.5/5.6) - 180'. Start low on the main trail where the
far right side of the Amphitheater reaches the trail. PITCH 1. Climb up staying
to the right of some small trees, and head for a small alcove the "Cave of
Silence" 60'. PITCH 2. Step up to the roof of the Cave and exit left
(crux) once out of the cave your will be on the left facing wall of the
amphitheater. Shoot straight for the top staying to the right of the
amphitheater's main corner and left of the gully at the top. 120' The climb was
named because you can barely hear you partner from the Cave of Silence which is
something like the cone of silences from the Get Smart show.
FFA: John Kelbel and
Ben Ardwin, May 2004
SISTERS/AMPHITHEATER AREA
GPS coords: (for the top of Little Jimmie Arete)
Lat: N 39°39.977'
Long: W078°46.702'
Archetype (5.8*) - 40'. Climb the obvious arching crack to the tree (a
bit harder and more awkward than it looks).
FFA: Tim Howe, Aaron Schmid &
Mike Varlotta, April 2003
Low Rider (5.10**) - 100'. From the belay tree, traverse up and left 25'
to sling the small tree. From that tree, move up and right back to the first
roof. Pop over the roof and up to the next roof under which you traverse left
until you can climb through the notch. Of the handful of 5.10s at The Narrows
here, this one gets the nod for being the most lead-friendly. There are great
moves with good gear on quality rock. Be prepared to handle the initial (easy)
traverse off the belay with care - the three-star stuff begins after you sling
the tree.
FA: Mike Varlotta, Tim Howe & Aaron Schmid, April 2003
Low Rider Double Direct (5.10**) - 120'. Begin slightly left of the belay
tree that is a bit to the left of the start of Archetype. Climb the face
directly up until reaching a large horizontal that is slightly higher than the
belay tree on top of Archetype. (Beware of a short section about 30' off
the ground of suspect rock.) Once at the horizontal, compress and hand traverse
left to sling the tree. When moving back to the right, rather than going far right,
up and then traversing back to the left as on Low Rider, reach high over
the first roof at your first opportunity which will put you directly under the exit
notch, thus eliminating the cruxy left traverse of Low Rider.
FFA: Will Dameron & Mike Varlotta, August 2004.
Cha-Cha (5.8**) - 110'. Use the same start as Cheetah, below, but
rather than taking a rising diagonal to the left, climb straight up the cliff.
Belay under the final large roof and subsequent 5.2 leftward traverse along the
ledge to escape the final roof and easily access the Sisters Rappel.
FFA: Mike Varlotta and Chuck Jones, April 2004
Cheetah (5.7+**) - 130'. Belay from the largest tree on the left side of
the amphitheater, about 20-30' left of the start of Archetype. Begin by
ascending through large holds up and left on a diagonal. Surmount the
penultimate roof gainging a great stance 15' below the final roof and traverse
left to gain the large ledge (you can trim down the difficulty to about 5.6 by
skirting the roofs on the left by continuing the upward left slanting diagonal
in order to gane the large ledge system). The Sisters Rappel is located 50' to
the left at the end of the ledge. A 5.9- variation would have you pull through
the final roof section and 20' exit crux finish.
FFA: Mike Varlotta &
Bob Dodson, May 2003
String Theory (5.6***) - 120'. This climb starts on the far left of the
amphitheater ledge and moves directly up the clean face just to the right of the
arete (stay left of the lower pine). Very nice moves on vertical rock. Together
with I Wanna Give and Easy Pickins, it is one of the best climbs
for the grade on the cliff.
FFA: Mike Varlotta & Ranjeet Tate, June 2004.
Little Jimmie Arete (5.4***) - 120'. This climb can be started along the
path below the base of Elisa and Gigi. From the trail, scramble
up and right to the bottom of the wall and begin climbing up and right over
blocks until gaining the arete. The majority of the climb travels directly up
the arete, occasionally moving to one side or the other as the holds lead you.
The crux is at the final roof. You can either pull through it (reminding
yourself it is only 5.4) or end it at the ledge below and traverse over
to the Sisters rap station. It is recommended you finish the route for
the full experience. This climb is a classic for its grade. Pleasant, long
vertical climbing from one big hold to the next. Plenty of rest stance when you
need them. Great moves over great rock on great gear. Not to be missed.
FFA: Mike Varlotta, Patrick Broderick & Annie Jones, August 2003
Elisa (5.8*) - 85'. This climb ascends the blocky corner on the far
right of the wall that can be found around the corner to the left of the
amphitheater. It ends at the "Sisters" rappel station on the tree
atop the corner (the majority of the climb is a couple of grades easier than
the brief, well-protected curx, making for what will feel like an easy climb
for the grade).
FFA: Mike Varlotta, Tim Howe & Nate Ghubril, April 2003
Gigi (5.9**) - 85'. Climb the face 10' to the left of Elisa.
Surmount the low roof at its widest point. Continue up through the bulging
section and then up through and amidst the many small triangular roofs. Top off
at the same point as Elisa.
FFA: Mike Varlotta & Chuck Jones,
April 2003
The Test (5.7**) - 100'. Bashed fingers, red [biting] ants, a huge
teetering rock that was a key handhold...next to a wasp next, a sliced rope,
and impending darkness made this climb one for the first ascentionists (Mike
Varlotta and Will Dameron) to remember. Start 20' to the left of the Sisters
corner. Climb directly up the lower face to the first tree and then up the
middle section of cliff to the second tree. Move slightly to the right a short
ways above the first tree and gradually move back to the left to reach the
second. Because of darkness the climb was ended at the same ledge as the
Sisters rappel rather than sending it through the vinal roof band.
Variation (5.9): maintain the most direct line possible up from the
first tree (rather than moving slightly to the right) in order to climb the
roof and low angle section directly above it.
FFA: Mike Varlotta and Will
Dameron, September 2003
BALLAD WALL
GPS coords:
Lat: N 39°39.XXX'
Long: W078°46.XXX'
Due to the nature of the rock on the remaining section (~300')
of cliff, the next four routes offer real adventure. Beware of the broken band of
stacked rocks that crosses the next three routes. The good news, though, is that these
stacked sections are very obvious before you get into them and, for the most
part, can be largely avoided. The exception is Con Cuidado - should you
try to send this climb direct, you will be forced to climb straight through
20-30' of sketchy 5.7 that probably isn't worth protecting. With all this in
mind, the routes are starred conservatively at 1 "*" - yet, for the
climber that doesn't mind (or even perhaps enjoys!) discerning the good rock
from the bad and the ugly, these routes arguably deserve a double or triple
star rating.
Decent Exposure (5.7+*) - 170'. PITCH 1: Begin at a small step about
waist high about 5 yards to the right of the tree trunk that marks the start
of The Ballad.... Continue straight up and into the steeper section (5.7+)
about 50' off the ground and then further up to the ledge. PITCH 2: From the
belay, move up and right into a 50' traverse (5.4) that allows a finish without
pulling the roof.
FFA: Ranjeet Tate & Mike Varlotta, June 2004.
The Ballad of El Goodoo (5.9*) - 170'. 45' left of Gigi, start
directly above the 4' sawed off tree trunk. Climb straight up through blocky
ledges and flakes to the triangular notch that is 15' to the right of its twin
triangular notch. Climb through the notch and straight to the top. Given the
rotten nature of some of the rock, belayers might consider being well off to
the side so as to 1) not get pancaked and 2) minimize potential rope cutting
events.
FFA: Mike Varlotta & Ray Tuttle, March 2003.
Twisted Oreos (5.8+ R) - 170'. The route shares the start of White
Corner (below), directly under the stack of white blocks in righthand side
of the scooped out area and about five feet left of a large left facing crack.
Climb the face to a short right leaning crack in the middle of the face about
25 ft up. Continue up through the open book to the first small white roof.
From this roof pull the four roofs (crux) directly up to the first prominent
notch just off to the right (the second notch is that of The Ballad of El
Goodoo). From the notch, gain the face and climb directly to the top,
passing the large roof barely on its right side. The face (minor crux) is
run-out for 12-15 ft, with delicate, easily breakable, and fracturable rock.
There are some shallow seams in this section, that will take micro-gear, but
will most likely not hold a fall. Once past the large roof the protection
becomes good again. This climb can be done in two pitches by setting up a
belay on a protected ledge directly beneath the prominent first notch.
The ledge was created by trundling large rocks out of the scooped out area.
Considering the high potential for rock fall on the second pitch, it may be
a good idea to break this climb into two pitches and take advantage of the
protected belay.
FFA: Bob Georgantas & David Wilkerson, June 2004.
White Corner (5.10-**) - 170'. 60' further up the trail there are some
belay seat stones placed at the crotch of a two-trunked tree. Climb the right
side of the scooped out area of rock slightly to the left of the belay tree.
Gain the short vertical crack that is 25' high. Continue straight up to the
left-facing white corner. Climb the corner and then up to the white roofs,
passing them on the left until you can step back on top of them in order to
pull the next roof band that is 20-30' below the top roof (crux) band. Atop of
the middle roof angle up and left to gain the horizontal crack/ledge that runs
out to the right underneath the highest roof. Unlike some of the harder roofs
in the area, this one stays cruxy for several moves beyond the lip of the second
roof (but not so much cruxy as surprisingly without much pro until you get to
the third roof).
FFA: Will Dameron & Mike Varlotta, March 2003
Con Cuidado (5.9+ R) - 170'. The first ascent climbed the route straight
up which entailed ascending the loose unprotectable section mentioned in The
Ballad Wall descriptor above. This required climbing next to, behind, and
ultimately up and over the massive square blocks that lead to the square notch.
It would be possible to hit the lower cruxes, meander left onto Maid...
and then return right for the exit crux - thus avoiding the "R"
section of the route. Doing the route: maintain a direct line between 5 and 15 feet
to the left of White Corner. Climb the middle of the scooped out section
up to and left of the pine and then back and slightly to the right. Pull the
roof 5' to the left of the left facing white corner then straight up to and
through the square notch. From the slanting ledge 15' below the final roof,
climb off the right edge and up through the right hand gunsight notch.
FFA:
Mike Varlotta & Chuck Jones, April 2003.
A Man Needs A Maid (5.7+***) - 170'. Climb the left side of the scooped-out
section up through several tiered sections of left-facing corners to the ledge
beneath the final roof (this is the same ledge mentioned in Con Cuidado).
Climb up to the roof and then traverse left beneath it into and up through the
left-hand notch.
FFA: Mike Varlotta & Will Dameron, March 2003
SUNSHINE BUTTRESS
GPS coords:
Lat: N 39°40.100'
Long: W078°46.715'
Sunshine Buttress is a striking butress with climbing on both faces of a 90 degree
arete. It is located about 200 yards north of the Ballad Wall. The trail goes down,
then follows ducks across and up a couple of scree slopes. The first two climbs are
on the south facing wall.
Getting down from Sunshine Buttress:
You can bushwhack a walkdown by going south along the ridge about 100 yards, just
past a meadow on the ridge, then working down through a tree-covered ledge and scree
system. You can see this route quite well from the top of Sunshine. There is a bit
of careful scrambling involved, but by judicious route selection, it can be done
quite safely. It brings you out on one of the scree fields between Sunshine Buttress
and the Ballad Wall.
The Further Passage (a.k.a., Sorry Ray) (5.8+***) - 100'. Good things come
to those who wait...but not to those who wait too late! Locate the obvious
clean-looking face at the start of the second section of cliff. Climb the easy-looking,
steep, blocky start to gain the 20' fingercrack in the back of the corner. Follow the
crack to the sloping ledge above. Continue up the steep 20' wall directly above to a
second ledge from which you continue up steep rock to a third ledge and then the top.
Much like the rest of the cliff, this climb offers distinct sections of great climbing
that are broken up by good ledges from which you get no hand rests and ample gear
placements. The pump factor is low but the overall quality of rock is high(!) and the moves
are cool.
FFA: Mike Varlotta & Will Dameron, July 2003.
The Klophaus Dameron (5.8*) - 120'. Start just to the left of The
Further Passage. Climb the wall directly to the top.
FFA: Jason Klophaus
& Will Dameron, November 2003
The Lost Era (5.8*) - 120'. Upon first climbing this route, Will Dameron
discovered several piton remnants from a previous era of climbing activity at
Cumberland. These pitons must be clipped for protection and range in quality. Some
appear good, others may need to be equalized to ensure safety. Scramble down
the series of ledges and around the free-standing pillar. Move ? feet left of
this pillar to a small arete leading up to a stance for gear. Head up and
slightly right to the right hand edge of the obvious overhang, clipping a piton
on the right of the overhangs. Head directly up to the next two pitons, then
begin moving up and left, clipping another piton, then head directly up to the
top.
FFA: Will Dameron & Jason Klophaus, November 2003.
Dawn of a New Era (5.7** PG) - 50'. This is a great short pitch to the top
of the clean SW face of the big partially freestanding pillar at the corner of the
Sunshine Buttress. The route starts at the beautiful ledge from which one can
traverse (via 3rd class scrambles in places) along the cliff face toward the far
(NW)end of the Sunshine Buttress well above the actual base of the crag. (Based
on the information in the guide packet, the first ascensionists believe Dameron and
Klophaus began their ascent of The Lost Era from the NW side of the big
partially free standing pillar which would put this climb around the corner to the
left as you face the wall.) Start several feet to the left of the 4th class chimney
that leads up toward the wall with The Further Passage on it. Climb directly
up the center of the face to the overhang. Pull the overhang directly on small holds
(crux) and continue up the face on easier but less protectable moves to a giant
ledge on top of the pillar. Two stars because the rock quality is excellent and the
line is obvious and natural with a fun crux. This route can link with The Lost Era
(for a second pitch) by stepping from the top of the detached pillar across the void to
the wall where a cam can be placed before reaching a series of pitons (an angle followed
by a Z and angle together, followed by another angle). Putting them together as a single
pitch seems like it would cause unreasonable rope drag, as the line would run over a few
edges at the top of the pillar.
FFA: Robert Hayes & Joe Neubauer, June 2004
Just Before Dawn (5.6*) - 50'. This climb starts on the clean SW face of the
lowermost section of wall below Dawn of a New Era, (i.e., below the big partially
freestanding pillar at the corner of the Sunshine Buttress). Climb directly up the
face to the rooflet above which can be seen a thin seam that continues for a body
length up to a good horizontal (Variation: climb directly through the seam, 5.10). By
making a move to the right you can avoid the seam and keep the climb at an easy/moderate
grade.
FFA: Mike Varlotta, Bob Dodson, Doyle Tarwater, August 2004
Our Horses are Turning to Mice (5.8*) - 50'. Begin 15' around the corner to the
left of Just Before Dawn. Climb the face (just to the right of the wide crack)
that leads to the roof and then move slightly to the right in order to protect the
finger crack that leads up the face above the roof (5.4 variation: climb the wide crack
to the ledges above the roof in order to gain the easy finish to the top). Pull the roof
at the crack. Once through, easier climbing leads to the top.
FFA: Mike Varlotta, Bob
Dodson, Doyle Tarwater, August 2004
[the exact location of the following few routes is not 100% known by me
at this time, but are to the left of the main Sunshune Buttress]
THE NORTHWEST FACE GPS coords:
Lat: N 39°??.???'
Long: W078°??.???'
The following three routes are on the Northwest Face of the wall and therefore do not
receive sunshine until very late in the afternoon. Facing directly into the valley NW
of the Narrows, the wall also receives the full force of the prevailing westerly winds.
These two factors taken together make the NW Face a great wall for the dog days of summer.
It starts from a ledge which is roughly 70' off of the forest floor, and 50' below the
ledge from which The Lost Era begins. The NW Face is amazing, containing two huge off-width
cracks that lead to large overhangs, many other face lines contain multiple small overhangs
to pull through.
Whereas the weak band of rock very evident on the Ballad Wall, is near the top of that
section of cliff, on the NW Face the weak band is roughly 40-60 feet off of the ledge.
This particular feature makes the face climbs difficult to protect, requiring microgear.
Yet, the hold structure of this rock band keeps the climbs fun and interesting.
Welcome to Sunshine (5.10 R**) - 130'. Start the climb at an inverted Y-crack about
50' left of the two large chimneys and 70' left of the 4th class scramble leading from the
free standing column of the Sunshine Buttress. The cracks end on either side of a small
overhang and large shelf. Take the left crack up to the first small roof. Go directly up
and pull the four small roofs (crux) to gain the face. Climb the run-out face (sling the
two large trees on sides of the face for pro) to a ledge. Finish by climbing the multiple
faces to the top. NOTE: With a normal rack this climb is an R with serious ground fall
potential. The crux itself (roofs), and face after the crux are not protectable with a normal
rack. There is only one questionable placement for a Red Alien or Red TCU. The climb is PG-13
with micronuts and microcams (a couple of Screamers would be advisable as well) allowing
protection of the multiple roofs comprising the crux. The face after the crux is still
devoid of gear placements for almost twenty feet, but there are two bomber trees on either
side of the line that can be girth hitched with long runners.
FFA: David Wilkerson, Bob
Georgantas, and Robert Hayes, June 2004
Southern Exposure (5.6+ G*) - 100'. Climb the stair-step blocks and arete to the small
ledge at approximately 60'. The gear is very good and the climbing easy to this point. As the
arete rises above the tree level, enjoy the exposure as the climb becomes a bit steeper. At
the ledge move onto the slightly overhanging, exposed face. Good handholds and gear appear
when needed. Work slightly left up the face the last 40', topping out to the left of the
blueberry shrubs. Excellent views and solid belay are at top.
FFA: Joe Neubauer & Robert
Hayes, June 2004
Southern Exposure Direct (5.7+ G**) - 90'. This is a beautiful natural line that
starts 40 ft right of Southern Exposure and takes a direct line to the crux and the amazing
overhanging of Southern Exposure. Start the climb in the middle of the face, just
left of a large off-width crack and small rectangular outcropping of rock. Climb the delicate
face to gain a short crack system beneath a small overhang (crux). Continue through the
overhand directly to the ledge and arete of Southern Exposure. Traverse the arete
and finish on the overhanging section of Southern Exposure. Once on top enjoy the spectacular
view of the Cumberland Valley, and of the entire northern side of the Sunshine Area Walls.
FFA: Bob Georgantas, Robert Hayes & David Wilkerson, June 2004
VARIATION 1 (5.7): Start the climb by pulling the small rectangular outcropping of rock
into the large crack. Stem up the crack to a horizontal finger crack that joins the vertical
crack of the main climb. Traverse the horizontal crack over to the (description incomplete)<>
Fortune Cookies And A G-String (5.5 G) - 80'. This climb starts on the second
face left of The Sunshine Buttress and the free-standing column, about fifty feet left
of Welcome to Sunshine, next to a large left facing crack that leads to two left
pointed horns/overhangs. Climb straight up the slightly overhung face to small ledge, then
continue up the face passing the top most horn on the left hand side. Climb the short arete
(thin pro), to gain the huge ledge with the tilting boulder. Belay from the ledge. There
is an easy, protected 4th class gully to gain the cliff top.
FFA: David Wilkerson & Bob Georgantas, July 2004
Where The Sun Don't Shine (aka West Virginia Virgin) (5.4* G) - Far more fun
than it looks and cleaner than you would expect. Start the same as Partial Eclipse
(below) but climb into the chimney. You will notice that the chimney section has
a floor that slants up and back into the depths, but the route stays well off the deck
inside. Get inside and continue straight up until you are just below the TV-sized
chockstone at the top of the chimney. At this point traverse right and upwards into the
depths. You will be able to see light from the hole at the top - aim for that! Holds
about and there are plenty of cracks for pro. Follow these up and towards the light
(the exit). The crux comes right near the end where you will have to do a difficult
squeeze while moving up and left to attain a stance still in the chimney but just below
the belay ledge. If you've never gone caving, this might give you an idea of what some
cavers do underground - without rope! Once through you can stand on the wedged rocks
that constitute the ceiling of the chimney you came through below. Finally, clamber
up the last couple feet onto a spacious ledge system where an anchor can be built by
slinging the pinch between the two enormous boulders directly over the finish. From the
ledge, a short 3rd class scramble up the ramp gets you to the top.
FFA Robert Hayes,
Robert Georgantas & Marty Taylor, July 2004
Partial Eclipse (5.8**) - 70'. Locate the massive, left-facing chimney
formed by an enormous flake 30' up from the start of the climb, between
Fortune Cookies... and Easy-X. Climb up a wide crack to gain the
chimney. Work up the chimney to the first horn/overhang. At this point traverse
out of the chimney to the right, around the horn, onto the short face. The pro
is very G rated until this point, then becomes very thin - a couple of micro-cams
(Two 0.2 Camalots, Blue Aliens, Purple TCU) would be useful to protect the one
small crack on the face, which is just left of the line. Continue to traverse
right to a small ledge. After a little rest on the ledge, climb directly up to
the large ledge with the tilted boulder.
FFA: Bob Georgantas, Bob Hayes &
Marty Taylor, July 2004
Penumbral Eclipse (5.8+* PG) - 70'. This is a variation to Partial Eclipse
above. After pulling the horn/overhang, rather than traversing right to the small ledge,
climb straight up the face from the horn. As with Partial Eclipse a couple of
micro-cams (Two 0.2 Camalots, Blue Aliens, Purple TCUs) would be useful to protect the
one small crack on the face, which will now be on the right hand side of the line.
FFA:
Bob Georgantas, Bob Hayes & Marty Taylor, July 2004
Easy-X (5.3 X) - 70'. Start about 20' right of Where The Sun Don't Shine
and Partial Eclipse. An easy climb and a good route to play on to gain the large
ledge and 4th class ramp, but there is only one real opportunity for protection in a
horizontal seam about 50' up.
FFA: Bob Georgantas, Bob Hayes & Marty Taylor,
July 2004
MOSS SHELF WALL
GPS coords
Lat: N 39°40.xxx'
Long: W078°46.xxx'
This wall is on the right side of the 4th class gully, which bisects the middle
of the far cliff. (2014 note: exact location still TBD) The wall faces west by
south west and receives a good deal of
sunshine in late morning until sunset. It begins at a 5-6ft tall block
with a small tree growing out its top, and it continues to the right until the mossy
ledge (very few thorns) comes to a protruding rock buttress on its right hand side.
There is an easy down climb at this buttress that leads to a lower shelf, and also an
easy up climb that leads to another 4th class ramp, which appears to continue to the
cliff top. The most obvious features of the wall are the 6ft block with the tree, a
white area 15 feet right of the block, which leads to some small black overhangs, a
ledge (at 35-40 feet off the deck) just above the overhangs, and a huge 60 foot tall
column of rock with overhangs to the top.
Fair to Middlin' (5.10*** PG/R) - 100' Note: this grade needs to be confirmed -
it may be harder, but it needs to be repeated for further verification. Start directly
beneath the whitish area/small overhangs and climb up to the overhangs. Pull past the
small overhangs using a small crack system on the left (harder) or directly through the
middle of the overhang (easier). Gain the rock ledge, and climb directly up some easier
ground to the next overhang with a small tree growing out of the crack. Pull the overhang
(crux) on the left side of the tree and continue directly up the face to the top. This is
an excellent climb with really exciting moves to pull through the overhangs.
FFA: Bob Georgantas and Lindsey Grenier, Nov. 13th, 2004
Fair to Piddlin' (5.7** G) - 110' A variation of Fair to Middlin'. Start
directly beneath the whitish area/small overhangs and climb up to the overhangs. Pull past
the small overhangs using a small crack system on the left (harder 5.7 crux) or directly
through the middle of the overhang (easier 5.6 crux). Gain the rock ledge, and climb
directly up some easier ground to the next overhang with a small tree growing out of a
crack. Move right of the overhang and the small tree to gain an easy corner to the top.
Even without the second overhang, this is a great route since the moves through both crux
variations are interesting.
FFA: Bob Georgants and Lindsey Grenier, Nov. 13th, 2004
BRIAR RABBIT WALL
GPS coords:
Lat: N 39°40.XXX'
Long: W078°46.XXX'
This wall is on the left hand side of the 4th class gully, which bisects the middle of
the far cliff (2014 note: exact location still TBD). The wall faces west and receives a
good deal of sunshine from noon until sunset. It begins at a tall left corner and crack
system on the left hand side of the gully, and continues until thin rock outcropping
about 60ft left of the corner. The rock outcropping has a small notch below an overhang
that is just about 6 feet off the ground. This notch makes for a superb belay stance,
since it will shield any rock fall from above. The prominent features of the wall are
the tall left facing corner with a large area of orange rock about half way up to wall,
and the belay notch.
This is called the Briar Rabbit Wall since he is the only creature that could have gotten
to the base of the wall without being ripped to shreds by the abundant thorn bushes,
which the first ascensionists had to deal with - thank you Prana for making thick
Denim/Kelvar pants...
The Flake and Crack Coalition (5.6* G/PG) - 105' Climb the short thin face (crux)
to gain a beautiful right facing flake with a ledge on its right hand side. Stay on the
short face between the flake and the off-width crack about 4 feet to the left of the
flake. Use the flake and off-width (very nice climbing) to gain a ledge about 50' up.
Climb over some easy ground and slightly to the right to gain an easy corner to the top.
G rated with a few big cams (#4, #4.5, and #5 Camalot; or two #4 and one #5 Camalot C4,
or two #3 and one #4 Big Bros) for the off-width.
FA: unknown
THE FAR WALL
GPS coords:
Lat: N 39°40.276'
Long: W078°46.813'
The Far Wall area is the shortest (height-wise) stuff here, and being so far
away, will probably see the least amount of traffic at this crag. Since the
routes are so short (from 20' to ~80'), it is relatively easy to set up
top-ropes on these routes. However, given the walk, and all the great climbing
you would pass on the way here, you'll probably opt to save the top-roping
stuff for crags closer to home and concentrate on the earlier-mentioned taller
stuff off to the right half of the cliff. Nevertheless, there are worthy routes
in this section worth doing, if not necessarily worth driving out exclusively
for.
The rock actually continues on into the woods to the right, but it is heavily
overgrown, with only a few unexplored 'towers' poking out of the trees.
For ease of locating routes, the climbs are described from left to right as you
face the wall.
Phat Ass Potatoes (5.2 G) - 20'. Climb the blocky face to the left and
around the corner of Hot As Slim Silver. This is about as far left as
you can go along the main wall before you reach another break (and the cliff
continues on through the woods).
FA: Mark 'Indy' Kochte, Phil Hodge, July
2004
Venus (5.8*) - 32'. Begin a few feet left of the large
left-facing corner. Climb up to and through the small roof to a blank-looking
face above split by two thin horizontals. Trend slightly left, aiming for the
arete as you pass the roof, and finish on the arete to the top. Solid 5.8 crux.
FA: Mark 'Indy' Kochte, June 2004
Size Isn't Everything (5.4* G) - 32'. Climb the blocky left-facing corner
next to a short and deep chimney that becomes a wide handcrack halfway up. Stem
the corner and use the crack or just climb the left-facing blocky face itself;
the grade is the same either way. Looks more intimidating than it really is.
FA: Mark 'Indy' Kochte, June 2004
Trundle Monkey (5.8* PG) - 40'. Climb the deep, blocky roof-ridden outside
corner to the right of Size Isn't Everything to the top.
FA: Scott
Haines, June 2004
Free Falling (5.6/5.7*) - 40'. Climb through the wide but narrow roof a few
feet right of Trundle Monkey, then straight up the face to the top.
FFA:Scott Haines, June 2004
He Speaks Foreign (5.4) - 40'. From the belay ledge below, climb up
through a wide weakness between two blocks to gain a ledge with a large
fin-like block to the right. Step left until over a bush, then head straight up
the face, passing to the right of a shallow right-facing corner a few feet
right of Free Falling.
FA: Phil Hodge, June 2004
I Speak Regular (5.7) - 40'. Start the same as He Speaks Foreign,
but once at the ledge, pull through the overhang and continue straight up the
steep face w/out using the fin-like block on the ledge. The black finger crack
is deceptively shallow and flaring, but has a three-finger pocket that is key.
FA: Mark 'Indy' Kochte, June 2004
Treppensteigen (5.4) - 38'. German for "stair climbing". Begin X feet right
of I Speak Regular, scramble up big ledges to a brown-tan
right-facing blocky corner until it ends below a whitish rock left-facing
corner. Transition from the lower to upper corner and finish on the upper
corner to easier ground to the top.
FA: Angela Roberts, June 2004
Project (5.v-hard) - 38'. Do the same initial scramble as for
Treppensteigen, but instead of following the corner, head straight up
the fractured face to a small overhang. Pull through the overhang directly and
finish on the steep face above (thin!). Once above this, easier climbing yields
the top.
Gesundheit (5.9** X) - 38'. Best line in this section of the cliff. Don't
sneeze at the crux! Begin as Treppensteigen and project, but instead of
pulling the small overhang directly, trend right to the higher section of the
overhang to gain two dynamite and bomber underclings. Work right on the
underclings and reach up to a thin flake in the black wannabe finger crack. You
may find a kneebar extremely helpful at this point. Work up and right one more
move to catch the U-slot notch (bomber hold). A couple more struggling moves
will surmount this stiff section and bring relief in the form of larger holds.
A powerful, technical crux section. Best top-roped; no gear for leading.
FA:
Johannes Reisert, June, 2004
Easy Corner (5.5) - 46'. Begin ~20 feet right of Gesundheit, climb the
long, blocky corner to the top. The crux is in the first half of the climb. As
the finish is anticlimatic, to spice up the final stretch, near the top of the
corner turn right and climb the blank-looking wall (5.6+) just left of the roof
at the top of the cliff.
FA: Patrick Polvinale, June 2004
Solid Adrenal-Ten (5.10* X) - 46'. Start on Easy Corner, but once
on a wide ledge partway up climb the steep and forboddingly thin wall directly
below the roof at the top on thinner holds with imaginary foot placements
(avoid using the blocky corner for feet if at *all* possible). At the roof pull
it on the right. Best top-roped; no gear for leading.
FA: Scott Haines and
Mark 'Indy' Kochte, June 2004
BLUEBERRY WALL
GPS coords:
Lat: N 39°40.265'
Long: W078°46.801'
This section is barely 40' tall, and has an amazing abundance of blueberry
bushes growing all around the area. Careful where you step! Many of the
blueberry bushes are protected from birds by massive greenbriar with
dagger-like thorns. The bushes not protected will be eaten clean probably
before you get there, so try to take care with any maintenance trimming
you do here (in order to have blueberries to munch on between climbs).
The routes are again listed from left to right, using the Far Wall routes
as the initial measuring point.
The routes are again listed from left to right, using the Far Wall routes
as the initial measuring point.
Desert Rose (~5.4/5.5) - 41'. This route starts at a six-foot tall
right-facing corner behind a multi-trunked oak tree 55' right of Easy
Corner. Scramble up the corner and step left a few feet until below
the blocky arete. Climb up through continuous blocks on good holds,
passing directly through a stained rose-colored section of rock halfway
up. Continue to the top.
FA: Mark 'Indy' Kochte, July 2004
Blueberry Bush (5.5* PG) - 41'. This line ascends a few feet right
from Desert Rose, starting in the middle of a blueberry bush patch. Head
straight up the wall to the top. Several variations are possible, but all are
essentially about the same difficulty level. The 'PG' lead rating is only
because if you fall, you _will_ hit a ledge somewhere along the drop.
FA: Mark 'Indy' Kochte, July 2004
Blueberry Pie (5.7*) - 40'. Start 5' right of Blueberry Bush,
climb straight up, aiming for the hardest-looking section of rock halfway up
(a blankish-looking concave section capped by shallow, dark overhangs). Pull
through the 'hangs (crux) to easier ground. Take care to not climb hard on
the column to the right at the top! The first ascention team attempted to
kick this lose, but it wouldn't budge. Feels pretty solid. However, it looks
quite fragile. Your belayer may be decidedly unhappy with you if this breaks
up while you are on it.
FA: Mark 'Indy' Kochte, July 2004
Sassafras Tree (5.4) - 40'. Start 5' right of Blueberry Pie,
take the path of least resistance to the top, ended up just right of the column
at the top. Without using the column, climb the final 7 or so feet to the top
(crux).
FA: Lisa V Smith, July 2004
SCI-FI WALL
GPS coords:
Lat: N 39°40.251'
Long: W078°46.791'
This is the next area to the right of Blueberry Wall, where the first route
stars approximately 70' to the right of Sassafras Tree. This section is
the left end of the Sci-Fi Wall area.
Red Shirts Rule (5.7*) - ~45'. Start on the left end of a the
rectangular boulder at the base of the cliff. Climb straight up through the
blocky overhang approximately 12' up, then continue up the broken face to the
overhanging arete. Skip up the right side of the pointed arete through a notch
at the top.
FA: Mark 'Indy' Kochte, October 2004
Aragorn (5.8* PG/R) - ~45'. Start just to the right of the rectangular
boulder that marks the start of Red Shirts Rule, a few feet before the
right-facing corner with small elm at the base of it. Climb the steep wall up
to and through two small successive roofs (5.7; height-dependent problem; you
can make life easier by avoiding them to the right). Continue up the featured
wall to a small ledge. Finish on the steep wall below the final rounded crux
roof (protectable with large-ish gear).
FFA: Mark 'Indy' Kochte, Aura
Garrison, October 2004
Redneck Martians (5.4 G) - ~45'. Start 5' right of the small elm tree at
the base of a right-facing blocky corner. Climb up the deep, broken black crack
system straight to the pine tree overhanging the wall from the broad ledge
above. Push through to the right onto the gravel- and dirt-covered ledge, then
quickly escape over easy 4th class terrain up to the right.
FFA: Aura Garrison,
Mark 'Indy' Kochte, October 2004
Striped With Radiation (5.8+? R/PG) - ~45'. Start as for Redneck
Martians, but instead of climbing the crack system, stay on the steep face
to the right of it and climb straight up to the gravel- and dirt-covered ledge.
Up to that point the climbing is quite easy. From the ledge aim up left for the
large detached block in the steep wall above the pine tree. Continue up left past
the detached block (pumpy crux) to the top, ending just to the right of Aragorn.
While protection is sparse on the first part of the climb, the crux finish takes good
gear.
FA: Aura Garrison, Mark 'Indy' Kochte, October 2004
The main section of the SF Wall stars with the tall buttress and continues on
for ~150-200' to a large right facing corner. Routes here range from top-rope
to short two-pitch leads.
GPS coords:
Lat: N 39°40.249'
Long: W078°46.782'
project (5.?) - As yet unfinished. Climb the left side of the buttress that
bisects the Sci Fi Wall.
War of the Worlds (5.5) - ~40'. Climb the large, blocky, slightly overhanging
right-facing corner of the tall buttress to a narrow notch near the top.
FA: Mark
'Indy' Kochte, Johannes Reisert, June 2005
War and Peace (5.7) - ~40'. Begin 5' right of War of the Worlds, between
the moderately-sized oak tree and the main wall. Casually weave through overhangs to a
small roof, and pass the roof on the left, gaining a small stance with a tree (crux).
Easy, peaceful climbing from there gains the top.
FA: Johannes Resiert, Mark 'Indy'
Kochte, June 2005
You Klingon Bastard (5.9) - ~40'. Start 10' right of War of the Worlds.
Climb straight up and through a series of small roofs and bulges. The final bulge
halfway up the wall is passed on the right (pulling it straight on seriously ups
the ante on this route). After the final bulge gain a ledge, and continue past that
up the final short steep section to the top.
FA: Mark 'Indy' Kochte, October 2004
Use The Force (5.8* PG) - ~40'. Pumpy crux, do as the route name
suggests! Begin 5' right of You Klingon Bastard, just to the left of a
series of left-facing corner cracks at the base of the rock wall. Wander up the
steep dark tan face to the roof. Pull through the roof following a crack of
weakness (extended crux, pumpy for hanging out placing gear) onto the white
rock above, then up to a ledge. Finish on the pleasant final wall up through a
square corner at the top.
FA: Mark 'Indy' Kochte, October 2004
Crackers Don't Matter (5.5 G) - ~40'. Crackers might not, but handholds
do! Start with the right two of the three left-facing corner cracks, ~6' right
of Use The Force. Climb up following the taller crack system (right) to
a small roof where the handholds run out. Step right onto a small hold and pull
around the roof (crux) onto a blocky ledge/ramp system. Finish by heading up left
over easy ground to the top.
FA: Mark 'Indy' Kochte, Lisa V Smith, October 2004
Number Six (5.6 PG) - ~35'. Starting 8' right of Crackers..., climb up the
bulgy face through small shelves to a broad ledge about halfway up. Continue straight up
to a small bulging block/roof system just right of a small pine growing out from the wall
near the top. Pull the block and easy ledges to the top. Beware that some of the ledges
may be sandy.
FA: Mark 'Indy' Kochte, Toni Price, November 2006
New Caprica (5.9) - ~35'. Start about 12' right of Crackers.... Climb up
easy holds to a broad ledge. Continue straight up to a short, left-facing flake/corner,
passing it on the left. Make a few somewhat not-so-positive moves until a sandy ledge is
gained, then pull up to finish on a final few jugs. Crux is the wall just above the broad
ledge.
FA: Mark 'Indy' Kochte, November 2006
Arrow of Apollo (5.7) - ~35'. Climb the first half of New Caprica. Instead
of heading up to the left-facing flake/corner, climb the face to the left, aiming for the
right side of the block roof system at the top of Number Six. Pass it on the right
and up easy shelves to the top.
FA: Mark 'Indy' Kochte, Toni Price, November 2006
DAK WALL
GPS coords:
Lat: N 39°40.233'
Long: W078°46.769'
This stretch of rock is the tan and grey wall to the right of the Sci-Fi Wall,
starting with the huge right-facing corner, and going over to a shallower
left-facing corner/chimney ~150' away. The center section of this wall is
featured with a stretch of tan rock adjacent to a stretch of grey rock. There
is a fair amount of dust on some of the climbs, from water run-off from the top.
Take care in the area that there are still loose holds, and definitely loose
rocks up at the top. You can either rappel in, or traverse over along the base
from the Sci-Fi Wall.
DAK stands for "Deutsches Afrika Korps", the proud but rag-tag German-Italian army
commanded by Erwin Rommel in North Africa during world war 2, and despite lack of adequate
support from the home front, nearly defeated the British before their supplies were
exhausted and the US forces became involved.
Ariete Arete (5.8** R/PG) - ~40'. 'Ariete' is Italian for 'ram', and is the name of
the elite Italian armoured division that served in North Africa during WWII before it was
destroyed to the last tank by the British 8th Army during the third battle of El Alamein.
This route climbs directly up the sharp arete seperating the Sci-Fi Wall and the DAK Wall.
Hug the arete and climb it straight to the top. There are places to put gear above the
crux (which is at the bottom, hence the 'R' part of the rating), but some of the blocks
higher up are not to be trusted, as a good fall could very well blow out a stack of them
onto your belayer.
FA: Mark 'Indy' Kochte 5/20/2006
Halfaya Pass (5.7* PG) - ~40'. Start a few feet right of the sharp Ariete
Arete and climb up the blocky corner system to the top, ending a few feet right of
the arete itself. As with Ariete, there are gear placements for leading is there,
but some of it is not bomber, as some of the blocks are not solidly in place and could
blow out on a fall.
FA: Mark 'Indy' Kochte, May 2006
I Deserve A Klondike Bar (5.10a*) - 42'. Begin up a ramp 8' above the base of the
wall, 20' left of DAK Crack and 30' right of Halfaya Pass, below and to the
right of two moderate sized pine trees on a ledge 10' below the top of the cliff. Climb
straight up the tan face through easy moves until you get to a pair of sharp "shark tooth"
holds (crux). If you miss them, you'll be on big slopers. The right tooth has a nice hold
for the right hand deep on the bottom, but be careful to not get bitten! Match hands and
reach up to decent holds. Continue up, passing to the left of a small bush, and arrive at
a very dusty ledge. The final 10' to the top is easy climbing.
FA: Stanislav "Stas"
Edel, May 2009
DAK Crack (5.5+) - ~40'. Start at a set of finger cracks below
a crack that seperates the tan wall on the left from the grey on the right, 50'
right of the large right-facing corner of Halfaya Pass. Climb up to a very
sandy ledge (crux), then follow the slowly widening crack to the top, climbing on the
tan or grey rock as you need. Feet get a little tricky up near the top. Take care of
loose blocks on the left as you climb the final few moves.
FA: Mark 'Indy' Kochte,
Johannes Reisert, June 2005
Kasserine Pass (5.8*) - ~40'. This clean line starts 10' right of
DAK Crack, at the right end of a wide and narrow roof 6'
off the ground. Boulder up through the roof and short wall above to a spacious
ledge. Work up to a right side pull/flake on the next steep section in order
to gain a series of horizontals, not all of which are as nice as you'd like
them to be (avoiding the side pull flake bumps the rating to about 5.9 or so),
gaining a small ledge with a small tree. Finish on the clean rock above to an
easy exit.
FA: Mark 'Indy' Kochte, June 2005
German Hair Force (5.6) - ~40'. Begin 5' right of Kasserine Pass.
Climb up an obscure line to a shallow corner with a crack. Finish by following
the corner/crack system to the top. This tends to be dirty due to the run-off
of silt and dust from above.
FA: Johannes Reisert, June 2005
The Gazala Line (5.7) - ~40'. Start 13' right of German Hair Force, atop of
a stack of 3-4 blocks. Climb up the black and white face to a ledge about 15' up. Continue
up the lightly golden brown face just left of the tan rock mottled with black splotches to
a smooth stretch of rock directly below the right end of the roof above (danger! at the
extreme right end of this roof are three stacked blocks cammed into the wall; they could
bust loose if pulled on, so keep your belayer well off to the side!). Pull through the
roof onto sandy ledges and continue over somewhat shakey blocks to the top.
FA: Mark
'Indy' Kochte, Stanislav "Stas" Edel, May 2009
![[Stas Edel on Nature of Time and Space]](nature-time-space.jpg) Astrophysics student Stas Edel contemplates the Nature of
Time and Space - and the need for chalk!
Astrophysics student Stas Edel contemplates the Nature of
Time and Space - and the need for chalk!
It's All About Me (5.4) - ~40'. Start at the base of a chimney in the large left-facing
corner 15' to the right of The Gazala Line. Climb up the chimney for about a body
length up. Just before reaching the awkward section, step outside to the right and delicately
step up another body length (alternatively, you could just struggle up the rest of this
section of the chimney, but really...why subject yourself to this?). Once above the broad ledge
that forms the base of the larger chimney in the corner, bridge across left to the compact
golden brown wall and continue up steeply on excellent holds until you reach the overhangs
above. Pull through the overhangs (crux) to the top.
FA: Mark 'Indy' Kochte, May 2009
Bombs Away Baby (5.3) - ~40'. Start as for It's All About Me, but after stepping
out of the chimney onto the right face, instead of stepping left across the gap to the steep
wall on the other side of the broad chimney, continue up the face to the right of the same
large chimney. Take care as there are still loose blocks and holds all the way up this climb.
FA: Kylee Underwood, Stanislav "Stas" Edel, May 2009
Nature of Time and Space (5.8* G/PG) - 50'. Begin 20' right from the It's All About
Me, below a small blackish roof 9' up. Boulder up to and through the roof on okay holds
(crux #1; you can bypass this by starting a few feet left and climbing up 10' then step right)
until you gain the shallow corner crack system. Layback the corner crack line for about 20'
until it veers sharply to the left. Continue straight up the golden brown blunt arete (crux #2)
to the upper overhangs. Pull through on more welcome holds and finish on easier ground.
FA: Mark 'Indy' Kochte, Stanislav "Stas" Edel, Bev DeVuono, May 2009
Fragments Of Faith (5.8* R) - 50'. Have a little faith, the holds are all there, in some
shape or form. Start 6' right of Nature of Time and Space, on a partially detached block,
between the small elm tree and the large wedge-shaped boulder. Climb straight up the face to
the overhangs a few feet left of the prominent projecting roof near the top. Once through the
overhangs climb the final 8-10' on easier ground to the top. Note: the cruxes (there are
several) are height-dependent. If you can reach high, you can by-pass the intermediate holds
between the horizontals.
FA: Mark 'Indy' Kochte, Bill DeVuono, Bev DeVuono, May 2009
Touch The Sky (5.7*) - 50'. This and the next two routes start in the same chimney, a few
feet right of Fragments of Faith. Climb up the 6' chimney to the ledge. Facing the main wall,
climb up the center of the tan face (crux), occasionally sharing a hold with Fragments...,
until you reach some larger holds. Trend right and up to a notch to the right of the square roof
at the top.
FA: Mark 'Indy' Kochte, Aug 2009
He Stole My Dress (5.6) - 50'. Same start as for Touch The Sky. Once at the ledge,
move right to the arete/chimney. Climb up the arete (or the chimney if you're a masochist) until
it is possible to step fully onto the wall on the left. Climb up the left portion of the face,
staying right of Touch..., then work the blocky corners (warning: some loose stuff here)
to the top.
FA: Michelle Mercier, Regina Schulte-Ladbeck, Aug 2009
The Tebaga Gap (5.4) - 55'. The crux is the start, really. Begin as per He Stole My
Dress. But instead of stepping onto the main wall, continue up the arete until even with a
pine tree off to the right. Then either slip around the right of the block before you into a 4th
class gully and climb up, or climb up the block before you (more enjoyable) to its top, then
finish on the blocky left and around the corner from the finish of He Stole My Dress.
FA: Mark 'Indy' Kochte, Aug 2009
THE SAND PILE
GPS coords:
Lat: N 39°40.217'
Long: W078°46.759'
This area starts around the corner approximately 30-40' to the right of The Tebaga
Gap, and about 15-20' down on the ground proper. The sand that is evident at the
DAK Wall is even more so on the holds and ledges here. But that aside, the area offers
some nice moderate level climbing - unless you like serious roof problems, then you can
up the ante a bit!
Belayer note! Given the amount of debris that litters the ledges above, and
potential for other holds and blocks to unexpectedly break off, it is suggested you belay
far left or right from where the climber is going up to avoid any gravity missiles that
may come shooting down. Wearing a helmet is a good idea here, but won't protect your
shoulders, back, arms, etc.
The first four routes climb the face and ledges to the left of the large roof
high above.
Trundle Warfare (5.7*) - 82'. Begin 12' right of the short, sharp-edged right-facing
corner, 15' below a right-facing crack. Climb straight up on long but shallow flakes and
inseams to reach a ledge. Continue up and layback the crack until you reach a flaring
chimney system. Continue up the right wall, using whatever you have available, until you
reach another ledge. Continue up the next steep but short section of wall to another
spacious ledge. The great rock ends at this point. From here work your way up another 30'
to the top, weaving through short, steep steps and ledges of sand and debris as you see
fit.
FA: Brendan Cathcart, Mark 'Indy' Kochte, Sept 2014
Trundle Junkie (5.8*) - 82'. Really a variation to Trundle Warfare, but
well worth the time to explore. Start as per Trundle Warfare, but upon reaching
the first ledge 10' up, avoid the layback crack (and flaring chimney above), instead
work the arete on the right. Rejoin Trundle Warfare at the next ledge up.
FA: Brendan Cathcart, Sept 2014
Dancing for a Vision (5.7*) - 82'. Start 5' right of Trundle Warfare, below
a short, shallow right-facing corner. Work up to the spacious sandy ledge, then directly
up the steep wall above, trending slightly right. After 35' of steep rock dancing, pass a
black bulge/small roof of rock on the right, taking care that some of those black holds
could break off unexpectedly (somewhat fragile seems to be the nature of that rock type).
It is possible to avoid using the lower black rock holds by working out an inventive
arm-deep undercling and reach tall for solid holds above. From there continue directly up
to the top. Steep, sustained, but not outrageous. Would be an awesome route if not for
all the sand on the holds.
FA: Mark 'Indy' Kochte, Brendan Cathcart, September 2014
Enter Sandman (5.4) - 82'. A bit of a wandering route, really. And a wee bit
sandy. Start at a short crack 5' right of Dancing for a Vision and climb up to a
spacious and sandy ledge. Sand will be the name of the game here. Join Dancing for a
Vision for about 10' then traverse and climb up right as easier ground dictates.
Continue following the path of least resistance (and larger holds) just right of
Trundle Warfare until about 30' below the top. From here finish as per Trundle
Warfare.
FA: Katie Bechtold, Mark 'Indy' Kochte, September 2014
![[Jeffrey Lash on the first ascent of 'Thank You
Space Expert']](space-expert-13.jpg) Jeffrey Lash on the first ascent of Thank You Space
Expert
Jeffrey Lash on the first ascent of Thank You Space
Expert
Theater of Tragedy (5.7*) - 77'. Start at a short right-facing corner that is
about 6' above the ground, uphill and 8' right of Enter Sandman, directly below
the stacked broken blocks below the large roof 35' up. Work up to a ledge then up the
broken blocks until you reach the broad roof. Pull around the roof to the left (fun) and
up the steep face (crux) until you reach a small ledge and a bush. From here trend
slightly left and hit the top.
FA: Mark 'Indy' Kochte, September 2014
Thank You Space Expert (5.9*) - ~70'. Locate the narrow vertical finger crack line
a few feet right of Theater of Tragedy. Dance up the face directly to the right
half of the large roof above. Working the block on the right, pull through the roof
employing some good side pulls as you can find them, then aim for some hand ledges (crux)
up the steep black face above. From here continue straight up to sandy ledges and
the top.
FA: Jeffrey Lash, Brendan Cathcart, September 2014
Travel is Dangerous (5.7) - ~70'. Begin at a vertical crack/groove system 12'
right of Theater of Tragedy. Follow that straight up to the roofs where there is a
large crack separating the blocks of the roof. Pull through and continue up the steep
orange and black rock to the top.
FA: Jeffrey Lash, September 2014
Yes! I Am A Long Way From Home (5.8*) - ~70'. Begin 5' right of Travel is
Dangerous at a broken vertical crack line. Follow that past a bush to the two
tiered roofs directly overhead. Step past the first roof on the left to reach the
second, main roof. Stepping right, and with limited feet options, pull through the main
roof. Intimidating due to lack of feet, but easier than Thank You Space Expert.
From there climb up the black and orange face to the top.
FA: Jeffrey Lash, September 2014
Jenga Me Crazy (5.6) - 54'. Start at the broad chimney that bisects the
north-facing wall, 7' right of the broad corner and 10' right of Yes! I Am A Long Way
From Home. Climb up/around/over/through the chimney until it ends, and continue up
following the large, somewhat rotten left-facing corner until another chimney is formed.
Take care for loose blocks! Climb up the left side of the chimney for a few moves until
it is possible to step out right onto and around the arete, onto the outside face. Climb
up the face and/or finger crack system to the top. Sketchy when in the chimney systems,
climbing is much more solid once on the face.
FA: Brendan Cathcart, Mark 'Indy'
Kochte, September 2014
Disintegration (5.7*) - 54'. Start a few feet right of Jenga Me Crazy,
at a wide crack (narrow off-width-sized). Follow that up to a block roof. Pull through
the roof and continue up the face for some pleasant climbing to the top. Note: there is
some potential for some loose large rocks in the corner on the left side of the climb.
Take care when climbing up if you end up into the corner.
Brendan Cathcart, September
2014
WHITE WALL
GPS coords:
Lat: N 39°40.205'
Long: W078°46.749'
Located to the right and around the corner of Sand Pile Wall, most of this section of
rock offers unique level ground at the base of the rock unlike most of the rest of the
cliff: no thorns, only a blanket of moss and partially buried rocks. Most of the routes
here start on the steep, lichen-free white face. Except for the ledges at the upper ends
of the routes, the rock here is pretty clean. The route cruxes are generally, but not
always, somewhere in the bottom third of the wall, in/around the bullet-proof white face.
Mountain Thunder (5.6-5.9) - 50'. This route actually begins on a ledge up and left
around the corner from Our Solemn Hour. Climb the arete with a vertical crack and
work onto the right face to reach a large vegetated ledge. (optional: work onto the more
bouldering left face (5.9) as the crack ends and gain the same ledge). Walk a few feet
over to the left end of the 35' tall buttress above you, and climb the mostly white rock
arete to the top, dealing with silty/sandy ledges about 15' up. Note: the tan/white/black
mix of rock in the middle of the buttress is fairly rotten and has loose blocks. Best if
your belayer is tucked in the left corner at the start of the route to avoid any
dislodgings you might inadvertently do. If you opt to climb this route, just be aware of
the loose rock potential. Your belayer will thank you.
FA: Mark 'Indy' Kochte, Travis Smith, October 2015.
Our Solemn Hour (5.9*) - 69'. Begin approximately 7' right of the blocky
right-facing corner at the left end of the wall, below a short, sharp right-facing block
about 8 feet up. Work up the short right-facing block to a stance. Continue pretty much
straight up the white face through a rectangular orangish rock alcove, and onto more
white (and black) face climbing (crux). Once at a ledge, step left and climb up black and
orange rock, staying left of the line Not Human Kind, aiming for the square white
wall at the top of the rock. Once at that final stretch of rock, finish as you see fit to
keep the climbing fun.
FA: Mark 'Indy' Kochte, Jeffrey Lash, Brendan Cathcart, September 2014
Not Human Kind (5.9+*) - 69'. Mildly contrived opening moves. Either start on
Our Solemn Hour and move up right quickly past the right-facing block, or begin a
couple feet to the right below several shallow roofs. Avoiding the right-facing block 8'
off the ground on Our Solemn Hour, work long reaches up the white wall and through
the shallow roofs (crux; also, look for a sideways undercling finger 'pocket'), until you
reach a ledge with a bushy tree on it. Either step through the tree and climb the shallow
inside corner behind the tree, or (better) stay to the left and climb the short buttress
until you reach a ledge. From here either trend left and climb the upper section of
Our Solemn Hour or continue up ledges and steps, aiming for a pair of
diverging gully chimneys at the top. Finish how you want to make the final moves fun up
along the gully chimneys.
FA: Mark 'Indy' Kochte, September 2014
Two Steps from Hell (5.9*) - 55'. Start 20' right of Our Solemn Hour, below
the right side of the roof 15' up. Delicately work up the bullet-proof white wall (crux)
to the roof, and step through it as handholds dictate on the right. (significantly more
challenging to the left). Continue up to a second roof, and step through it on the blocky
right side. Finish on steadily easier ground to the top, taking care of loose rock on the
ledges for your belayer below. There's a lot of climbing packed into this 50-odd foot
tall route.
FA: Mark 'Indy' Kochte, Brendan Cathcart, September 2014
(next wall over)
GPS coords:
Lat: N 39°40.185'
Long: W078°46.744'
SENTINEL TOWER GPS coords:
Lat: N 39°40.346'
Long: W078°46.941'
This outcrop tower can be seen far to the left of The Far Wall area, poking
lonely out of the woods. It actually is easy to reach, but takes a bit of time.
You can either follow the directions to The Far Wall area, but instead of
veering off into the woods at the arrow-head rock, continue on the trail
(semi-overgrown with greenbrier due to lack of foot traffic) until you reach
the dirt road. Turn left and follow this to a wide area where the road bends
hard to the right, and go off left to the overlook. This is the top of the
Tower. An alternate way to go would be to follow the dirt road from the paved
road of the plastics factory the entire way. It will add a few minutes to the
walk, but you will be free of greenbrier.
GPS coords:
Lat: N 39°40.317'
Long: W 078°47.328'
![[Cumberland - Locust Grove
Walls]](cumberland-locustgrove-walls.jpg) The great slab walls outside of
downtown Cumberland
The great slab walls outside of
downtown Cumberland
Parking coords (at the far end of the community, near where the RR tracks cross Wills
Creek; local fishermen sometimes park here to fish):
Lat: N 39°40.653'
Long: W 078°47.296'
From this parking spot it IS possible to cross the tracks right near the bridge to get to
the crag, but this (crossing the RR tracks) is illegal. To keep it legal, traverse
under the RR bridge and do the short climb up the other side. From there take the
trail into the woods until you come to another trail leading left and right. Turn right
and continue down the trail approximately 0.4 miles until you get to the rocks on your
left. On your way back out, pay attention to where the side trail is that leads over to
the RR tracks. If you suddenly have the river near you, you went too far. Reverse the
procedure for going under the bridge.
These next two parking options I do not recommend as they force you to cross the
tracks directly, which, while super easy to access the cliffs, is
PATENTLY ILLEGAL! BE WARNED! IF CAUGHT, YOU WILL BE ARRESTED!
Furthermore, if you are caught, consequences could extend as far as shutting down any
access to these cliffs. I recommend instead the above parking location. Otherwise,
exercise extreme discretion and don't ruin it for the rest of the climbing community.
Parking coords (across from the used car dealer; mind the mailbox, don't block it):
Lat: N 39°40.267'
Long: W 078°47.365'
Parking coords (just left as you cross the bridge over Wills Creek from Alt 40; room
for 2, maybe 3, cars):
Lat: N 39°40.241'
Long: W 078°47.370'
If you DO opt to park at one of these two locations, do NOT park near/by/at/in front of
the brick utility building!
This is a fairly well-developed sport/trad/top-rope climbing area a mile or so north of
The Narrows, a few miles northeast of downtown Cumberland. To access it from I-68 get off
at Exit 43D (Maryland Ave; these directions assume you are coming in from the East).
Follow the road as it turns left a block later and then turn right at the stop sign onto
Park Street. Follow that about 0.1 or so miles to a multi-directional intersection.
Continue straight (bearing ever so slightly left) and turn right when you can.
Immediately get over to the left lane at this point and follow that to the left. A short
distance later you will reach Alt 40 proper.
After the third light (Pear Street) you'll then go over a bridge and come to
another light; bear right. Continue on Alt 40W for 1.1 miles, passing the Fruit Bowl
market on your right. As you approach another light at the junction of Alt 40 and Rte 36,
there will be a small road to the right called Locust Grove NW. Turn right here! Cross
over the small, one-lane(!) bridge. You'll see the cliffs on your right, across the
tracks. There are parking options right after you cross the bridge, but I would recommend
continuing on into the community. As Locust Grove NW comes to an end, turn left briefly
onto Bear Lane, then right onto Wabash St NW. Follow Wabash to the end, then turn right
and follow the 'road' back as far as you can. When parking, pull off as far as possible
so other people who use this area can get by your vehicle.
The cliffs face northwest.
There are around 30-40 routes here: a mix of top-rope, trad, sport, and mixed. Be warned:
not all of the bolts are well-placed. There are a number of trad lines in the area as
well. It is best, at this time, to find someone who frequents the area if you want to
climb there, to get more information on the routes.
The entirety of Locust Grove faces northwest, so does not get a lot of mid-winter sun.
In the spring and fall, however, sunlight should be plentiful by late afternoon. Midday
in the summer it can get pretty hot on the rocks. (not to mention ticks, mosquitoes, etc).
The jungle of the surrounding forest will ensure the lower bands retain higher humidity
levels.
Land ownership issue #1. There is some discrepency on who owns the
land: the railroad, the city, or is it part of the state park. To the best of my
understanding the rocks are on railroad property (given some of the signs I've seen on
trees below the cliffs of the Narrows; also, the flat trail you walked in on is actually
an old RR bed), and thus climbing here is considered trespassing (railroad companies are
notorious for not liking the public to be hanging around on their property, much less
crossing tracks anywhere but at controlled intersections). Nevertheless, people have been
climbing here for easily three or more decades, and there are periodically random hikers
and geocachers that visit the area. It has also been claimed that the cliffs are
public land, but whether they are or not, unless you come up and over from the Narrows,
you still have to cross the railroad tracks (unless you go under the RR bridge), which
is illegal (see warning above). So if you visit, be discreet and on the down low.
Land ownership issue #2. There is a section of rock a fair ways down (I
do not yet know exactly how far; TBD) that is not on railroad property, just before the
quarry. It is still private nonetheless. And the landowner does not wish for the general
climbing populace visiting. Yes, there are bolts on the rocks there, but you are not
allowed to climb on them. This is their private wall. Please respect it.
But if you really really have to climb those routes, get to be friends with the
landowner.
The coordinates for the walls noted below are mostly for the top, but in some cases they
were taken at the base of the slab(s).
TIMBARB BUTTRESS
GPS coords:
Lat: N 39°40.285'
Long: W 078°47.337' This is the furthest left slab of the crag right along the
walking path. So-named due to the "Tim + Barb" graffiti on the left side of the face.
There are at least four established routes on it with potential for more around the
corner to the right. There are a pair of bolted anchors with rings at the top just right
of where Copperhead finishes, but as of the spring 2015, they were very, very
rusty. Until/unless they are replaced, best to set anchors using cracks and the larger
trees on the ledges, and/or scramble down the corner to the left (low-5th class).
Unknown (5.? PG) - x'. This is the furthest right ramp/corner system as the trail ends
and dumps you down onto the tracks. Climb up the corner and ramp to the top.
Unknown (5.easy PG) - x'. This route is the first clean and clear ramp around the corner
from the main TimBarb face. It is not often climbed, though back in the day it was often
used as a top-rope route for beginners. Climb up the blocky right-leaning ramp and
corner system to the top. No anchors. Scramble down to the left or rap down the TimBarb
face.
West End Crack(?) (5.10c* G) - 75'. Great jamming! This route climbs the hand/fist crack up
the black overhanging wall just right around the main TimBarb face. Once the crack ends,
follow the right-facing flake system to the top.
West End Boys (5.10a* G) - 80'. Starting to the right of the blunt arete that is
the start of Copperhead, climb the blocky and right-leaning face to the roof
above. Staying low, get a good left hand hold, right heel hook, and stretch up to a solid
right jam in a coarse hand crack. Crank, get another jam, then reach up to finish the
crux. Finish the climb by running up the stellar arete to the top. The crux protects very
well with #0.75-#2 cams. No anchors up top, establish your own. Then either rap off from
the Copperhead anchors (see note above) or down-scramble left from there. Note:
some of the rock at the crux is severely fractured and loose!
TimBarb (5.7** PG/R) - 80'. Start at the blocky blackish outside corner until you
can step left and reach a thin crack. (alternatively, climb the shallow, narrow,
left-facing ramp of Copperhead until it peters out at the thin crack; bit slippery).
Continue up left to a sizeable boulder on a ledge below a long left-facing corner.. At the
large block on
the first ledge, traverse right and up. If you are leading, get in some good gear at the
block. Your next decent pro placement isn't for another 15-20', and if you blow it here,
you're smacking the ledge on the way down, if not outright decking (hence the "/R"
attribute). From the horizontal dance delicately up the face and shallow right-facing
flake systems until you get to a broad ledge. Finish by either climbing the offwidth
crack of Copperhead or delicately climbing the thin-holds face to the top. Lower
off or scramble (4th to low-5th class) down to the left.
Copperhead (5.6** G) - 75'. So-named because of the periodic copperheads that have
been found nesting in the cracks of this climb. Gear would include everything from small
nuts to a #5 Camalot near the top, plus something to deal with any snake encounters you
might experience. Begin at the right outside corner of the slab as per TimBarb.
Climb up to the block below a long left-facing corner. Follow the corner and jam crack
until it ends at another ledge. Finish by going up the easy (hah!) offwidth to the fixed
anchors. Lower off the rap anchors (see note above) or scramble down to the left.
LEFT-RIGHT WALL
GPS coords:
Lat: N 39°40.xxx'
Long: W 078°47.xxx'
This is the first wall to the left of the TimBarb Wall. There is a line of three bolts
up the center of the face. Nominally to protect the two face climbs, they are awkward to
climb from either route. Not the best bolted line around.
Unknown Right (5.9+) - 40'??. Climb the face to the right of the bolt line.
Unknown Left (5.9+) - 50'??. Climb the face to the left of the bolt line.
GREEN WALL
GPS coords:
Lat: N 39°40.312'
Long: W 078°47.330'
This obviously green lichen-stained wall is located 100' down
the trail from the Left-Right Wall. There are short and tall lines here. The first two
routes are actually on the wall just to the right of the main Green Wall.
Waltzing Matilda (5.10a* G/PG) - 40-45'. Four bolts and anchors. Follow the bolt line up
to the top. Note: after the 4th bolt it is about 15-20' to the anchors. It is also at
this point that the difficulty eases off to about 5.4 or so, with a 5.6 or 5.7 move to
keep it honest,
Unknown (5.10) - x'. This is a partially bolted line located a dozen or so feet left
of Waltzing Matilda. Follow the 3-4 bolts up the first half of the wall, and use
gear (sparse) for the second half.
Green Wall (5.10b*) - 32'. Area testpiece and a crimp master's delight. This short
sport route is in the center of the Green Wall. Follow up 4 bolts to anchors. Crux is
passing the first two bolts. Relatively easy if you know the sequence. If you don't,
it's likely to feel much harder than it is rated.
Baker Flake (5.4-5.6* G/R) - 69'. This route starts a few feet left of
Green Wall at a shallow left-facing corner system. Work up the corner and face
until you get to a horizontal (and the first decent gear placements). From here traverse
easily left to gain the large right-facing corner system (alternatively, climb the face
just right of it for a bit more spice). Follow this until it ends and finish the last 10'
up to the anchors. A nice route with a variety of options that one can use to make
it harder or easier.
Baker's Way (a.k.a. Broken Rib) (5.7* G/PG) - 69'. Start on
Baker Flake but instead of traversing left to the right-facing corner system,
continue up the face passing three bolts. Finish on the last block with the Baker
Flake anchors. Really a variation to Baker Flake. You can make this as hard
as 5.7 if you avoid the big holds and follow the bolt line directly.
Baker Street (5.9+*) - 69'. Really, a variation start to Baker Flake. Begin
halfway between the start of Baker Flake and Superman. Climb the thin face
up to gain a nice horizontal. Finish on Baker Flake.
Superman (aka, The Overhang) (5.10b*) - 66'. This will test your Kryptonian-born
powers. Start directly below the large detached offwidth-sized right-facing Baker
Flake. Climb the thin crack (crux) to the overhang, clip the bolt (if you are
leading) at the lip of the overlap, step right and heroically pull through it. From
there fly up the face to the anchors at the top.
![[The piton of Piton Crack]](piton-crack-piton.jpg) The piton of Piton Crack
The piton of Piton Crack
Piton Crack (5.8+** G) - 60'. A classic route. Begin 12' left of Superman
at a detached flake boulder buried upright at the base of the wall. Follow the thin finger
crack past a piton until it tapers off, then past two bolts bolts to gain a broad ledge
with two beefy rap bolts. There is a second pitch (5.10-, ~30') with one bolt in
the wall above the ledge, and bolt anchors up top.
BEE STING WALL
GPS coords:
Lat: N 39°40.324'
Long: W 078°47.297'
To get to the start of these routes, zig-zag scramble up a
few ledges for about 30'. It is possible to drop top-ropes on several of these routes
by continuing the scramble up left until you can gain the higher ledge, then work your
way right. Be careful as the ledges up here are exposed. A misstep would not make your
day. The first three noted routes are some of the hardest at the Grove.
Unknown (5.11b/c, PG/R) - ~70'. Start below the long line of bolts. Climb a few moves up to
a left-sloping mossy foot ledge. Follow the bolt line until the difficulty increases
dramatically, then head right toward a right-leaning finger crack (crux). Thin gear will
protect the crack. Climb up the crack and face to the arete, then scramble up ledges to
the top.
Unknown (5.12c* G) - ~70'. 10 bolts. This is the first tall wall (with a bolt line) you
would come to scrambling up from Piton Crack. Follow the bolt line up to the
chains! The crux is the very thin nearly vertical scooped out section of the face. A
solid testpiece route.
Unknown (5.11d, G/PG) - ~70' 3 bolts, mixed. This route has some very thought-provoking
slab moves. Very thin at the crux, pretty steep for a slab. Start just left of the
previous route, at the base
of a thin crack. Follow that up until it meets a shallow right-facing corner about half
way up. Climb this until the scooped wall steepens and the right-facing corner ends.
Above you is a featured face with three bolts spaced a fair ways apart. (there is a gear
accepting horizontal between the second and third bolts). Delicately make your way past
the bolts then angle up right to the chains for the previous route.
The next set of routes climb the main Bee Sting Wall.
Unknown (5.8 R) - 76'. Begin X' to the left of the previous route on the main face of
Bee Sting Wall. Climb up a shallow ramp toward a small tree, then up to a series of
shallow right-facing corners to a rooflet. Pull that and continue on up to the top. If
you start directly below the small tree and climb straight up it is more like 5.8+.
Unknown (5.10d* PG) - 76'. 4 bolts, mixed. This stout blank line follows four bolts from
bottom to top. Thin crimps and tiny feet at the bottom. The first two bolts are 15-20'
off the ground, and within 5' of each other. The third bolt is a very very long runout
5.9 slab away, as is the 4th bolt from there. There are some gear options between the
bolts (hence the spacing; note that the rock is a bit hollow about 6 or so feet past the
second bolt). Also, the anchors are not exactly close to the 4th bolt, but then again, a
fall from there won't ground you.
Start to the right of the right-facing corner below the first bolt. Follow the bolt line
to the top.
Unknown (5.9) - ?'. This route starts in a right-facing corner system formed by a slab
'pillar'leaning against the main face, to the left of the above 5.10d problem. Climb up
the corner until it ends. From here traverse right and either climb the unknown 5.10d
route or explore for other options on this golfball-dimpled slab until you reach easier
ground at the anchors.
Killer Bee Sting (5.8-*** PG) - 76'. Excellent! Begin at the base of the mini slab
leaning against the main wall here, forming the lowest point on the wall. Climb up through
a few horizontals (crux) until you gain the top of the 'pillar'. Step up and onto the main
wall, following the fantastic finger crack system to the top. If you lead this, there are
no bolts, it's all gear, and the lower slab is difficult to protect well. Hence the PG
rating.
Bee Sting (5.7** G) - 70'. Great climb. While some contend this is a 'hard 5.6', others
suggest it is more solid 5.7. For purposes of this guide, it's 5.7. Start uphill to the left from Killer Bee Sting,
at a left-facing corner. Climb the corner until you reach a nice, right-leaning discontinuous finger
crack system. Follow that towards the anchors at the top. Probably one of the most
aesthetic lines in Locust Grove. If you like crack.
Unknown (5.9* G) - 51'. 6 bolts. This and the next route (Unknown 5.10a) can be TR'd from
the shuts at the top. Climb the shiny bolted line just left of Bee Sting.
The first three bolts are fairly close together, then the fourth is quite a ways up. You
have to deal with the first crux to get to the fourth bolt. The final crux is getting to
the bolt anchors. Interesting face climbing problem.
Unknown (5.10a R) - 51'. 3 bolts, mixed. Thin gear, when it is there. Start as for the
Unknown 5.8, but trend left and climb the sparsely bolted line just right of the
right-facing corner/chimney that marks the rightt end of Barbed Wire Wall, left end of
Bee Sting Wall. The crux is at the top, and if you fall there while on lead, you might
tag the top of the large flake that forms the chimney on the way down. Be aware.
Our Little Secret (5.4 R) - 75'. While off-putting to most folks, if you want to
experience an easy and (cough) nice (cough) chimney route, this one's for you. Climb the
chimney formed by the right facing corner at the left end of Bee Sting Wall, just left of
the Unknown 5.10a route.
BARBED WIRE SLAB
GPS coords:
Lat: N 39°40.330'
Long: W 078°47.294'
So-referred to for the rusty coil of barbed wire wedged between some boulders a few feet
past the anchors at the top of the wall. This wall is just to the left of the Bee Sting
Wall.
Unknown (5.11b G) - 40'. 4 bolts. Immediately left of Bee Sting Wall is a short slab, with
the base a little higher up than that of Bee Sting Wall. Climb up the edge of the buttress
right of the first bolt, then head up left to a horizontal crack, where the third bolt in
the line is a couple feet above. Continue up passed the 4th bolt to the anchors. While
shorter than the routes on Bee Sting Wall, this route still demands some respect.
Project (?) - <40'. This route climbs the face to the left of the previous line, directly
below the large boulders hanging over the edge above.
Unknown Wall
GPS coords:
Lat: N 39°40.329'
Long: W 078°47.288'
UPPER SLAB
GPS coords:
Lat: N 39°40.345'
Long: W 078°47.250'
Sometimes called White Slab or White Wall. There are five
routes established on this exposed above-the-trees rock. Due to the lack of tree cover,
this can still get afternoon sun as late as November, or as early as February. And be a
reflector oven in the summer. You can access the top o the rock face by
walking around to the left then bushwhacking up.
Right Now Arete (5.3 R) - 55'. Climb the right arete of the slab to the top.
Not much for gear on this route, better to TR it instead.
Upper-Unknown (5.7*R/PG) - 44'. Originally 5.8, the crux hold apparently broke off, and
somehow that made this route easier?? Start below a thin finger crack at the right side of
the slab, then follow the right-arching crack up to the arete. Angle left and up the face
to the bolt anchors. (no gear; clip a bolt if you can reach it). Be aware of ground fall
potential high up on the route.
Upper-Unknown (5.11a* G) - 44'. 5 bolts. The is the rightmost of the two bolt lines on the
face. Start about 10' right of the tree at the base of the slab. Delicately balance your
way up the almost mostly useless featured face, following the bolts, to the shuts up top.
The crux is at the bottom, but the top is no sneeze.
Upper-Unknown (5.10d/5.11a* PG) - 44'. 4 bolts. This starts 5' right of the tree at the
base of the slab, and follows an exceedingly thin crack/seam along a bolt line to the top.
No anchors. Because of this it gets a PG. Best that you either build your own, or traverse
right to the shuts on the route to the right. No shame in building an anchor and just
TR-ing this, either.
Upper-Unknown (5.9+ PG) - 40'. Stout. No bolts. Small, tricksy gear placements.
Start a few feet left of the tree at the base of the wall and Climb the thin face and
right-trending crack. No bolt anchor for this one; you need to build it with gear and
natural pro.
The Unwanted Wall
GPS coords:
Lat: N 39°40.xxx'
Long: W 078°47.xxx'
If you continue down the main trail from the Green Wall, there is more climbing to be had.
Currently (spring 2016) there is only one established line down here. But plenty more
rock for exploring new routes! To get here follow the trail a few hundred feet from Green
Wall, then turn right and bushwhack up the steep hill to get to the base of the rock.
Red Headed Stepchild (5.10) - ~40-50', 3 bolts, mixed. Climb up past two bolts to
a horizontal. From there continue up to a large-ish rooflet that has a right-facing
right-leaning corner. Pull the roof directly at a bolt then continue up to anchors.
GPS coords:
Lat: 39°31.640'
Long: 079°24.000'
Fork Run Recreation Area is a small heavily wooded area a couple miles behind the Wisp
Ski Resort that hosts some bouldering, top-roping, and short trad & sport leads. It's
gritty nature is very reminiscent to that of Coopers Rocks 20 miles or so to the west.
And the plethora of pockets on this rock make it even more unique in the Maryland
repetoire of climbing styles for you to exercise on.
The Boulders area was first developed by Brian Trusty and Brandon Thompson, which at the
time was an over-vegetated mound of rhododendron that completely hid the rock beneath.
After weeks of blood, sweat, and tears, they cleared away the rhodo to reveal the wealth
of climbing potential. They also then tackled the Ledges area, bringing in a couple
friends from Yosemite, Tamara Hastie and Matt Greco, to help out with setting the bolted
lines and anchors.
Nothing here is overly tall, 35' max with 25' being the average. This is not going to be
a 'destination' crag. But if you live locally, or are going to be spending any time in
the area (i.e., at Deer Creek) and feel that desperate need to get some vertical
action in, this place will fit the bill!
The lands and climbing area are managed and maintained by
Adventure Sports Center International
(ASCI).
![[Martin bouldering barefoot]](fork-run-bouldering-martin.jpg) Only REAL boulderers go it barefoot!
Only REAL boulderers go it barefoot!
All climbers are asked to register at the kiosk and sign a waiver before heading in to
climb (although the sign-in area does not always have a register or waiver for you to
fill out).
At this time, short of some route descriptions, no difficulty information is available,
other than routes range from "pretty darn easy" to "damned impossible". Until I can learn
more, you're on your own judgement.
Directions:
From I-68 take exit 14 onto Rte 219 south towards Wisp Ski Resort (alternatively, if coming
from the west, take exit 4, get on MD 42, and take that 7.5 miles south to 219; keep right and
continue another mile to the Wisp ski Resort area). Once you get to the environs of the Wisp Ski
Resort, turn right onto Sang Run Road (you can short-cut this by jumping off of 219 onto Deep Creek
Road, but it's not going to save you any real time). 0.2 miles later turn left onto Marshall Road.
Go slowly through the resort cottages, houses, and other businesses for 1.1 miles, then turn right
onto a very inobviously marked Overlook Road. This road is a private road (which is why it's marked
differently from all other road signs). Travel up the sometimes steep and always continuous hill
until you come to a stop sign at the top of said hill (0.7 miles). Turn left onto Wisp Mountain Road
and go for another 0.7 miles to a stop sign (2-way) at Shingle Camp Road. Turn right onto Shingle Camp
and follow it for 2.25 miles, almost to the very end of the road (and another stop sign). Just before
you reach the end of Shingle Camp, turn right onto a 1 lane gravel road that is the entrance to the Fork
Run Recreation Area. 500 feet later you will arrive at an ample parking area.
Parking:
Lat: 39°31.500'
Long: 079°24.226'
From the parking area, saunter down the gated dirt road past the kiosk. About 500' later
you will come to a shack on the left with a couple of picnic tables. You'll have also passed
a porta-privy halfway between the shack and the parking area (so no need to use a tree).
Continue on another 50-80' to the trailhead on the right. Follow the trailhead (and signs)
to the climbing spot of your choice (below).
Word of Caution: Some of the bolts, hangers and rings have gotten rather...rusty in the
time since they were put in. Use your judgement in trusting whether or not to use these as
anchors or for clipping purposes!! Pre-inspect the bolts on the route, or scout the anchors
from up top to be sure they meet your level of acceptable risk. This is especially of note for
the fixed anchors in The Boulders climbing area.
THE BOULDERS
Lat: 39°31.667'
Long: 079°24.111'
This is the first climbing area you can get to from the trail. It consists of 4-5 free-standing
boulders clustered together, just far enough apart to offer some fissures for you to squeeze
through (and access climbs on the "inside" of these boulders). There are 5 bolted sport lines
on the steep rock face on the left side of the boulders, a couple of top-rope lines on the
buttress you first see coming in from the trail (that could also be trad-led), plus a handful of
additional top-rope lines in between the boulders. There are some personal anchor bolts on the very
top, but being spaced out so that more often than not a single bolt covers two or three routes, they
are likely anchors for people to tie off on in order to set up the top-ropes.
In order to most easily get to the top of these boulders, the ASCI maintains an aluminum ladder
on the 'back' side of the rocks.
The routes are described right to left, starting just right of the top-roping buttress. It is possible to
chimney straight up the fissure to the top. Good for some chimney practice, if you're into that sort of
thing. ;-)
If you continue on down the path past the Main Face, you'll come to another short, overhanging boulder to
play on.
TR Buttress Area:
Boulder Buttress Right (5.8-* PG) - 23'. Standing before the boulders from the path, locate the anchors
atop the right, very featured and somewhat overhanging wall with a leaning right-facing corner, to the right
of the fissure that splits the two rocks apart. Clamber anywhere up the wall to the anchors. You can trad
lead this route, but given the angles you have to work with, getting gear in may be a little tricky. Hence
the PG rating.
The next two routes are located on the buttress you first see as you approach from the trail. Warning:
as of summer 2009, the anchors and rap rings were getting seriously rusty. You might want to back up
the anchors with gear, wrapping the boulder, and/or using one of the personal anchor bolts atop the
plateau portion of the rock. Or just not use the anchors and set up your own top-rope anchor system.
Boulder Buttress Center (5.4* G) - 25'. Pockets, side pulls, underclings, and pinches abound.
This is the right of the two climbs on the first buttress to the left of the fissure splitting the
rocks. Starting at the heavily-pocketed, featured face and work your way up to a small, blank bulge
halfway up. Step around on the right, and continue up to the anchors up top, using good holds on the
right arete when necessary. Optionally, pull directly through the bulge (5.5) and then move up to the
anchors. It is possible to trad lead this route.
Boulder Buttress Left (5.6*) - 25'. Start the same as above, but as you go up, move left 5' and climb
the somewhat less-featured face to the anchors.
The next set of routes are located to the left, around the corner from Unknown Boulders TR 3.
Main Face:
Unknown Boulders TR 1 - 25'. This route starts around the corner, 12' to the left of Boulder Buttress Left.
Start at the tufa-like hold and climb up the wall next to the blunt arete until the face angle eases a bit. Step left
and up to the boulder. There are no fixed anchors for this route. You will need to use gear or natural anchors.
Unknown Boulders Bolted 1 (5.?) - 26'. Begin 6' left of Unknown Boulders TR 4. Follow the
3-bolt line up and left to the anchors. The crux is at the start, but the finish isn't trivial, either.
Unknown Boulders Bolted 2 (5.?) - 26'. 9' left of the narrow chimney is another 3-bolt route. Start
on the boulder (harder w/out) and follow the bolt line to the anchors overhead. Some nice pockets on this
climb.
Unknown Boulders Bolted 3 (5.11) - 29'. 6' left of Unknown Boulders Bolted 2 is a line of
4 bolts. Side pull up coarse but good pockets to gain a ledge with a few small chickenheads. Work up the
smoother face above to gain the next ledge (crux). A friction sidepull on a shallow divot to the right is
key. Finish by standing up and tagging the anchors.
Unknown Boulders Bolted 4 (5.11) - 29'. 5' left of Unknown Boulders Bolted 3, on the blunt
arete, is another 3-bolt line. It shares the same anchors as Unknown Boulders Bolted 3. Use
lieback, pocket sidepulls, and a chalked-up knob, work up the bolt line to the top.
Unknown Boulders Bolted 5 (5.?) - 20'. This is the shortest sport route here, with 2 bolts and
anchors. Begining 5' left of Unknown Boulders Bolted 4, climb the steep face past the bolts to
the anchors. Best if your rope doesn't stretch too far should you fall.
Shards (5.8) - ~20' or so. This climb is on the face around the corner from Unknown Boulders
Bolted 5. No bolts, no gear, it's a TR route only. Or solo it. Just don't fall and break something.
Fissure Climbs:
There are a couple of TR routes with bolted anchors inside the fissures between the free-standing
boulders, to the right of the top-roping buttress.
Unknown Fissure 1 (5.?) - 20'. This route is located inside the narrow chimney between Unknown
Boulders Bolted 1 and Unknown Boulders Bolted 2. Either face climb or chimney up the fissure
to the anchors above. This is a TR or trad-lead (small gear) only.
Unknown Fissure 2 (5.?) - 20'. This is a TR route located in the very center of the main fissure
area, 15' right of Unknown Fissure 1, and visible from the fissure from between the first and
second routes of the TR Buttress area. Climb the short face up to the anchors.
30-40' around to the right of the TR Buttress and the fissure entrance is a massive roof between two of
the free-standing boulders. This is the Lynn Hill Cave area, and hosts a handful of boulder problems for
you to work on. Bring a crash pad or two for the Lynn Hill Cave stuff!
![[Coy pulling through the steep Lynn Hill Cave 2 problem]](fork-run-coy-on-lynn-hill-2.jpg) Coy cranking through the huge Lynn Hill Cave 2 overhang!
Coy cranking through the huge Lynn Hill Cave 2 overhang!
Lynn Hill Cave (V?) - Located on the far right side (from the trail) of these stacked boulders,
climb up the steep wall just to the left of the huge roof. A quick dyno past a vertical hand jam slot to
a huge horizontal followed by a toe/foot cam allow you to grab some decent-sized pockets on the steep
wall above. Crank up, hit another horizontal, then top off. Return to the ground either by way of the
ladder, down-scrambling something, or by sliding down the nearby leaning tree.
Lynn Hill Cave 2 (V?) - You'll need some strong guns for this problem! Use the same start as Lynn
Hill Cave, but at the first major horizontal, angle right and reach up to the big pockets, getting
yourself seriously inverted. Keep cranking until you can top off.
unknown boulder problem (V?) - The short wall to the right of the large Lynn Hill Roof has 2-3
variations to play on. But mainly step up the face, hit the lone pocket, tag the horizontal, then step up
and top off.
Face Off Arete (V?) - Climb the highly featured arete just right of unknown boulder problem.
360 BOULDER (aka, TAMS)
Lat: 39°31.656'
Long: 079°24.044'
This is a shortish (10-20' tall) set of boulders right along the trail to the Ledges Climbing
Area.
360 Boulder (V?) - Namesake traverse problem. Start anywhere on the rock, and traverse
around counterclockwise w/out touching the ground (or going over a body length up) until you
return to your starting point. A good pump!
Cup of Tea (V?) - Unknown. Best seen in
this youtube video
THE LEDGES
Lat: 39°31.640'
Long: 079°24.000'
This is a nicely cleared area with what is probably the tallest stuff at Fork Run, with one
outcrop topping out at 35' high. The main wall faces east and is 30-32' tall.
Overhanging Ledges: this is the first rock outcrop you come to after passing 360 Boulder. It is
showcased by several ceilings and offers 2-3 lines up it. There are no bolts or bolted anchors
at the top, so this is primarily a top-rope (or high ball boulder) spot. The biggest problem
for top-rope anchoring is weaving the anchor line through the thick rhododendron trees/bushes
from the 'real' tree 20' back from the top of the rock.
Main Ledges Wall: This wall offers 6 bolted lines with bolt anchors and rings at the top and several
non-sport TRs or trad leads. The bolts, hangers and rings are in better condition (overall, but not
fully) than those at The Boulders. There are five bolts and hangers on top of the rock near left four
bolted routes on the wall. These are likely for people to anchor themselves to while setting top-ropes,
but could be used as an alternative anchor system from the bolts/hangers/rings at the top of the routes.
The routes are listed right to left, as you approach the rock. To get to the top, you can either
go through the fissure at the right end of the main face, or walk the trail around past the main
face, which will swing you around the left to the top. About half the routes have 3-4 bolts plus anchors.
A few lines have no anchors, so you will have to build your own up top. Most of the routes are one-
to two-move crux problems wrapped by more mellow climbing.
Who Cares (5.5) - 27'. Sometimes noted as a 5.4. Start on the rightmost corner of the main face,
just left of the fissure that allows you semi-technical access to the top. Using pockets and rounded
features, climb up to a horizontal break, then up the bulge to the anchors at the top. TR or trad only.
P.F.R. (5.7*) - 30'. As I understand it, "Pointing F*cking Rocks". Fun opening
moves lead to an awkward crux, then a straight-forward finish. Start halfway up (or down,
depending) the sloping ground beneath the first bolt line 5' right of Who Cares.
Follow the line of 3 bolts past several left-facing corners to the anchors.
No Balls Allowed (5.7+) - 30'. Another awkward route. Start 2' left of P.F.R..
Climb up following the bolt line, initially working a left-facing layback flake to the first bolt
and a featured section with a left-facing corner. Continue up and right past two more bolts to the anchors.
3 bolts.
Rabies (5.8) - 31'. The awkward theme continues with this route. Begin 10' left of
No Balls. The crux is getting off the ground. Undercling and layback the thin left-facing
corner to the 1st bolt. Keep working up the face past a couple of left-facing corners to the anchors.
4 bolts.
Santa Clause (5.8+) - 32'. Begin at a featured left-facing corner 6' left of Rabies.
Climb up to and past a ledge, angling slightly left for a few moves, then straight up to the anchors.
Stay right of the black water streak. 4 bolts.
Underwater Bears (5.9**) - 32'. The area classic! Begin atop the larger of 2 boulders, 6' left of
Santa Clause. Climb up to a good ledge, then continue up the face left of the chunky left-facing
corner to an overhang. Either pull the overhang directly (fun!!), or step right to by-pass it. Finish on
pocketed ledges to the anchors. 4 bolts.
Amphibious Attack Tigers (5.10a*) - 30'. A good route with a thin crux. This might
be one of the hardest routes at the Ledges. Begin 11' left of Underwater Bears.
With thin feet, dance up to the first bolt, then to a ledge. Stand, clip the 2nd bolt,
and delicately work the face (crux) to the ledge and 3rd bolt. Continue up to the corner
and 4th bolt, gaining the anchors after a couple of awkward moves.
Unknown Ledges 8 (5.?) - 27'. Begin 6' left of Amphibious Attack Tigers
Step up onto a mossy ledge, and climb up to and along the obvious vertical crack system
to the top. TR or trad lead only. Natural anchors only.
Unknown Ledges 9 (5.?) - 27'. Begin 5' left of Unknown Ledges 8 at a short left-arching
corner. Climb to the overhang above, pull through, then up the steep and thin stretch of rock to a
left-facing flake and then the top. TR or thin trad lead only. Natural anchors only.
Hemorrhoid (5.8+) - 24'. Another awkward route. Around the corner to the left of Unknown
Ledges 9 is a short 3-bolt line next to a vertical crack. Climb the face and crack to the top. The crux
is just getting off the ground. But the rest of the route isn't trivial, either.
For those of you in the know, and those of you not so much, there are Other Areas to climb in
western Maryland. Not huge or extensive like The Narrows or Locust Grove, and most are small
places like Right Fork Rock or Nathaniel's. But arrr! There be climbing nevertheless! As mentioned
earlier, I'm not trying to chart ALL of these places (though it'd be cool to have a real good
idea of exactly how much there is available in Maryland!). But I mention in passing here a few.
There are a couple of decent routes to play on at Dan's Rock, and the nearby Wolf Rock.
There's a new-ish area called cat Rock near Oakland that has a lot of bouldering, possibly some short
rope routes. Don't know exactly where it is, but word in the woods is that there be lots of stuff being
developed.
Swallow Falls has some bouldering and short toprope routes. There is apparently one area called
Porcupine Rock. But I have no info on it.
And at Rocky Gap State Park, there are several other areas to get wild on, if you so choose to explore.
One time at an IMSAR party, Ed suggested we go climbing, as we were all properly totally f**ked up.
So we pissed off our girl-friends, packed gear, and aided up to the middle of the roof at 2am, where we
all hung bat tents or hammocks and spent the rest of the night. Waking up and realizing I was under a
bridge was funny. - Rob Savoye
Buildering is not something I indulge in a much, but since it has been going on in the region
since the 70s at the very least, I figured I'd address this as an "alternative option" for climbing. While
I don't really plan on expanding this section much, if something very worthy comes along, I'll
put it in.
Lat: 39°xx.xxx'
Long: 07x°xx.xxx'
In the Robert E Lee Park, just off of Falls Road in Baltimore, near the Light
Rail stop, is a dam. On either side of the downstream side of this dam are
concrete brick walls. The left wall (as you face the dam) is south-facing, and
is relatively easy to access. It runs upwards of maybe 25' high, but the author
advises against you climbing all the way up (if you slip, it's concrete below,
and we don't want any broken bones there, please). Instead try a low traverse.
At no time should you really go much more than 4 or 5 feet above the base.
Start at the far left side, traverse over the chainlink fence, and over to the
dam, and up the side of the ramp. Finish by getting on top of the ramp, but
never touching the ground. Nice, sustained, forearm-pumpy workout. Another
variant would be to reverse the left-to-right traverse, and go down the ramp
instead.
Note: there is a sign on the chainlink fence off to one side, apparently to
discourage people from wandering around that area, but you can easily access
the same place by walking up and around from the top; no barriers. Your call.
No one's yelled at anyone...yet.
Lat: 39°16.084'
Long: 076°47.623'
![[Zili doing some buildering practice]](zili_ellicott_city_buildering.jpg) 12-yr-old Zili takes advantage of every vertical opportunity
12-yr-old Zili takes advantage of every vertical opportunity
Right across from the Trolley Stop at the edge of downtown Ellicott City are a few old
remaining stone walls from an era gone by. It is possible to boulder/builder up or
traverse on these walls. The main wall (14' tall) between the sidewalk and river offers
some of the best options to play on. But the river side of that same wall offers more
challenges and privacy from passersby. An excellent training option if you desire
to try your hand at the Shepherdstown pillars.
Lat: 39°xx.xxx'
Long: 07x°xx.xxx'
A few miles south on the AT from the parking lot for Annapolis
Rocks is a ~30' tall tower/monument made out of stone, dedicated to George Washington.
It looks like it has some nice moves and lines on it. However...do NOT climb on
this! This is a National Landmark, and if you are caught - you WILL be busted!
That means you WILL be fined, and possibly jailed. So, for your own sake, and for that of
the climbing community in general, steer clear of this for buildering. Okay??
Lat: 39°26.034'
Long: 077°47.932'
Out in the middle of the Potomac River stand several old railroad trustle pillars,
made from blocks of rock.
![[Indy on the first ascent of Courage Stands Alone]](courage_stands_alone.jpg) First ascent of Courage Stands Alone
First ascent of Courage Stands Alone
Before Sept 2009 the tower in the middle of the river had only seen one free-climbed ascent and a
dozen aided ascents. After that, it has seen several additional free-climbed ascents, establishing
several new lines. The reason for all the ascents up this tower came from geocaching. There is a
geocache atop of this pillar, placed by helicopter, which generated interest in people climbing
this tower.
The tower can either be led or top-roped. In order to top-rope the tower, you will have
to go through some convoluted procedures to set up anchors. It is not illegal to climb
it. So go and have fun.
If you climb this, take care for the poison ivy on the side wall, and the poison ivy tree on the
downstream end (no, really, it is a tree). Also, be very aware up top as it is full of broken rock
and exposed rebar.
Bring anchors for rappeling. Currently the tree up top is strong enough to hold a rappel,
but it probably won't be there forever. You might consider fixing an anchor at the
bottom of one side of the pillar and rappel off the other side.
Courage Stands Alone (5.10b** PG/R) - 70'. This is a very steep, sustained climb. Begin on
the Virginia side of the pillar. Climb up the steep, slightly overhanging wall towards the tree,
using holds in the rock, cracks in the mortar, and bracing bars where available. The climbing
starts out at 5.8/5.9, then quickly becomes sustained 5.10a. The crux is halfway up the pillar.
There are great photo opportunities from the overlook in Shepherdstown. Gear from #00 Master Cam
to #0.75 Camalot. FA: Mark 'Indy' Kochte, June 2007
TBD(5.6* PG/G) - 70'. Begin on the Maryland side of the wall, at the blunt arete about 10'
downstream from the upstream-most point of the tower. Climb up the right side of the wall,
passing a couple of bushes that you could sling for added protection. At the platform midway up
(optional belay) step right and climb the upstream wall straight up to the top, using the rusted
steel bands for both holds and slinging for protection. Beware the nasty thorn bush hanging off the
platform at mid-height. Gear from pink tricam to a #1 Camalot. FA: Aaron Box, Ron Kablunde, ,
Sept 2009.
Tower Spiders (5.7+ PG) - 70'. Start at the base of the tower on the Maryland side, between
two trees. Climb a gently rising traverse up and right to gain the ledge at mid-height. Finish on
TBD. Gear from #00 Master Cam to #1 Camalot. FA: Mark 'Indy' Kochte, Michelle Pappadia, Todd
Hill, Rachael Smith(?), Oct 2009
The downstream side of the pillar is coated in poison ivy, and is thus unclimbed. The upstream side has
some poison ivy, but not as much as the downstream end. Just be careful of it all when in the area.
 Level:	Beginner	           Novice	               Competent	          Expert
 Who:  Your SO who thinks      Has actually climbed    Knows who Derek        Friends *are* Derek
       you are crazy, but      on rock, knows what     Hersey and Christian   Hersey and Christian
       is willing to try it.   'friends' are.          Griffith are.          Griffith.
 Does: Climbs 5.4, eyes	       Climbs 5.9, still       Climbs 5.11, no        Solos 5.11.
        closed, screaming.     screams sometimes.      more screams.
 Shoe fit:  Comfortable.       Snug.                   Tight.                 Cuts off circulation
 Size: Same as sneakers.       A size smaller.         Would fit 	          Would fit a
                                                       Cinderella.      	  four-year-old.
 How:  Arms give out long     Feels good to            Loosens shoes at	      Must soak feet
       before feet hurt.	  take them off at         each belay stance.     in hot tub at
                              end of day.				                      end of 1 pitch.
 Quote:  "Are you *sure*      "I bet I'd climb         "I bet I'd climb       "Could you look
         I'm not going to     5.10 if my shoes         5.12 if my shoes       and tell me if
         kill myself?"        were tighter."           were tighter."         my feet are
                                                                              still there?"
______________________________________________________________________________
 - compliments of Ilana Stern, Cliff Swallow of Colorado
Having done 90% of my climbing to date within the boundaries of the United
States, I never developed a real good feel for rating systems used by other
countries. A trip to Italy in the spring of 2000, without a handy
cross-referencing chart in my pocket, emphasized the problem of having
different rating systems. For the international traveller who is in the area
and wants to use this guide, it is best that you are familiar with the Yosemite
Decimal System, as that is what is used to indicate the approximate difficulty
level of routes (and as any experienced climber can tell you, route ratings are
subjective to many factors, and are usually an attempt to give an overall
comparison of a given route's difficulty as reflected to other routes in the
area). I did not include a reference table in with this current edition. A
future version will have one. The few aid routes in this guide will either be noted with 'A#' or 'C#'
notations. 'A' means pins or other [semi-]fixed gear were used for the ascent,
'C' means that it was done using completely clean aid techniques. Sometimes a
situation calls for one and not the other. It's very route-dependent.
Adding to some confusion, I used the accepted 'V#' rating for some routes
which are more or less strictly boulder problems. The confusion comes in
that I also use a 'V#' to denote variations to a climb. It should be fairly
obvious by the text when a 'V#' is a rating grade and when it is indicating
a variation to a route.
Like the innumerable climbing guidebooks I have in my library, I opted to
follow a '*' system to indicate climbs of higher quality. Instead of a 5-* system,
I conservatively kept this a 3-* system (originally I kept it to a 2-* system, but
have since expanded to 3).
- no '*'s: average or below average quality route
- one '*': high quality climb; make an effort on it if you can
- two '*'s: well worth getting on, do it if possible
- three '*'s: classic; don't miss this route!
Again, the *'s are a subjective call on a climb. One person may consider a
given route as 'classic' and deserving of three *'s, whereas another might abhor
the route as nasty and yucky (eg, a crack climber may love The Sherpa
Connection, but a pure face climber may desire to avoid it at all costs). I tried
to follow the consensus of the local climbers to each area for this, admittedly tainted
by my own prejudices. In
any event, use the * ratings as a guide, but use also your own
judgement about
the routes you may climb.
But in the end, as long as you're having fun and enjoying yourself,
does it matter all that much?
Sugarloaf: Bloodguard, Rhythm Roof, Seven Wishes
White Rocks: Force Ten, Sherpa Connection, Hubble
Annapolis Rocks: Black Crack, Faint's Roof, A Call To Arms
Black Rocks: Learning Curve, No Surrender No Retreat,
Falling Towards Apotheosis
Rocks State Park: Vertical, Breakaway (any var), Strawberry Jam
Ilchester: Blue Rose, High Anxiety, Rennaisance
Hunt Valley Rocks: Avoid The Temptation, Daylight Dancer, Tunnel
Vision
Balcony Rocks: Cliff Monster, Cliff Monster Direct, Crown Of Thorns,
Popeye's
Skink Rock: Carpet Crack, Rags To Riches
Rocky Gap State Park: The Great Roof, Quietly Confident
The Narrows: Cumber Honey, Jim Pick, Little Jimmie Arete, RAMA II,
Rendezvous With Rama, School House Rock, The Howling, Unexpected Party, House of Sticks
Locust Grove: Bee Sting
Shepherdstown Pillar: Courage Stands Alone
(return to Table of Contents)
This index list includes those routes which do not appear in the guidebook.
 Route Name                                     Rating
--------------------------------------------------------

SUGARLOAF MOUNTAIN:

O  Last Of The Wilds ...............................5.4*
O  Bypass ..........................................5.5*
O  Deviled Eggs ....................................5.6?
O  Highway .........................................5.4?
O  Hogwarts ........................................5.2*
O  V1: Last Of The Wilds Left ......................5.10a

              BLUE ROCKS
O  Clair Voyant ....................................5.9+*
O  Codpiece Dancing ................................5.7+*
O  Fool's Gold .....................................5.8
O  Magnan Imus .....................................5.7?*
O  Mandatory Fun ...................................5.6
O  The World Is Mind ...............................5.4*
O  To Glory ........................................5.5-5.6*
O  TBD .............................................5.9+
O  Victorious Secret ...............................5.7


              WHITE ROCKS
O  Ablation ........................................5.7
O  I Can't Seem to Find Molly ......................5.10d
O  Lofty Appeal ....................................5.10b/c****
O  Motorcycle Rush .................................5.7+*
O  Penguin Trainer .................................5.4
O  Reach Around ....................................5.10c
O  Recent Convert ..................................5.8
O  Searching For Glory .............................5.7-5.9
O  Size Isn't Everything ...........................5.6
O  TBD .............................................5.10d
O  Under Klingon ...................................5.10b
O  Wide Or Not .....................................5.7
O  Project .........................................5.10b?
O  Project .........................................5.?

ANNAPOLIS ROCKS

O  Foliage Sex .....................................5.7
O  George Of The Jungle ............................5.12b
O  Rambling Man ....................................5.3
O  Sevenfold .......................................5.7+
O  Skyworld ........................................5.9+
O  Skyfall .........................................5.7
O  The Stair Steps .................................5.0
O  Training Wheels .................................5.0
O  Ulterior ........................................5.11b
O  A Call To Arms Direct ...........................5.9*
O  Gluten Free .....................................5.10c*
O  Unknown .........................................5.?

BLACK ROCKS, WOODS CRAGS

O  Brian's Wedgie ..................................~5.7*
O  Dr ASCII School Of Heelhook .....................5.6 - 5.8*

BLACK ROCKS, MAIN CLIFFS

RAVEN ROCK HOLLOW

O  Cliff of Insanity ...............................V?
O  Corners .........................................V?
O  Da Cheat ........................................V?
O  Devil's Dyno ....................................V?
O  Finger Swing ....................................V?
O  Hooker Love .....................................V?
O  Jammer ..........................................V?
O  Monkey Move .....................................V?
O  Pokey Man .......................................V?
O  Slip and Slide ..................................V?
O  The Pinch .......................................V?
O  The Contraption .................................V?
O  V Back-Crackah ..................................V?

             LEFT FORK ROCK

O  Arguing With Idiots .............................5.1
O  Don't Poke The Baby .............................5.1*
O  Free-range Tofu .................................5.3
O  Games People Play ...............................5.6
O  Karmic Koala ....................................5.7
O  Never Pet A Platypus ............................5.7+
O  Never Smile At A Monkey .........................5.4
O  Rock Zombie .....................................5.5
O  V Notch .........................................5.1
O  tbd (furious angels) ............................5.10a/b


             ROCK GARDEN


             WAVE WALL & J WALL

O  Jammin'..........................................5.8+*
O  Jeez, Can't Find My Knees .......................5.7
O  Just Jaws .......................................5.6
O  Juxtaposition ...................................5.8+
O  Unknown .........................................project
O  Unnamed .........................................5.?
O  Unnamed .........................................5.?
O  Unnamed Chimney .................................5.?
O  Wing And A Prayer ...............................5.7


             BUSHWHACK ROCKS

O  Anduril .........................................5.7*
O  Angel's Punishment ..............................5.10d
O  Bad Wolf ........................................5.6
O  Bifurcation .....................................5.10c*
O  Bill's Route ....................................5.8+
O  Brian's Way .....................................5.4
O  Cartoon Physics .................................5.9
O  Dale Did It .....................................5.6
O  Dumbass! ........................................5.2
O  Earth Dancer ....................................5.5+*
O  Earthquake Prediction Theory ....................5.6*
O  Funemployment ...................................5.7
O  Golden Tour .....................................5.7
O  Hat's Off .......................................5.5*
O  Here, There Be Dragons ..........................5.3
O  Here To Kill The Pain ...........................5.1
O  Houses Of The Holy ..............................5.5-5.8
O  Indy's Harem ....................................5.4**
O  Jose Jalapeno (On A Steeek) .....................5.5
O  Layback Crack ...................................5.5*
O  Lichen It Or Not ................................5.3
O  Looking For Cowgirls ............................5.5
O  Machete With A Twist ............................5.9
O  Nothing Worth Dying For .........................5.2
O  Peanut-Fu .......................................5.3
O  Premature Detonation ............................5.4
O  Short But Sassy .................................5.10a/b*
O  Sickle Edge Anemia ..............................5.8
O  Silence! I Keel You! ............................5.5*
O  Siren's Call ....................................5.9-
O  Spellbound ......................................5.7*
O  Stairway To Heaven ..............................5.1+
O  Suicide Bomber Training Camp ....................5.0-5.2
O  TBD .............................................5.2
O  The Golden Hour .................................5.8**
O  The M&M Route ...................................5.4
O  The Way Life Should Be ..........................5.7**
O  The White Rider .................................5.2
O  unfinished ......................................5.hard
O  unknown .........................................5.9?
O  unknown chimney .................................5.?
O  unknown .........................................5.?
O  unnamed (@ White Face) ..........................5.0+
O  Hello Mr Fancy Pants ............................5.10c
O  Veronica's Open Book Test .......................5.4
O  Vision Quest ....................................5.8
O  White Lightning .................................5.10*
O  White Line Fever ................................5.7+


             NATHANIEL'S PLACE
O  Pastel Roof .....................................5.6+
0  Donum Dei .......................................5.2-5.4
o  Got Milk? .......................................5.6
o  Eet More Chikun .................................5.7

             GAMBRILL STATE PARK

CATOCTIN MTN/CUNNINGHAM FALLS

ROCKS STATE PARK

O  Blister .........................................5.10c
O  Horizontal ......................................5.8

ROUTE ONE ROCK

RAPID ROCK HOLLOW

O  Chunky Monkey ...................................5.7/5.8

               THE FIN

BUNKER HILL

RAVEN ROCKS

LOWER RAVEN ROCKS

UNCHARTED TERRITORIES

SPARKS CRAG

O  A Simple Kind Of Life ...........................5.10a*
O  Bob's Route .....................................5.?
O  broadway face 1 .................................5.?
O  broadway face 2 .................................5.11?
O  broadway face 2 V1 ..............................5.?
O  broadway face 3 .................................5.12?
O  broadway-seam ...................................5.13??
O  Che Schifo ......................................5.7**
O  Dirty Dancing ...................................5.3
O  Dirty Laundry ...................................5.3
O  Dirty Mind ......................................5.3
O  Fixed Line ......................................5.?
O  Jeanne d'Arc ....................................5.12/5.13??
O  Joan Left .......................................5.11d/5.12a
O  Sentinel ........................................5.10a*
O  Sentinel Direct Finish ..........................5.10*
O  sentinel-face-1 .................................5.10
O  sparks slab 1 ...................................5.?
O  sparks slab 2 ...................................5.?
O  Stellar Atmospheres .............................5.10/5.11?
O  Stellar Conquest ................................5.10/5.11?
O  The Queen Spider ................................5.6
O  Three's Company .................................5.11d/5.12a*

             WARREN ROAD ROCK

O  Oh Shit .........................................5.6/5.7
O  Sneakers ........................................5.3
O  Watch Out For The--- ............................5.1
O  Unknown .........................................5.7
O  Unknown .........................................5.5

             PAPERMILL CRAGS

O  Black Canary ....................................5.4
O  Digrunashafuposh ................................5.3
O  Elektra .........................................5.10a
O  Fly From The Inside .............................5.7+
O  Noisy Cricket ...................................V1
O  Sylar ...........................................5.10a
O  The Quiet Sun ...................................V0-
O  Time Of The Profits .............................5.8
O  Time Of The Profits, V1 .........................5.10c
O  The Historian ...................................5.7
O  The Remains Of Mankind ..........................5.9
O  unnamed .........................................5.3
O  V1: Dawn Of Mankind .............................5.7
O  Vision ..........................................5.6
O  Why Don't Goldfish Bounce? ......................V2
O  Wolverine .......................................5.8*
O  unknown .........................................5.5
O  project .........................................5.?

             HUNT VALLEY ROCKS

O  Avoid The Temptation ............................5.9+**
O  Adopted By Default ..............................5.6*
O  Banks of McCormick ..............................5.10d*
O  Cell Phone Drivers ..............................5.10c
O  Copperhead Venom (aka Book of Serpents) .........5.6
O  Daylight Dancer .................................5.9**
O  FUSE ............................................5.7
O  Hubble ..........................................5.6
O  Ladders of Chutes ...............................V3-V5
O  MESSENGER .......................................5.9*
O  Mucalinda .......................................5.6+
O  Nerd Powers Unite ...............................5.7
O  Oh Sunny Day! ...................................5.5
O  Panic Attack ....................................5.5**
O  Snake Skin ......................................5.4
O  Suckered In .....................................5.6+*
O  Tree In My Way ..................................5.6
O  Tunnel Vision ...................................5.6+**
O  Wall Street .....................................5.4
O  Yet Another Roadside Distraction ................5.9

              LEAKIN PARK

CASCADE FALLS WALL
O  Classic Route ...................................5.10a/b**
O  Climb The Tango .................................5.10c
O  Pillar Climb ....................................5.4+
O  Popular Route ...................................5.8
O  Power Play ......................................5.10c*
O  unnamed .........................................5.10d
O  unnamed .........................................5.6+
O  unnamed .........................................5.10a/b
O  unnamed .........................................5.?
O  unnamed .........................................5.?

             BLOEDE DAM CRAG

O  Beginner's Crack ................................5.3
O  Beginner's Route ................................5.3
O  Blood Sacrifice .................................5.10a
O  C Cup ...........................................5.9
O  Crystal Madness .................................5.9
O  Friends And Lovers ..............................5.7
 O  unknown 1 .......................................5.?
O  unknown 2 .......................................5.?
O  unknown 3 .......................................5.?

             BLOEDE DAM ROCK

O  Center ..........................................5.8
O  Left ............................................5.7
O  Right ...........................................5.9

             BLOEDE DAM WALL

O  A Way Of Life ...................................5.8+
O  Anorexic Thin ...................................5.10b
O  Dirty Feet ......................................5.6
O  Glitch In My Brain ..............................5.10a
O  Have You Seen John Lately? ......................5.10c
O  Sand In Yer Eye .................................5.4

              ILCHESTER

FRICTION SLAB
O  Interzone (was Unknown-FW-2) ....................5.12d/5.13a
O  Blood On Tracks .................................A2

             TROLLEY LINE

             ALBERTON ROAD ROCK

O  Apoptosis .......................................5.8
O  Copperhead ......................................5.10c
O  Kelbel's Klimb ..................................5.11d
O  Portable Ketchup ................................5.9
O  Two Tips ........................................5.11?

             UPPER ALBERTON

O  Bill Me Later ...................................5.2-5.4
O  Climbus Interruptus .............................5.7
O  Diagonal ........................................5.9*
O  Elbow Grease ....................................5.4+
O  Exit Stage Left .................................5.5+
O  Handle With Care ................................5.9
O  No Eye In Team ..................................5.8
O  No Knees Pleeze .................................5.3
O  Pieces of Eight .................................5.8*
O  Pocket Change ...................................5.3
O  Poison Ivy Alley ................................5.7
O  The Next Jenneration ............................5.8

              WOODSTOCK ROCK


              MARRIOTTSVILLE GOLD

O  Impassable Tower ................................5.9
O  Journey .........................................5.7
O  Keep Fear Alive .................................5.1
O  Level of Cheating ...............................5.8+ - 5.10
O  No Need for Cheating ............................5.0
O  No Need for Painting ............................5.1
O  Plausible Pillar ................................5.8
O  Return to Sanity ................................5.3+
O  Ride the Barn Door ..............................5.9
O  Sharp Enough to Shave ...........................5.10
O  Synchronize Your Dogmas .........................5.5
O  Thorny Cat ......................................5.?


KELBEL KRAG

O  Candy Corner ....................................5.1
O  Dirty Vegas .....................................5.9+
O  Left Face .......................................5.9+
O  Right Face ......................................5.5
O  Trade Folk ......................................5.7+
O  Unnamed .........................................5.?

MORGAN RUN

O  Angry Potato ....................................5.7
O  Club Ninja ......................................5.9
O  Conspiracy Theorist .............................5.10a
O  Gamma Flake .....................................5.7
O  Gamma World .....................................5.9
O  Morgan Run It ...................................5.5+
O  Smooth Ride .....................................5.7
O  Tactical Grace ..................................5.9+
O  The Nose ........................................V3
O  The Wedge .......................................V3
O  Unknown .........................................V0
O  Unknown .........................................V4
O  Unknown .........................................V7??

GATHLAND ROCKS

O  Double Exposure .................................5.9
O  Lichen Or Not ...................................5.7

LAMB'S KNOLL

O  Addietude Arete .................................5.8
O  Addietude Direct ................................5.9
O  Angela's Face ...................................5.10b
O  Anti-Gravity Climb ..............................5.8
O  Aqua Crack ......................................5.8
O  Bear Hug ........................................5.7
O  Deception .......................................5.9*
O  Exoplanet .......................................5.10a/b*
O  Face Hugger .....................................5.10a
O  Gert's Climb ....................................5.4
O  High Voltage Soulchild ..........................5.10d
O  Kindergarden Blocks .............................5.2/5.3
O  Pressure Under Grace ............................5.8+*
O  Neubauer-Reinhart Route .........................5.7*
O  Neubauer-Reinhart Left Crack ....................5.6
O  Neubauer-Reinhart Right Crack ...................5.8
O  Panther .........................................5.6*
O  Phil's Chimney ..................................5.5
O  Pokey ...........................................5.2
O  Restricted Access ...............................5.5
O  Stretch .........................................5.9
O  The Confessor ...................................5.8
O  The Kneepad .....................................5.6
O  Tiger ...........................................5.3
O  Unknown roof ....................................5.?

              WEVERTON OVERLOOK

        MARYLAND HEIGHTS

O  Black Tie Affair ...............................5.12a
O  Daniel's Variation .............................5.10
O  Ishmael ........................................5.10c
O  Ishmael's Escape ...............................5.9
O  Metropolis .....................................5.10
O  Outrage ........................................5.12b
O  project ........................................5.?
O  Spectacular Spetacle ...........................5.8 A3+ IV
O  The Great Escape ...............................5.12a/b
O  The Hard Way Up ................................5.10c/d
O  Whirlwind ......................................5.10-
O  unknown ........................................5.?

              BALCONY ROCK

O  Cliff Monster ...................................5.8*
O  Cliff Monster Direct ............................5.8+*
O  Crown Of Thorns .................................5.6*
O  Doc Ock .........................................V3/4
O  Gold Medallist ..................................5.9
O  Gravity Kills ...................................V3/4
O  Hound Of Hell ...................................5.9+/5.10a
O  Popeye's Left ...................................5.10d
O  Popeye's ........................................5.10b
O  Problem #12 .....................................V1
O  Sceptre Of Might ................................5.8
O  The Education Of Ben ............................5.6+
O  The Goblin ......................................V4
O  The Notch .......................................V1
O  Thumb Press .....................................5.8
O  Thumb Press Right ...............................5.8
O  Unknown .........................................5.9?
O  Unknown .........................................5.10

              BALCONY JR

O  Cold Steel Corner ...............................5.8*
O  V1: Cold Steel Face .............................5.9*
O  Forearm Furnace .................................5.11d/5.12a
O  Potomac Power Plant Pump ........................5.10d/5.11a
O  Salty Dog Saloon ................................5.10c**
O  Serious Callers Only ............................5.10b/c*
O  The B&O Burn ....................................5.9/5.10a
O  The Founder's Forge .............................5.9+/5.10a*
O  The Paymaster ...................................5.11d/5.12a**
O  Project .........................................5.?
O  Mojo Filter .....................................5.7
O  Groovin' Up Slowly ..............................5.5+
O  Gravitas Free Zone ..............................5.6
O  john's project route ............................5.11a*

             SKINK ROCK

O  Air Show ........................................5.11
O  Bluepill ........................................5.10a
O  Carpet Crack ....................................5.8*
O  Conquest ........................................5.10d
O  Conrad Vs The Skink Monster .....................5.11-
O  Dancing With Tree ...............................5.6
O  Driving With The Top Down .......................5.8
O  Eyes Of A Stranger ..............................5.9+
O  Kuutamo .........................................5.8-
O  Oh My Eyes! .....................................5.7
O  project .........................................5.12?
O  Rags To Riches ..................................5.9**
O  Skink Magic .....................................5.9+
O  Skink Rock Chiminey .............................5.6
O  The White Man Headbob ..........................5.10a
O  Unyielding Finale ...............................5.10a/b
O  V1: Oh My Eyes Right Finish .....................5.7-

             STONE FORT WALL

O  Stone Fort Corner ...............................5.7
O  Guns of the South ...............................5.7+
O  Dirty Lichen Party ..............................5.9
O  Peppermint ......................................5.9*
O  I Think I Can Do It .............................5.10a*
O  TBD ....
O  TBD ....

             ROCKY GAP STATE PARK

O  Gray Area .......................................5.3-5.5
O  Ode To Lichen ...................................5.9
O  Quietly Confident ...............................5.9+/5.10a*
O  The Great Roof ..................................5.6/5.7*
O  You Look Like A Nail ............................5.8
O  See Nick Climb ..................................5.5
O  See Nick Overlook ...............................5.5
O  See Nick Pulloff ................................5.8
O  See Nick View ...................................5.7
O  Dramatic Exit ...................................5.8-5.9
O  TANSTAAFL .......................................5.9/5.10

              THE NARROWS

O  A Man Needs A Maid ..............................5.7+***
O  A Winter's Tale .................................5.9-R**
O  A Winter's Tale (the uncut story) ...............5.10R**
O  After Hours .....................................5.6R*
O  Aragorn .........................................5.8*
O  Archetype .......................................5.8*
O  Ariete Arete ....................................5.8**
O  Arrow of Apollo .................................5.7
O  Blueberry Pie ...................................5.7*
O  Blueberry Bush ..................................5.5*
O  Buddy ...........................................5.8**
O  Buffalo Soldier .................................5.9**
O  Carousel ........................................5.4**
O  Cha-Cha .........................................5.8**
O  Charged Emotion .................................5.7*
O  Cheetah .........................................5.7+**
O  Chuck Middle ....................................5.9+
O  Chuck Left ......................................5.?
O  Cumber Bunny ....................................5.6
O  Cumber Honey ....................................5.8***
O  Con Cuidado .....................................5.9+R*
O  Crackers Don't Matter ...........................5.5
O  DAK Crack .......................................5.5+
O  Dancing for a Vision ............................5.7*
O  Dancing Spanish Through The Chimney .............5.8**
O  Dawn of a New Era ...............................5.7**
O  Decent Exposure .................................5.7*
O  Deconstruction ..................................5.7***
O  Desert Rose .....................................5.4/5.5
O  Dirty and Cheap .................................5.3
O  Disintegration ..................................5.7*
O  Easy-X ..........................................5.3
O  Easy Corner .....................................5.5
O  Easy Pickin's ...................................5.7-***
O  Elisa ...........................................5.8*
O  Enter Sandman ...................................5.4
O  Fair To Middlin' ................................5.10***
O  Fair To Piddlin' ................................5.7**
O  Fortune Cookies And A G-String ..................5.5
O  Fragments of Faith ..............................5.8*
O  Free, But Worth It ..............................5.3*
O  Fun House .......................................5.8*
O  German Hair Force ...............................5.6
O  Gesundheit ......................................5.9**
O  Ghetto Booty ....................................5.6**
O  Gigi ............................................5.9**
O  Gin And Tonic ...................................5.6*
O  Halfaya Pass ....................................5.7*
O  He Speaks Foreign ...............................5.4
O  He Stole My Dress ...............................5.6
O  House Of Sticks .................................5.5*
O  How Yick Ying ...................................5.5
O  I Deserve A Klondike Bar ........................5.10a*
O  I Speak Regular .................................5.7
O  I Wanna Live ....................................5.10+***
O  I Wanna Give ....................................5.6*
O  I'm Too Sexy ....................................5.7+/5.8-
O  It's All About Me ...............................5.4
O  Jim Pick ........................................5.8***
O  Jenga Me Crazy ..................................5.6
O  Jungle Love .....................................5.3
O  Just Before Dawn ................................5.6*
O  Kasserine Pass ..................................5.8*
O  Kiddie Land .....................................5.4+*
O  King Butt .......................................5.2
O  King Tut ........................................5.5/5.6
O  Left Pick .......................................5.9**
O  Little Jimmie Arete .............................5.4***
O  Low Rider .......................................5.10**
O  Low Rider Double Direct .........................5.10**
O  Mini-skirt ......................................5.9**
O  Misty Splitter ..................................5.9+**
O  Monk ............................................5.6*
O  Mountain Thunder ................................5.6-5.9
O  Mystery House ...................................5.4*
O  Mystery Scat ....................................5.4*
O  Nature of Time and Space ........................5.8*
O  New Caprica .....................................5.9
O  Not Human Kind ..................................5.9+
O  Number Six ......................................5.6
O  Our Horses are Turning to Mice ..................5.8*
O  Our Solemn Hour .................................5.9*
O  Partial Eclipse .................................5.8**
O  Penumbral Eclipse ...............................5.8+*
O  Phat-Assed Potatoes .............................5.2
O  Preschool Dropout ...............................5.5*
O  Project .........................................5.hard
O  Rain Check ......................................5.9
O  Rama II .........................................5.9***
O  Red Shirts Rule .................................5.7*
O  Redneck Martians ................................5.4
O  Rendezvous With Rama ............................5.8**
O  Richard's Roof ..................................5.7/5.8**
O  Robinson Crusoe .................................5.7*
O  Sassafras Tree ..................................5.4?
O  Second Pick .....................................5.7+**
O  Shardly Worth It ................................5.5
O  School House Rock ...............................5.7***
O  Size Isn't Everything ...........................5.4*
O  Smoke 'em If You Got 'em ........................5.10*
O  Solid Adrenal-Ten ...............................5.10a/b*
O  Southern Exposure ...............................5.6+
O  Southern Exposure Direct ........................5.7+
O  String Theory ...................................5.6***
O  Striped With Radiation ..........................5.8+?
O  Sudden Future ...................................5.7*
O  Thank You Space Expert ..........................5.9*
O  The Ballad of El Goodoo .........................5.9*
O  The Boulder Wall ................................V-easy to V-hard
O  The Christening .................................5.9*
O  The E Street Shuffle ............................5.2*
O  The Flake And Crack Coalition ...................5.6*
O  The Further Passage (aka, Sorry Ray) ............5.8+***
O  The Gazala Line .................................5.7
O  The Howling .....................................5.7***
O  The Howling Arete ...............................5.8**
O  The Howling Direct ..............................5.9-***
O  The Klophaus Dameron ............................5.8*
O  The Lost Era ....................................5.8*
O  The Tebaga Gap ..................................5.4
O  The Test ........................................5.7**
O  The Verve .......................................5.9+*
O  Theater of Tragedy ..............................5.7
O  Tips ............................................5.6
O  To Great Lengths ................................5.8*
O  Touch The Sky ...................................5.7*
O  Travel is Dangerous .............................5.7
O  Treppensteigen ..................................5.4
O  Trundle Junkie ..................................5.8*
O  Trundle Monkey ..................................5.8*
O  Trundle Warfare .................................5.7*
O  Tunnel Of Love ..................................5.6**
O  Twisted Oreos ...................................5.8+
O  Two Steps from Hell .............................5.9*
O  Unexpected Party ................................5.5**
O  Unnamed (toprope) ...............................5.10
O  Use The Force ...................................5.8*
O  Varlotta's Daughters Would Totally Flash This ...5.3*
O  Venus ...........................................5.8*
O  War and Peace ...................................5.7
O  War of the Worlds ...............................5.5
O  Welcome to Sunshine .............................5.10**
O  When The Buffalo Roam ...........................5.6**
O  Where the Sun Don't Shine (aka WV Virgin) .......5.4G*
O  White Corner ....................................5.10-*
O  Who Do You Believe ..............................5.8*
O  Yellow ..........................................5.7**
O  Yes! I am a Long Way from Home ..................5.8*
O  You Klingon Bastard .............................5.9

             LOCUST GROVE
O  Baker Flake .....................................5.4-5.6*
O  Baker Street ....................................5.9+*
O  Baker's Way .....................................5.7*
O  Bee Sting .......................................5.7**
O  Copperhead ......................................5.6**
O  Green Wall ......................................5.10b*
O  Killer Bee Sting ................................5.8-***
O  Our Little Secret ...............................5.4*
O  Piton Crack .....................................5.8+**
O  Right Now Arete .................................5.3*
O  Superman (aka, The Overhang) ....................5.10b*
O  TimBarb .........................................5.7**
O  Project .........................................5.?
O  Unknown .........................................5.?
O  Unknown .........................................5.easy
O  Unknown .........................................5.8
O  Unknown .........................................5.9
O  Unknown .........................................5.9*
O  Unknown .........................................5.10
O  Unknown .........................................5.10a
O  Unknown .........................................5.10d*
O  Unknown .........................................5.11b
O  Unknown .........................................5.11b/c
O  Unknown .........................................5.11d
O  Unknown .........................................5.12c*
O  Unknown Left ....................................5.9+
O  Unknown Right ...................................5.9+
O  Upper-Unknown ...................................5.7*
O  Upper-Unknown ...................................5.10d/5.11a*
O  Upper-Unknown ...................................5.11a*
O  Upper-Unknown ...................................5.9+
O  Waltzing Matilda ................................5.10a*
O  West End Boys ...................................5.10a*
O  West End Crack ..................................5.10c*

             FORK RUN RECREATION AREA

O  360 Boulder ....................................V?
O  Amphibious Attack Tigers .......................5.10a*
O  Cup of Tea .....................................V?
O  Face-Off Arete .................................V?
O  Hemorrhoid .....................................5.8+
O  Lynn Hill Cave .................................V?
O  No Balls Allowed ...............................5.7+
O  P.F.R. .........................................5.7*
O  Rabies .........................................5.8
O  Santa Clause ...................................5.8+
O  Shards .........................................5.8
O  Underwater Bears ...............................5.9**
O  unknown boulder problem ........................V?
O  Unknown Boulders Bolted 1 ......................5.?
O  Unknown Boulders Bolted 2 ......................5.?
O  Unknown Boulders Bolted 3 ......................5.11
O  Unknown Boulders Bolted 4 ......................5.11
O  Unknown Boulders Bolted 5 ......................5.?
O  Boulder Buttress Right .........................5.8-*
O  Boulder Buttress Center ........................5.4*
O  Boulder Buttress Left ..........................5.6*
O  Unknown Boulders TR 1 ..........................5.?
O  Unknown Fissure 1 ..............................5.?
O  Unknown Fissure 2 ..............................5.?
O  Unknown Ledges 8 ...............................5.?
O  Unknown Ledges 9 ...............................5.?
O  Who Cares ......................................5.5

              GREAT FALLS, VA

O  Amphitheater Wall ...............................5.2 - 5.10
O  Wake Up Call (Aid Box area) .....................5.9/5.10 - 5.10/5.11

             SHEPHERDSTOWN PILLAR

O  Courage Stands Alone ............................5.10b**
O  Tower Spiders ...................................5.7
O  Unknown .........................................5.6
Notes:
07/22/16 - Added new routes to Blue Rocks, added a topo for 2/3 of the routes established
at Blue Rocks, added note about bouldering restrictions lifted at Catoctin Mountain
National Park
06/20/16 - Tweaked some route descriptions at the Narrows; installed further navigation
links from the Area of Content to the sub-areas at the Narrows; new route at the Narrows;
added route name info to several new routes at Alberton; added new routes for Stone
Fort; added new route (boulder problem) for Hunt Valley Crag; new route/outcrop and GPS
location information for White Rocks; added a new area for development (Blue Rocks);
updated some information at Balcony Rock; updated some info for Marriottsville Gold; added
some more info to the general Maryland Heights climbing access; updated the note and link
about peregrine falcon nesting at Maryland Heights; fixed an error on one of the routes
at Skink Rock (Conquest was not listed where it was supposed to have been); updated
some route info (plus added a couple new routes) at Annapolis Rocks; updated route info at
Balcony Jr; added direction, parking, and fixed up a bunch of route information for Locust
Grove (still need more info, though); added some route info to Upper Alberton; updated
some access info for Wolf Rock at Catoctin Mountain National Park.
10/28/15 - Updated some erroneous directions for Black Rock; update some route info at
Bushwhack Rock; added some background info to Fork Run; added another note on the current
state and status of the Climb Maryland! guidebook; added new crag near Skink Rock; added
information on temporary closures of Maryland Heights due to peregrine nesting; updated
some info to Morgan Run (included bouldering guide link); added new routes at Rocky Gap
State Park, The Narrows.
09/18/14 - Fixed a handful of typos (I'm sure there are still more to ferret out), added
updates and a new route to Hunt Valley Crag, a dozen new routes to the Narrows, half
dozen new routes to White Rocks near Sugarloaf, fixed the access directions for Black
Rocks, fixed a couple links, fixed/added some parking coordinates, updated some info at
Rocks State Park (notably re: pets; thanks Chris Hogan), and added a note about the
current status of the Climb Maryland! guidebook.
06/11/12 - Added new routes to Bushwhack Rocks, added overview map of Bushwhack Rocks (compliments of
Todd Hill), cleaned up a few route name typos I came across, tried to clean up Ilana Stern's climbing
shoe guide (which got munched from an inadvertent reformating save in a previous edition of this online
guide), cleaned up various paragraph/description things in the Narrows section, added link to MountainProject.com
for the Narrows, added route names for some climbs at Fork Run, added new routes to Maryland Heights area,
added warning note about independent sellers of the "Climb Maryland!" guide on Amazon,
03/10/11 - Cleaned up some route descriptions at The Narrows and Maryland Heights, updated some route
info/names for Locust Grove, added some route info/names to Alberton/Upper Alberton, cleaned up some
general text notes, updated various crag/parking coordinates, updated some route info for Fork Run and
Bushwhack Rocks, and added Marriottsville Gold, added routes for Balcony Jr Rock
01/30/10 - Some updates to routes at The Narrows, Locust Grove, added Skink Rock near
Maryland Heights, fixed up some typos that I had recently noticed, added some new routes to
Sugarloaf, Left Fork Rock, and the Shepherdstown Pillar, added variant route at Annapolis Rocks,
tweaked up the route checklists, finally added some parking coordinates for some crags (more to
still be done, however), renamed Lost City to Bushwhack Rocks, added a dozen routes to Bushwhack
Rocks, added J Wall and routes for J Wall and Wave Wall. Added link to John Kelbel's Google Earth
climbing guide
07/15/09 - Started adding parking coordinates, added a number of new areas: Hunt
Valley Rock, some crags in Loch Raven Watershed, Upper Alberton, Cascade Falls, Frederick Watershed and
Frederick Municipal Forest areas, Fork Run Recreation Area, another buildering area, added (limited) route info
for Locust Grove, new route and rockfall information at The Narrows, finished properly attributing FA/FFA climbs
at The Narrows, add note on Maryland bouldering, rearranged the ToC (and body of document) a bit to segregate
the Western Maryland climbing areas into one section, re-added Conrad's resurrected link to Harpers Ferry
climbing (bouldering and roped climbing), added a few photos
09/15/07 - Updated the route description for Robinson Crusoe at The Narrows, noted
that Conrad's Harpers Ferry Bouldering Guide had been deleted from the web and is now
long-lost and gone
06/04/07 - Updated rating for Toast at Rocks State Park. Also added
updates to the parking
situation out at the Narrows as well as added another rap station to the list(Unexpected Party), and
tweaked the description and height of the routes Unexpected Party, Chuck Middle andHouse of Sticks
04/09/07 - Updated closure status for Middle Earth area
03/07/07 - Added link to the Harpers Ferry Bouldering guide
12/21/06 - Added a few new climbs to The Narrows section
06/27/06 - Added new section (Rapid Rock Hollow), added nine new routes to The Narrows, began adding FA/FFA information for routes at the Narrows, added some missing route height information for the Narrows, cleaned up various typos scattered about, added GPSr coords for A & B Slabs at Maryland Heights, added warning about disappearing rap stations at Maryland Heights, added Annapolis Rocks' first 5.12 climb, changed oil and kitchen sink
09/27/05 - Added entry for Marriottsville Road 2 Crag
09/06/05 - Added new route to the Narrows, cleaned up descriptions of a couple Narrows routes, added GPS coordinates for most of the Vaso Island walls
06/20/05 - Added nearly a half dozen new routes to The Narrows.
06/13/05 - "Bowed" to pressure about the rating for Jim Pick, increasing it from '5.7+' to '5.8'. Added route description for a new climb, Rendezvous with Rama. Added note about trash clean-up and trail maintenace at The Narrows. Updated a few bits of information at Locust Grove.
06/02/05 - Added new routes to Lamb's Knoll; corrected some errors at the same; added some route/rappel comments from climbers at the Narrows; put in warning note about block busting off of Rhythm Roof
04/14/05 - Added new areas: Hidden Valley (sub-park of Rocks State Park), Wave Wall (in the Frederick Watershed), Watershed Wall (also in the Frederick Watershed), Indian Cave (at Lake Linganore); added errata/corrections to Ilchester and Friction Wall.
10/14/04 - Route description for Ulterior tweaked.
10/11/04 - Cleaned up some info in The Narrows section; added some new routes for the same; added better directions for The Narrows; added update route at Annapolis Rocks.
8/16/04 - Enhanced the rock quality warning in the Narrows section after a couple of comments and complaints about loose rock at The Narrows
8/10/04 - Added a couple new routes to the Narrows area.
7/27/04 - Updated some route info at Lamb's Knoll; added in The Narrows in Cumberland, noted Spiderman's Route at Sugarloaf being freed, adjusted directions a little for Locust Grove
4/10/04 - Added some new route info for Balcony Rocks. Added new bouldering information for Raven Rock Hollow. Added new route info for Lamb's Knoll. Added Gathland Rocks climbing area.
11/03/03 - Added new route to Annap Rocks, added some more coordinate information to several areas, added new route information for Balcony Rock, finally added in new area: Lamb's Knoll
8/20/03 - a couple of very minor additions: some errata at Ilchester and the fact that the guidebook is now available at REI.
8/5/03 - Added a few more GPS entries, a note about guidebook availability at REI and amazon.com, and a small note about the route Horizontal at RSP
7/25/03 - Added a new route to Rocks State Park, a few more GPS coordinates for the Carderock islands area.
7/7/03 - Added a few new routes to Annapolis Rocks, added a few more GPS coordinates all around. Added more route info for Morgan Run. Errata for Friction Wall. Small tweaks to Rocky Gap and Locust Grove. Small, small clarification to Yellowjacket's first ascent attribute.
5/30/03 - Added a bit more information for Morgan Run Natural Environment Area. Amended the Notes section with more definitive information on where the guidebook may be obtained. At the request of some ubergeek climbers, begin inputting GPS long/lat locations for some areas. Added brief area entries/links for Raven Rock Hollow, Lamb's Knoll, Raven Rocks, Lower Raven Rocks, and Uncharted Territories. Re-ordered some areas in preparation for a revamp of the online guide to better match the layout of the guidebook itself. Fixed some links that weren't working properly as well. Updated the route index section. Added some new photos, took down some older ones. Moved "Notes" section here to bottom of document (as it was getting far too large to live near the top).
5/6/03 - As the actual guide is now out, much of the information in the book has been removed from this webpage (sorry, but my publisher thinks you lot are going to forego getting the book in lieu of the information being available on here - when there is far, far more information in the book than was ever on here to begin with!). Added notes for Rocky Gap State Park, Locust Grove (Cumberland), and Morgan Run Natural Environment Area, added some errata for Rocks State Park, wrote up note about new routes at Annapolis Rocks.
1/17/03 - Updated "the Future" section with info on the Book
11/25/02 - Added image of front cover, linked pdf of guidebook cover, amended the status of the online guide section, added notes about the Sandy Hook climbing area, fixed up some stuff in the indices (still not perfect, but not as out of date as before)
10/31/02 - Made another status of the guidebook amendment, added initial information to Kelbel Krag 07/30/02 - Updated some background info to Leakin Park; amended note re: status of guidebook, updated routes for Route One Rock, updated indices for The Fin, Bunker Hill, and Route One Rock
06/16/02 - Added brief note about status of the actual guidebook itself
04/17/02 - Added notes for The Fin and Bunker Hill
08/09/01 - Added note about Eric Horst's book being available, added new 'Climb Maryland' icon/image (bottom), added note warning of thefts and car break-ins around the Susquehanna River crags, did a couple minor tweaks to Woodstock.
07/18/01 - Added note about the online guide's future; updated some info at Woodstock and Maryland Heights; added note about raven nesting at Sugarloaf being over; corrected a route name at Annap. Rocks; added a couple routes to Friction Wall area
04/16/01 - Added notice about raven nesting on Sugarloaf and closures resulting from it
03/29/01 - Added a couple photos to the Ilchester area
03/19/01 - Added a quick few notes to the Maryland Heights section
01/15/01 - Unexpectedly awarded 'site of the week' by ClimberOnLine. Also, a note for why some routes remain undescribed at Maryland Heights, a few clarifications to some route descriptions and some updated ratings at Sugarloaf, and an updated note on access to the Catoctin Mtn/Cunningham Falls Park
01/03/01 - Happy New Millenium! Quick update to Ilchester's permenant anchor situation and some updated route names at Sugarloaf
11/27/00 - Some tweaks to Annapolis Rocks and Frederick Watershed, added some info for Catoctin Mtn National Park, plus action pics for Sugarloaf and Alberton
11/07/00 - Significant updates to Sugarloaf Mtn; change name of Dogwood Crag to Alberton Road Rock (because the paved path is the old Alberton Road roadbed! and that's how the rangers refer to it as), update additional route information at Alberton Road Rock, Sugarloaf Mtn, Annapolis Rocks, and Black Rock. Several other new areas have been looked over and researched in the past year, but those are being left out for the time being.her
09/29/00 - added some route info for Sparks Crag, Woodstock Rock, and Dogwood Crag
09/11/00 - some updates to Rocks State Park, some notes on Susquehanna State Park, note about Sparks Crag being on private land (TAKE NOTE!), a note about buildering on the Mt Washington Monument (or rather, DON'T!)
09/01/00 - fixed up more typos (they procreate, I swear it!), updated more things to the Sugarloaf section, corrections to route info at Ilchester, added some notes about Frederick Watershed climbing, tweaked some info on some Rocks State Park routes, added a bit to Woodstock Rock and Route 1 Rock
08/06/00 - updates to some information at Sugarloaf, more route updates to Ilchester, more information about Woodstock.
08/02/00 - renamed NCRR Crag to Sparks Crag, added section for Route 1 Rock (to be expanded in the future), redid Annapolis Rocks intro, fixed still more typos that keep creeping in (all those late-night editing sessions, I guess), added critical warning message of rock quality (less than sterling) for the Sparks Crag (1000 lbs rock was recently pulled off a route, narrowly missing the belayer), tweaked some info on Friction Wall
07/30/00 - more tweaks added (typos found and corrected, etc), better descriptions and other information put in for several sections, including Annapolis Rocks and Rocks State Park add entry for Woodstock Rock (to be expanded later).
07/24/00 - added some route info to the NCRR section, added to the buildering section (Mt Washington Monument), tweaked route descriptions for a number of climbs scattered throughout the guide, added the West View area to Sugarloaf, worked over a number of little items here and there in the guide, started an 'Route List by Grade' section.
07/05/00 - added to the Annapolis Rocks section, began work on the Maryland Heights section, added description and route information to crags in Patapsco State Park (Dogwood Crag) and along the North Central RailRoad trail (NCRR Crag), updated a lot of information for Rocks State Park, removed the reference to REM Wall at Great Falls (it's really just an extension of Dike Creek), and began revamping guide into a somewhat different format
06/23/00 - added half dozen new photos for different areas, including Rocks State Park, Annapolis Rocks, Sugarloaf Mtn.
06/14/00 - updated information to Ilchester and Friction Slab area, some minor corrections/changes to Sugarloaf & White Rocks.
06/10/00 - added a few new entries to the Black Rocks section, updated/reworded disclaimer, added rating system section
06/01/00 - verified several route grades at White Rocks
04/20/00 - added "Spiderman's Route", an aid line that ascends "The Prow" at Sugarloaf directly; corrected name of "Cakewalk Cracks" to "Cub Scout Cracks"
03/14/00 - minor cosmetic and descriptive changes to some of the Annapolis Rock and Sugarloaf routes (not that many people will notice!), plus a possible rating update for Midnight Lightning at Ilchester
12/15/99 - added a couple new entries for the Annapolis Rocks region
08/30/99 - fixed up some entries, reorganized the Annapolis Rocks section, adjusted some of the html and image formatting.
05/21/99 - added new route information to the Sugarloaf sections, updated some route location info to Rock 2 of Black Rocks, confirmation of what route is Nixon's Nose.
12/21/98 - cosmetic html additions; no significant changes
08/23/98 - added information re: unknown/unnamed route next to Black Crack at Annapolis Rocks
06/22/98 - updated additional approach directions to Black Rocks, update some Rocks State Park routes as well as the Tower of Babylon routes at Black Rocks
06/10/98 - updated info on the geology of Ilchester and Annapolis Rocks; added photos from Black Rocks
06/04/98 - updated information on the Annapolis Rocks spring, Black Rock section expanded, slight expansion to couple of Ilchester routes
04/27/98 - Black Rocks section expanded
03/30/98 - Black Rocks section expanded
10/07/97 - A little more on Rocks State Park
06/29/97 - Some notes on Sugarloaf, Ilchester, Catoctin and Rocks State Park added in.
04/28/97 - Some updates/corrections to the BoyScout Ledges area, and an update on Ilchester's BLUE ROSE route.
Notes prior to April '97 were never kept or archived.
Awarded

on Jan 15, 2001
Copyright 1994 Mark 'Indy' Kochte. All Rights Reserved.
(return to Table of Contents)
 Finally, in May, 2003, the book, after much pain and many tears and hours of arduous labor, had finally come out!!!
You can find it on the shelves at the Earth Treks climbing gyms and REI (you used to be able to find it at Hudson Trail
Outfitters, The Trailhouse, and Potomac Outdoors¹, as well as online at
www.amazon.com,
and Barnes & Noble)
Finally, in May, 2003, the book, after much pain and many tears and hours of arduous labor, had finally come out!!!
You can find it on the shelves at the Earth Treks climbing gyms and REI (you used to be able to find it at Hudson Trail
Outfitters, The Trailhouse, and Potomac Outdoors¹, as well as online at
www.amazon.com,
and Barnes & Noble)
 A climber called Bri on
A Flake Called Lee
A climber called Bri on
A Flake Called Lee![[left side
of the Prow]](prow.jpeg) Anchors here generally utilize the nearby trees and
boulders, although The Prow takes medium-sized gear in its blocky top.
Anchors here generally utilize the nearby trees and
boulders, although The Prow takes medium-sized gear in its blocky top. Topo for main wall of
Blue Rocks
Topo for main wall of
Blue Rocks![[The author on The Sherpa Connection - photo by E Horst]](sherpa-connection-indy.jpg) Author debating whether to continue on The Sherpa Connection or finish up on
Force Ten Direct Finish (photo - E. Horst)
Author debating whether to continue on The Sherpa Connection or finish up on
Force Ten Direct Finish (photo - E. Horst)